Whether you have been diving for a while now, or just starting out fresh after finishing your open water course, you’re probably starting to think “I need a camera!! Otherwise nobody will believe me that I saw that 10ft shark right next to me!”. So we created this guide to help you make the decision on your very first Underwater Camera!
The first thing you need to ask yourself is:
How Good Are My Diving Skills?
In the beginning, diving is hard enough as it is. Keeping yourself in a fairly neutral horizontal position, keeping distance from corals and sea urchins, minding your air, noticing your dive buddy and more… That’s already plenty to handle. If you add a camera to that equation too early, something has to give and you might be risking yourself, others or the delicate marine life around you.
If you have just finished your Open Water, and only have 5-10 dives, practice a bit more before taking a camera with you. Trust me on that one…
If you already have 20-50 dives, you might consider a simple Action Cam which won’t require changing many settings underwater.
For those of you with 50+ dives, who are feeling fairly confident with your buoyancy skills, you can consider a Compact Camera, maybe one strobe or video light.
I wouldn’t consider a DSLR or Mirrorless before 80-100 dives and mastering your buoyancy skills.
That being said, these numbers are quite arbitrary and each has his own personal learning curve, but try not to over-estimate your diving skills. Even if you have no trouble in pool-like conditions and perfect visibility, you might find it harder when currents are involved, poor visibility, gear malfunctions and other unexpected things which may occur underwater.
So what are my options?
Action Cams
Action cams are small, simple cameras, designed to withstand various conditions including wet environments, capturing a wide angle of view with pretty decent quality. They usually have very few buttons and controls, for ease of use while performing an extreme or less than extreme (diving ) activity.
These cameras are mostly recommended for videos since focus is infinite, resolution is great (Full 1080 HD to 4K) and you can turn them on and forget about them.
Shooting stills is possible, but with a few limitations:
1. You can’t zoom in. All of your shots are extra-wide fisheye shots and your subject might look a bit small in the frame.
2. You can’t connect an external flash unit, since you have no way of triggering it (Intova Edge X is the exception).
3. Low light will most likely cause a blurry photo.
4. You can’t control focus. It’s basically infinite.
Keeping these limitations in mind will help you avoid bad photos when using an action cam.
Action Cams are great for beginner divers since they are very simple to use, and can even be mounted on your mask / BCD / Tank for handsfree shooting. They are awesome for creating souvenirs, sharing with your friends and documenting cool marine life that you saw. However, keep in mind that you probably won’t be able to produce contest winning imagery with these…
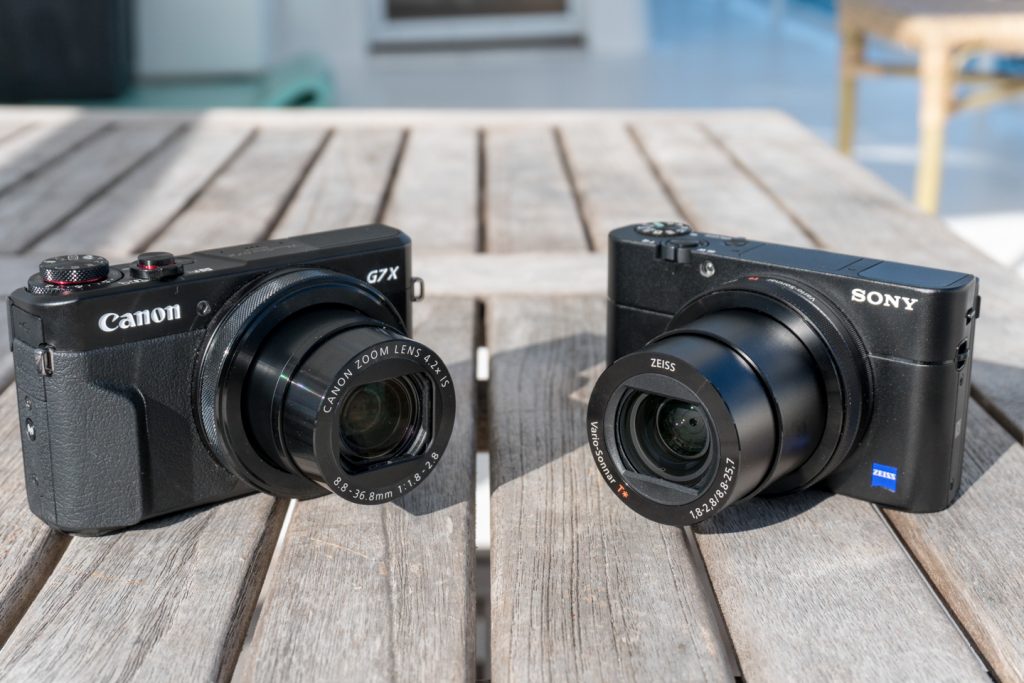
Compact cameras are currently the most widespread choice for underwater photography. The latest technological advancements for the past few years have shot the compact quality to the sky. Small cameras which can fit in your pocket such as the Canon G7X, Sony RX100 IV and Panasonic LX100 can produce outstanding imagery while keeping the housings small and the complete package very travel friendly.
This is probably the best choice for most divers looking to enter the world of underwater photography, thanks to their versatility. You can use them on complete Auto Mode or even UW Mode if they support that, getting pretty decent shots without putting too much thought into it. With the same cameras, you can switch to Manual mode, shoot RAW, add strobes, video lights and wet lenses, producing contest quality shots and high quality videos.
Compact bundles, including camera and housing, start from about $700 and can reach up to $1800 with a high-end Nauticam or Sea & Sea housing. They are compatible with a huge array of add-ons and accessories, such as macro lenses, wide angle lenses, filters, video lights and strobes mounted on many types of arms and trays. Each add-on opening a whole new world of imagery and creative options. This is really a system you can grow with.
Once you have purchased your new underwater compact camera, use our Beginner’s Guide to UW Photography to shorten your learning curve and learn from our mistakes
These are the big guns. The SERIOUS cameras for people who dare call themselves Underwater Photographers.
DSLR Cameras, also known as interchangeable lens cameras, which have lately been reduced in size to become Mirrorless Cameras, are capable of producing the best quality photos and videos in the industry. High quality optics, advanced settings and large sensors help the photographer achieve top quality both above and of course under the water.
Since these cameras are naturally bigger, the housings which accommodate them tend to be bulkier, pricey, and not suitable for everyone. When taking an interchangeable lens camera underwater, you will need to deal with interchangeable ports, extensions and gears, making the process more complicated and more prone to human error and leakage. The advanced settings allow more things to be changed underwater, which requires good diving skills to focus on camera operation without endangering yourself and others.
Oops, hope I didn’t scare you off there
The great things about them of course, is that you will be able to produce amazing images and videos, tack sharp macro shots and colorful vivid wide angle shots, as well as production quality videos. As a bonus, you will also be the envy of all the divers around you, which is always great.
When choosing such a system, it’s usually best to choose the housing first, and only then the camera body and lenses, since the housing is usually the larger investment in such a purchase.
Mirrorless systems usually lower the cost a bit, since the housings are smaller and less expensive, but other than that it’s very similar to DSLR systems.
You can read more about getting your first UW DSLR here.
If you currently own a DSLR and just want to use it underwater, while still minding your budget, check out this post about Affordable DSLR Housing Options.
If you are oriented towards video, with the intention of concentrating only on that type of photography underwater, you may consider a dedicated camcorder or video camera with a video housing.
These housings are usually elongated to accommodate the shape of video cameras and they are divided into mechanical or electronic housings. Mechanical housings use the same principles as the above housings we mentioned, using levers and buttons to press on the camera’s controls. Electronic housings connect to the camera itself via hard wire, and transfer all controls to an external control panel on the housing, which is many times relocated to the tips of your fingers, so that everything is easily within reach.
Some of these housings feature interchangeable ports and some have fixed ports.
Many of the relevant camcorder models can be fitted with a Mangrove housing which is an excellent option for dedicated video shooting underwater.
Mangrove Housing for Sony HXR-FS100 | US$3652.10
If you’re still having a hard time choosing which camera to buy, consult with the rest of our Buying Guides, or simply contact our agents via the online chat and we will help you out!
There are two types of lighting which are used underwater, strobes (AKA flashes) and Video Lights (Constant LED Lights). After creating the Ultimate Strobe Guide, we wanted to share our thoughts on the second type, and help you choose the best underwater video light for your needs.
Strobe, Flash, Flashlight, Torch, Video Light… HELP!
Let’s set things straight. As we mentioned, there are only 2 types of lighting underwater:
Strobe – A Xenon based light bulb which can emit a very strong pulse of light for a brief moment.
Also known as “Flash” (not flashlight!)
Constant light – A device which can emit a constant beam of light for minutes to hours, today commonly based on LED technology which can be focused to perform as a dive light or spread out to perform as a video light.
Also known as “Torch”, “Flashlight”, “Dive Light”, “Video Light” and unfortunately even “Strobe” in the topside industry, which is incorrect for underwater photography lingo.
An underwater video light is basically a waterproof flashlight. There is some confusion due to the use of the word “flash” in “flashlight”, but don’t let linguistics mess with you. “Flash Light” and “Flashlight” are two different things!
Now that we got that out of the way, we’ll continue to discuss video lights!
Main Features of Video Lights
There are several terms and features commonly used when comparing video lights. Let’s go over them.
Lumens
This is perhaps the most important feature differentiating between video lights.
The power emitted by a light is measured in units known as Lumens. Without getting into the science of it, the more lumens a light outputs, the stronger it is. Common lumen ranges today are 500-1000 for a basic light, 2000-3000 for a medium range light and the most powerful ones can even reach 25,000 lumens (!!!).
An important thing to remember is that Lumens are measured by collecting all the light the device emits, so the actual brightness of the subject lit by the light will vary according to our next feature – Beam Angle.
Beam Angle
A video light can be engineered to focus or spread out its light output in different manners. Focusing all the light to a very narrow beam with lenses and mirrors, will actually create a dive light, which is great for spotting out things or signalling to other divers. On the other hand, spreading the output to a 60 degree, 100 degree, or even a 120 degree angle, is much better for lighting up videos, so that you can cover the entire frame with 1-2 wide (aka flood) lights.
Most video lights will feature a 60-120 degree beam angle. This factor will determine how bright your subject would be in the frame just as much as lumen output. For example, lighting up a Grouper in blue water with a Sola 2000 Flood on 60 degree beam angle, will probably be more effective than using a 90 degree Sola 2500 Flood, even though it has lower lumen output.
However, when lighting up an entire coral system, you may prefer to get closer and use the wider beam light.
There are several types of lights available: Flood only / Spot Only (dive lights) / Flood & Spot / Variable Beam
The variable beam lights seem ideal but they usually can’t reach a very wide beam angle for video. There are add-ons available for some lights which modify the beam from flood to spot or vice versa.
Flood & Spot lights are the most versatile option and allow you to switch from dive light to video with a quick press of a button. This leads us to our next feature.
Controls
Over the years, manufacturers have created several types of controls for underwater lights, each with pros and cons.
1. Twist method – This method is quite straightforward. Twisting the light head all the way in will turn it off and unscrewing it slightly will turn it on. This is the easiest for the manufacturer to implement and lowers the cost of the light significantly, which is a big plus. However, this method risks corrosion of the O-ring after some time, increasing the risk of flood as well as risking potential flooding by human error – unscrewing it too far underwater without noticing and effectively destroying your light.
The early I-Torch Pro 5 used the twist mechanism
2. Push Buttons – The is the most common method used on most video lights. Using either 1 or 2 buttons to control the light is a safe and efficient method for powering up/down and switching between modes. A 1 button light will be more affordable than a 2 button light, but usability is greatly improved when using 2 buttons. A single button allows 2 types of presses – short press, usually switching between modes and long press, usually to power on / off. A 2 button light will allow more options such as one button for mode switching and the other for switching output levels, making the overall experience easier and faster.
Fantasea Radiant PRO 2500
3. Other – Some manufacturers have developed their own signature controls such as Sola’s sliding lever, which functions in a similar fashion as 2 buttons, but in a much more elegant way of gently pushing a single switch back and forth. FIX Neo lights come with 3 buttons and an LCD screen, creating a little control panel on the top which is incredibly useful.
4. Remote Control – This is a fairly new method, developed by Nauticam on their FIX Neo light system, as well as by I-Torch on their Venom series. By connecting fiber optic cables to the lights, as single master remote controller can control several lights at once, making it much easier and faster to change your lighting instead of setting each light separately.
Modes and Levels
We have already discussed the two main modes – Spot (narrow beam) and Flood (wide beam). Another common mode included in video lights today is a Red light mode. The red light is very useful as a focus assist beam, since the camera can read it easily and use it to facilitate focus, while marine life are not disturbed by it, since it’s out of their visible spectrum. The red light is also to weak to show up in most photos so it won’t affect your overall lighting.
A cool mode introduced lately is UV or Blue Light. This is similar to black lights which are painfully familiar from those underground parties back in the 90’s. Essentially it’s an ultraviolet light which excites bio-luminescent organisms underwater and when paired with a barrier filter (yellow filter) it creates a unique glowing effect which looks great on photos and videos.
Another mode which is included on some lights is SOS or Emergency. This causes the light to randomly flash a white light, indicating that you have a problem or you are lost. This can be very useful in emergency situations, but also very annoying if one of the divers sets it off accidentally and can’t figure out how to power it down…
Power levels are almost always implemented in some way, allowing you to control the power output from low, medium and high. Some lights have 3-4 modes and some have complete control from 0-100 in 1 unit steps (FIX Neo). Most lights are set to operate for about 1 hour on full power. Using the light on lower power settings increases usage time significantly, allowing you to use it for several dives before charging / changing batteries.
Generally, more modes and levels are great! However, this affects the complexity of the using the light and if you have just a single button to control many levels and modes, you may find yourself scrolling frantically between them while the once-curious-now-bored Hammerhead swims off to the deep blue.
Beam quality
Beam quality is usually measured by how even the beam is across the output circle.
Using multiple bare LED’s may result in a less even beam than one single LED or a diffuser dome spreading the light out evenly. Some LED’s create a more even beam than others. Video light manufacturers will always need to compromise between an even beam, power output, price, heating and more factors which create various types of LED formations.
Another important factor is CRI rating (stands for Color Rendering Index). This number indicate how accurately the light will reproduce the true life colors of the subject (Ideal light = Daylight/Tungsten). The higher the number (closer to 100), the more accurate the color rendering will be. Check out this excellent video explanation of CRI.
Mounts
Just imagine getting a new $1000 light which you intend to use on your $3000 system which you are taking tomorrow to a week in the Galapagos Islands, just to find out the mounts don’t match! Before you start creating MacGyver solutions with tie-wraps and sticky tape, go back a few days in time and order the correct mounts for your system! Most lights will come with one mount as default and additional mounts optional. Some arms will support one type of light mount or several.
Usually you can’t go wrong with a 1″ Ball mount, or a YS mount which are easily interchangeable between them. Make sure you add a mount to your Sola lights since most of them come without.
It might be a good idea to get a second type of mount upon purchase. You never know when you might switch trays or lend the light to a fellow diver who wants to try it out before buying.
When creating cross brand systems, you might not be sure if the light will match your current setup or vice versa. Consult with our experts and they will figure that out for you.
Batteries and Charging
Most lights have a fairly similar battery life on full power of about 50-70 minutes. However, there are several different battery implementations:
1. Interchangeable rechargeable battery – The light can be opened and the batteries changed as needed. Each battery can be charged individually. This is the standard method and has the advantage of getting several batteries and switching them between dives. This method also increases the risk of flooding due to human error or bad O-ring maintenance.
2. Factory Sealed lights – Sola lights are factory sealed, which means they are less prone to leakage due to human error. That’s a huge advantage and insures hassle free use for a long time. The downside is that you can’t replace the battery. That means you have to remember to charge between dives and if you aren’t near a power outlet for the whole day, chances are you will not use the light on the last dive. Light and Motion have implemented a new Fast Charge technology on their new lights, reducing the charging time significantly to about 1:45 hours, but this still doesn’t help if you forget to plug it in or if you don’t have an available power source.
3. Interchangeable Light Heads – Nauticam’s FIX Neo and I-Torch’s Venom series have created a line of interchangeable light heads which mount on the same base. This means that you can get a second light body without getting a whole new light as a new battery. It’s pricier than just a battery but still more affordable than getting a second light. You can also get several light heads and use them as needed on your light bases.
Price
We can babble on forever, but in the end, it all comes down to price. All the features we discussed here, may lead you to believe that you want the best, strongest, most versatile option available, but then you find out that it either doesn’t exist or will set you back a few thousands of dollars more than you expected. Indeed, creating a quality product doesn’t come cheap and you have to prioritize. Video lights range from $100 to $3000+ so you need to decide on your budget before hand and then consider your best options within that budget.
We gathered here some of leading video lights in the market (As of Dec 2015) to help you choose:
I-Torch Venom 35s | US$749
This excellent and versatile video light by I-Torch is capable of producing 3500 lumen of flood and 1000 lumen of spot light. Easily controlled by two push buttons and featuring red light and interchangeable light heads. This is truly one of the best value lights you can get.
The Radiant Pro 2500 Video Light is a durable and powerful video light, designed to significantly enhance color and light in underwater videos and still images. It offers a variety of advanced features for creative photographers. Flood, Spot, Red, UV & Blue, all in the same light!
The Sola video 2100 Spot/Flood is Light & Motion’s best-balanced Sola video light, combining 2100 lumens in a 60 degree flood beam with a piercing 1200 lumen 12 degree spot beam. Factory sealed with fast charge technology for 1h 45m for full charge.
The Vega packs a lot of power into a compact and travel-friendly size. Mount, arm, and diffuser sold separately. Featuring a 2200 lumen diffused 65° beam, rated to a depth of 300ft (90m), this factory sealed light packs quite a punch! Add the optional Low Loss Diffuser for a wider 100° beam angle.
The Sea Dragon 2500 uses flat panel COB LED technology to closely mimic natural sunlight, bringing out amazing colors in underwater photos and videos. With a Color Rendering Index of 90, the Sea Dragon 2500 solves the issue of blue underwater photos and videos by giving divers the ability to add light down to 200 feet/60 meters with portable sunlight.
The incredibly wide 120-degree beam of the Sea Dragon 2500 ensures maximum lighting coverage and is ideal for cameras with a wide field of view, like the SeaLife Micro HD or GoPro. With a lab verified lumen output of 2500, the light has a 60 minute burn time at full power – making it incredibly efficient as well as bright.
Small and highly sophisticated light with 2 sets of LEDs featuring a flood and spot mode. This light is 2 in 1, a video light and a dive light. Depth rated to 100mts/330ft.
Wide beam can be set at 4 power levels. Red beam is offered in one low power level and SOS mode is also available.
Small and powerful light by Fisheye FIX. 6 High intensity LEDs deliver up to 2000 Lumens of white light. 1 LED for 720 lumen spot light and 4 red LEDs provide 200 lumen red light. The light features an advanced LCD display and control panel for simple operation. Comes with plenty of mounting options, best control panel in the industry and excellent build quality.
Big Blue AL2600XWP (AKA “Black Molly 3”) | US$289.99
Big Blue Black Molly III (AL2600XWP)
This is one of the best value lights available in the market. It’s tiny, it’s powerful and it has amazing battery life!
Capable of 2600 lumens, 120 Deg beam and even red light feature in a surprisingly small package! You can take it down to 100m, and max burn time on full power is 2hrs!
Yes and no. A video light can never replace a strobe as a main lighting source for photography due to a much weaker output. A medium range strobe would be about 10 times as powerful as a medium range video light. That’s because video lights produce constant light while strobe give just one short pulse.
However, for macro photos or even closeups, you definitely can use a video light or even a dive light (spot mode). For more info on that, read this.
How many lumens do I need?
The more the merrier. Even very high output light will have a lower output mode, so you probably won’t encounter a problem of having too much light. However, high power output comes at quite a price, as well as size and heat problems. You need to find the right balance for you, which fits your budget and look at other important factors such as modes, controls, beam quality and more of what we discussed above.
These days the standard is 1600 – 5000 lumens, but remember that actual intensity varies with beam angle. That means a 60 deg 1600 lumen light, would actually feel stronger than a 120 degree 2000 lumen light, but with less coverage.
One light or two?
If you want to go as compact as you can, one light is definitely enough. You can get a strong light with a very wide angle to cover all of your field of view, if your are shooting with a wide angle lens.
If you get two lights, you will have better coverage and better illumination of your subject, especially if they are hiding. Trying to get a hiding sea horse or blenny lit properly with just one light might be much harder than two opposite directions.
Which is the best setup for my GoPro?
Remember that a GoPro has a very wide view angle, so you want a light that will cover your entire frame. 2 lights here might be a good idea, especially with BTS’s excellent boomerang tray, the GPT-4. It adds stability to your footage and gives you excellent coverage from both sides, with whichever lights you choose. If you wish to stay even more compact, a single light with a pistol grip tray will be great, especially for those harder to reach places. Get a light that has a 120 degree beam to cover the entire frame. 2000 lumens will be a great number to start from in total, so either one light of 2000+ or two lights of 1000+. As we mentioned above, the higher the output the better reach you will have.
Christmas is upon us and we dive into an ocean of options (even non-divers!), trying to find the perfect gift for our friends / spouse / parents / neighbours and dive buddies!
Just like we did last year, we have organized the best gifts for you to choose from according to your budget (and how much you love the person getting the gift )
So without further ado, here we go!
Here are a few quick-links to help you out:
Note: Prices are in USD. To switch to CAD, click the little flag on the top header of any product page.
** Sale prices might be valid by Dec 26 or Dec 31 2015 only! See product page for details.
Fantasea – Silicone Grease for Underwater Housing and Strobe O-rings
Fantasea – Silicone O-Ring Grease
$4.95
You cannot replace a winning horse! At the top of our list is the popular Silicone Grease! Nothing says “I love you” like a small tube of Silicon Grease.
The grease would help you remove that friend from your life as smooooth as possible…
Backscatter – FLEX Dive Filter for GoPro Hero3+ / Hero4
Backscatter – FLEX Dive Filter for GoPro Hero3+ / Hero4
$29.99
The Backscatter FLEX FILTER system is a simple press on color correction filter system for the Hero 3+ and Hero 4 standard housings. The FLEX system allows any filter from the FLIP 3.1 system to mount to the FLEX FILTER frame, giving you the flexibility to expand your filter system in the future.
Great affordable option for adding color to your GoPro footage!
Polar Pro – Switchblade 2.0 – GoPro Hero4 | Hero3+ Standard Housing
Polar Pro – Switchblade 2.0 – GoPro Hero4 / Hero3+
$69.99
The Switchblade2.0 is a great scuba diving accessory for the GoPro diver. It combines a macro lens and a red filter making it one of the most versatile GoPro filters on the market.
The all new Ultra-Macro lens provides 10x magnification which means underwater focus distance of 3 to 8 inches, and above water focus distance of 1.5 to 5 inches.
The PolarPro red filter provides precise color correction from 15 to 80 feet. The red filter and the macro lens can be used together, or separately.
Polar Pro – GoPro Microphone Kit – Promic
Polar Pro – GoPro Microphone Kit – Promic
$49.99
The Promic GoPro microphone is the perfect addition for increasing your GoPro’s audio performance. This GoPro microphone allows you to capture increased audio levels as well as higher definition sound. The Promic’s rugged design ensures durability and offers a sleek low profile look.
As professional cinematographers know, an internal microphone will never reach the capabilities of an external microphone. External microphones will always outperform internal mics in capturing crisp audio at high sound levels. The ProMic achieves just that. By capturing higher sound levels and recording high definition audio, your GoPro® videos have never sounded better.
Big Blue AL450MAFO (450 Lumens) Underwater Focus Light
Big Blue AL450MAFO Underwater Focus Light
$95.99
Smaller for 2016! This light is a rugged, reliable, and compact light with a powerful output and auto flash off feature.
The AL450MAFO is an upgraded version of the popular AL350AFO – the AL450AFO offers 450 lumens, a 55 Deg beam angle, a twisting bezel for on/off function, and a lanyard. This is a great small light option for any diver.
Powerful 600 lumen dive light featuring the new CREE XM-L2 LED and was Designed for multiple applications down to 300 feet/100 meters, the Sea Dragon Mini 600 features a wide 75-degree beam angle, two power modes, and easy on/off control with the twist of the light head bezel.
Unmatched in versatility – The Sea Dragon Mini 600 is compact enough to fit comfortably in your hand, but can also easily be used for other applications. With the included GoPro camera mount, cold shoe mount, SeaLife AquaPod mount, universal Y-S adapter and lanyard clip, you can add brightness to your dive in any situation.
Vivid Pix Picture-Fix Software
Vivid-Pix Picture-Fix
$49.99$39.99
Easy-to-use software that Auto-Magically* improves underwater pictures. Fast 1-Click adjustment improves most pictures. Recommended by Photo Pros: Cathy Church and Marty Snyderman.
Adjustment Sliders for Fine tuning the image to your preferred exposure, color and sharpness.
Mac & Windows compatible, Downloadable onto 2 computers.
Picture-Fix software was developed specifically for the underwater world. Without proper lighting or exposure, your pictures don’t relive the colors, marine life… the beauty of your dive or snorkel.
Gifts Under $300
Light and Motion GoBe S 700 Spot Underwater Dive Light
Light and Motion GoBe S 700 Spot Underwater Dive Light
$299.00$149.99
The ultimate waterproof flashlight. Conscientiously designed to go anywhere you want to be. Featuring a powerful 20 degree beam optimized to eliminate hot spots and provide an excellent balance of beam distance and viewing angle for a variety of uses.
The GoBe light is a combination of L&M’s outdoor and sport experience with their diving experience to produce a light that is designed to go anywhere you want to be. Depth rated 120mts / 400ft and perfect for illuminating base camp, taking videos or photos, and exploring open areas.
Inon UCL-165 M67 Close-up Lens
Inon UCL-165 M67 Close-up Lens
$178.75
The Inon UCL-165 is one of the most popular and well known lenses available in the market. It has been around for quite some time now, and still going strong!
This lens will mount on top of a standard 67mm threaded port in order to magnify the subject and allow you to fill the frame with it while maintaining sharp auto focus.
The cool thing about it is that you can stack two of these to double the effect, while still keeping excellent sharpness and contrast.
YS-03 – Mounted on a Sea & Sea Universal Lighting System Light Set
Sea & Sea YS-03 Strobe Universal Lighting System
$350.00$299.95
Underwater lighting just became easier with YS-03 strobe. YS-03 is designed to mimic the light intensity of the camera’s built-in flash. Say goodbye to manually adjusting the strobe output, as YS-03 is TTL.
YS-03 is compatible with any camera containing a pre-flash and a TTL flash exposure function.
SEA&SEA created this strobe for any underwater photographer with any level of expertise. It is simple to use and easy to understand. With only one rotary power control, YS-03 is ready to start shooting beautiful images with a turn of the switch from OFF to TTL.
This package contains everything you need to start adding light to your images! Simply place the camera on the tray, connect the fiber optic to your housing and you’re ready to go!
Intova – Edge X Underwater Action Camera
Intova – Edge X Underwater Action Camera
$299.95
Edge X is the most full featured action camera with functionality that is unmatched. Performance driven upgrades include 1080p 60fps video, unique image enhancing features, wireless file transfer, 60X Zoom, built in LCD screen with removable shade, flash photography capability and more.
Selectable Auto Correction Firmware improves the video Fish Bowl effect caused by extremely wide angle lenses found in all Action Cams.
Big Blue Black Molly 3 (2600 Lumens) Underwater Video Light
Big Blue Black Molly 3 (2600 Lumens) Underwater Video Light
$289.99
BLACK MOLLY 3!!! AL2600XWP: This light is nicknamed the モBlack Molly 3ヤ and is a perfect light for underwater photo/video divers.
With a 120 degree beam and an illuminated power switch/battery indicator, this light boasts awesome lumen strength and increased efficiency.
The AL2600XWP comes standard with built-in red LEDメs for enhanced focusing and night video work.
The light comes with a Yellow removeable filter, and a 1ヤ ball for easy video system mounting.
It is easily removed and replaced with an optional spare battery that can be kept fully charged for convenient extended use.
Big Blue HL1000XW (1000 Lumens) Underwater Video Light
Big Blue HL1000XW Underwater Head-Mounted Video Light
$169.99
New in 2016, this head-mounted light boasts 1,000 lumens of power.
It’s mounted on an adjustable head-strap which fits most head sizes, and is powered by a rechargeable 18650 Li-ion battery.
Whether diving in low light, cave or night dives, this light will make sure you see what’s ahead with vivid colors and keep your hands free!
Itorch A6+ Underwater Housing for Apple iPhone 6+
Itorch A6+ Underwater Housing for Apple iPhone 6+
$145.00
The iPix for iPhone is a multi-featured solution specifically made to optimize the photo and video imaging capabilities of those who have traded their digital cameras for the simplicity of their smart phone.
This housing protects your phone in up to 42 meter deep water. This isn’t your standard waterproof case, this is a waterproof enclosure for your phone! Custom app and buttons to optimize still & video camera functions & upload to social media (available at the App Store).
Glass lens port and baffle for optical image clarity. iPhone is fully suspended within the housing ensuring the phone and screen are effectively shielded from wear, tear, shock and pressure.
Gifts Under $600
Sea & Sea YS-01 Strobe – Mounted on a Uni-Tray Flex Arm Set Light Set
Sea & Sea YS-01 Strobe – Mounted on a Uni-Tray Flex Arm Set Light Set
$499.00
Our most popular UW strobe kit! Compatible with almost any compact or mirrorless housing!
The YS-01 is one of the top-selling strobes in the market. It’s a compact yet powerful strobe that can be used with multiple modes: DS-TTL, manual, TTL with converter. It can also be used as a Slave flash. The strobe offers a guide number of 20 and support a standard Fiber Optic connection.
The Uni-Tray is a Sturdy, Easy to Use, Modular, Lightweight and Carry-Friendly Tray/Arm Package. This High quality Locline arm package was designed specifically for Mozaik Underwater Cameras.
Sea Dragon Flash – Mounted on a Sealife Flex-Connect Light Set
Sea Dragon Flash – Mounted on a Sealife Flex-Connect Light Set
$399.95$299.00
Sea Dragon Flash – Universal strobe with a Guide Number of 20. Auto or manual power level, 80×60 Deg beam or 100 with supplied diffuser. Uses 4 x AA batteries which last about 150 flashes. Recycle time 5 seconds at full power.
Quickly and easily expand your camera set with Flex-Connect – add grips, Flex Arms, trays and other accessories with just a “click!” Flex-Connect allows you to transform your camera set from compact to full-featured in just seconds, providing a quick way to adjust to any dive environment. – Optional are Flex arms to extend the strobe and light away from the camera.
Dual Fantasea Action 700 – Mounted on a BTS Boomerang Tray & Flex Arms Light Set
Dual Fantasea Action 700 – Mounted on a BTS Boomerang Tray & Flex Arms Light Set
$499.85$459.00
A powerful lighting kit for your GoPro / Action Cam. A total light output of 1400 Lumens. Compatible with all models!
Very compact light , 75 degree beam, 700 Lumens, 3 power levels – Operation modes: 100% power, 50% power, 30% power and SOS Signaling
This BTS action cam tray/arm set is lightweight, includes two grip handles and will work with almost any action camera and two Video Lights. Includes YS Mount ends.
Ikelite DS-51 Strobe – Mounted on a Ikelite Flex Arm Light Set
Ikelite DS-51 Strobe – Mounted on a Ikelite Flex Arm Light Set
$599.95$549.95
This kit combines everything you need to add a strobe to any Ikelite compact or DSLR TTL system. The compact, lightweight and affordable Ikelite DS-51 Substrobe is an excellent choice for any underwater photographer.
The Ikelite DS-51 is a 28GN flash, capable of 200 flashes per charge and rated down to 300ft / 90m. The included sync cord guarantees precise True TTL exposure with every shot on your Ikelite housing.
The strobe is mounted on an easy-to-use flex arm which makes strobe positioning a simple and quick task.
Sealife SL501 Micro HD+ Underwater Camera
Sealife SL501 Micro HD+ Underwater Camera
$499.00$449.00
The first permanently sealed underwater camera – Capture the tranquil beauty of the undersea world with the first permanently sealed, flood-proof underwater camera. The Micro HD+ has no doors or openings that could possibly leak. With 32GB of onboard memory and a high capacity internal battery, there’s no need for memory cards, batteries, O-rings, or maintenance.
Small and ergonomic, the Micro HD camera is easy to handle underwater, operating with three wide “Piano Key” controls.
Fully Rubber-Armored, Shockproof 6ft / 2m. Charging the camera and transfering files is simple through the waterproof USB port.
The Micro HD+ can wirelessly download and share images and video to smartphones and tablets through a free iOS or Android app – perfect for backing up and sharing your photos and videos immediately after a dive or during a vacation. The app also allows for wireless control of the Micro HD+ camera to capture and review photos and videos.
Features colorful 13MP still images, full 1080p HD video and a built-in 140-degree Fisheye Lens.
Inon UWL-H100 28M67 Type2 Wide Conversion Lens
Inon UWL-H100 28M67 Wide Conversion Lens
$522.50
Inon’s flagship wide angle lens, one of the best and sharpest in the market. Dual Use – Can be used both underwater and above.
Unique optical design allows to shorten minimum focal distance with ultra wide view angle thus effective for wide macro shot.
The lens is highly versatile and compatible with all M67 Screw mounts.
For an even wider field of view, add the optional Dome Unit II and increase your angle by an additional 25% and improve corner sharpness!
Radiant 2500 Pro – Mounted on a Cold Shoe Mount Light Set
Radiant 2500 Pro – Mounted on a Cold Shoe Mount Light Set
$589.90
The Radiant Pro 2500 Video Light is a durable and powerful video light, designed to significantly enhance color and light in underwater videos and still images. It offers a variety of advanced features for creative photographers. Flood, Spot, Red, UV & Blue, all in the same light!
This package includes the a standard ball mount for your coldshoe, a ball clamp and a ball to YS arm for mounting the light.
Complete versatility and easy positioning!
Gifts Under $1000
Sealife Micro HD+ Underwater Camera w/Sea Dragon 2000
Sealife Micro HD+ Underwater Camera w/Sea Dragon 2000
$899.00$799.00
Ready-To-Dive camera and light package!
Capture the tranquil beauty of the undersea world with the first permanently sealed, flood-proof underwater camera. The Micro HD+ has no doors or openings that could possibly leak. With 32GB of onboard memory and a high capacity internal battery, there’s no need for memory cards, batteries, O-rings, or maintenance.
Small and ergonomic, the Micro HD+ camera is easy to handle underwater, operating with three wide “Piano Key” controls.
This package includes the powerful Sea Dragon 2000, a wide angle video light with a 2000 Lumen output at a 100 Degree beam angle.
Nauticam WWL-1 Wet Wide Lens
Nauticam WWL-1 Wet Wide Lens
$995.00
WWL-1 is the highest quality wet changeable underwater wide angle conversion ever made, featuring unmatched contrast, overall sharpness, corner sharpness, and clarity. The design is truly full zoom through, allowing zoom to to be used as a tool for framing, and removable in water for close-up and macro shots.
Mount this incredible lens on any 67mm thread, directly or with the optional bayonet mount, and enjoy the sharp, crisp ultra wide angle images produced.
Fantasea FG7X Underwater Housing AND Canon G7X Camera
Fantasea FG7X Underwater Housing AND Canon G7X Camera
$1569.95$999.95
The Canon G7X is one of the best high-end compacts available. Featuring a huge 1″ sensor, 24-100mm f1.8-2.8 very bright lens and all manual features we know from previous Canon cameras, this is a perfect system for underwater imaging.
The Fantasea FG7X is a custom molded, Polycarbonate housing that is perfectly contoured to the camera. This high end design make their housing very ergonomic which almost feels as an Aluminum housing but at the price of Polycarbonate. The housing offers full control of all cameras function. Its dials and buttons are strategically placed at thumbs reach making it very comfortable to use. BONUS – Moisture Detector comes installed in every FG7X housing at no additional cost!
Dual Fantasea Action 700 – Mounted on a BTS Boomerang Tray + Flex Arms and Aquapod Light Set
Ultimate GoPro Package
$859.00$789.00
The ultimate package for your GoPro! Including an excellent Boomerang tray, 2 powerful lights, Flip3.1 filters/macro combo kit and a Sealife Aquapod!
A powerful lighting kit for your GoPro / Action Cam. A total light output of 1400 Lumens. Compatible with all models!
Aquapod – Fits all cameras with a standard tripod screw – 1/4″-20 and includes a GoPro mount.
FLIP3.1 MacroMate Mini Combo Package Included, with SHALLOW, DIVE, and DEEP Underwater Color Correction Filters with 55mm Lens Adapter and MacroMate Mini for GoPro Hero3 & Hero3+.
** GoPro Camera not included! **
Big Blue VL7500P (7500 Lumens) Underwater Video Light
Big Blue VL7500P Underwater Video Light
$621.99
This great new addition to the Bigblue Dive Lights photo/video light family offers many features making it a great choice for any diver.
The VL7500P is a self-contained, compact yet powerful, all-purpose dive light – but is best suited for video purposes with a 120 Deg beam angle.
This light generates 7500 lumens, and offers 4 power settings controlled by a reliable push-button.
Also an option in the push-button system is a built-in red LED mode, great for lowering the color temperature and creating a great light for viewing all types of sea life.
This light also comes with a yellow filter and ball joint for camera use, and has a reliable Li ion rechargeable battery and charger.
Sea & Sea YS-D2 Strobe – Mounted on a Uni-Tray Flex Arm Set Light Set
Sea & Sea YS-D2 Strobe – Mounted on a Uni-Tray Flex Arm Set Light Set
$913.95$779.00
All included strobe package, featuring Sea & Sea’s newest strobe – the YS-D2 and Mozaik’s universal Uni Tray, compatible with almost any compact or mirrorless housing in the market and fiber optic cable included! Ready to dive lighting package.
The Sea & Sea YS-D2 is the next generation TTL underwater strobe, following the widely popular YS-D1. Excellent for both wide-angle or macro photography above and under the water.
The Uni-Tray is a Sturdy, Easy to Use, Modular, Lightweight and Carry-Friendly Tray/Arm Package. This High quality Locline arm package was designed specifically for Mozaik Underwater Cameras.
FG16 Underwater Housing AND Canon G16 Camera
FG16 Underwater Housing AND Canon G16 Camera
$1034.95$699.00
The Canon G16 bundle with the Fantasea housing has been our most popular compact bundle for the past year.
The G16 is the ideal underwater camera, packing plenty of features and excellent quality in a compact size. It’s complimented by the incredible value Fantasea housing, which allows complete control over all the camera’s features and includes a bonus leak detector, as well as double O-ring seals, keeping your gear safe and dry.
Fantasea offers plenty of easy-to-add accessories such as a wide angle lens, macro adapter and lens, filters and more which snap on the housing effortlessly.
Now offered at surprisingly low price! Valid while stock lasts.
Gifts Under $1500
Big Blue VL30000P (30000 Lumens) Underwater Video Light
Big Blue VL30000P (30000 Lumens) Underwater Video Light
$1449.99
THIRTY THOUSAND LUMENS! Also known as the “Big Chubby”, the newest powerhouse in the Bigblue line of photo/video products is the VL30000P.
Self-contained Li ion rechargeable battery pack, Battery and charger included with an easy-to-access, removable battery pack.
Beam angle of 160 Deg, Push-button on/off switching system with 4 power output settings and an SOS setting, A built-in red LED setting.
A Lantern grip for easy hand-held use, a standard 1″ ball joint for easy mounting to any camera system, and A 35 LED cell design giving a stunning 30,000 lumens!
Dual Radiant 2500 Pro – Mounted on a Blue Ray Tray Light Set
Dual Radiant 2500 Pro – Mounted on a Blue Ray Tray Light Set
$1079.00
This complete lighting set will allow you to take stunning and colorful videos withe a total of 5000 lumens!
The Radiant Pro 2500 Video Light is a durable and powerful video light, designed to significantly enhance color and light in underwater videos and still images. It offers a variety of advanced features for creative photographers. Flood, Spot, Red, UV & Blue, all in the same light!
The Fantasea Blue Ray Double Tray allows integrating different components in an underwater photo system, including the camera housing, arms, strobes, lights, lens holders and more.
Fantasea FG7X Underwater Housing AND Canon G7X Camera w/ BigEye & RedEye
Fantasea FG7X Underwater Housing AND Canon G7X Camera w/ BigEye & RedEye
$1925.95$1499.95
A complete underwater setup including a camera, housing, lens and filter, reado to create awesome top quality videos and photos!
The Canon G7X is one of the best high-end compacts available. Featuring a huge 1″ sensor, 24-100mm f1.8-2.8 very bright lens and all manual features we know from previous Canon cameras, this is a perfect system for underwater imaging.
The RedEye fits directly over the housing lens port or installed on compatible lens accessories. It can be installed and removed during the course of the dive.
The BigEye is used as a Wet dome to restore the original viewing range of the lens underwater.
Fantasea FG16 Underwater Housing for Canon G16 w/S&S YS-01 Strobe
Complete G16 Underwater Setup
$1599.00$1439.00
This popular Fantasea G16 package includes everything you need to take you G16 underwater and produce stunning wide angle AND macro photos! The bundle includes the BigEye lens, which expands your field of view by 25%, the SharpEye, which allows you to get closer to critters and take cool macro shots and a RedEye, for better colors when shooting with ambient light.
The YS-01 strobe is one of the most popular strobes in the market, adding true vivid colors to your photos, with a fast recycle time and wide beam.
The Blue Ray tray keeps everything in place and even includes the EyeGrabber which is used to stow the lens that isn’t in use at the moment.
All of the professional-grade features a camera of this caliber demands. The only Canon EOS 650D/700D housing to offer built-in hard-wired true Canon eTTL2 metering with an underwater strobe. And more than a little pocket change left over for your next equipment upgrade.
Access to all important camera function, Capable of electrical TTL strobe exposure, Comfortable rubber grips
Glass optical viewfinder enhanced for underwater, Visible o-ring seals, Corrosion-proof solid body
Release handles with comfortable rubber grips allow for easy attachment and removal of mounting arms at the touch of a button. Two 12-24 screws remove the handle and tray assembly for traveling.
For more options or custom packages, consult with our experts via the online chat on the bottom right corner! We’re always here for you and glad to offer advice!
Most top-side DSLR / Mirrorless photographers appreciate the importance of having several lenses for different types of shots. A basic photography kit usually includes a wide angle lens, a telephoto zoom lens and perhaps a couple of prime lenses.
Switching between lenses on ground is pretty easy, but underwater, we don’t have that luxury.
Even if you’re shooting with a compact above water, you can always take a few steps back, or zoom in, to get a different angle or frame. When water enters the equation, things aren’t that simple.
Enter Wet Lenses!
Wet lenses were developed as a method of altering the field of view or optical quality of our original lens, without the need to surface. Hence the name – Wet Lenses!
Wet lenses are positioned in front of the camera housing, flush against the port. They are usually designed to take into account the layer of water between the front of the port and the back of the lens, since water combined with air creates some type of optical element.
The main advantage of shooting with compact cameras underwater is versatility. The option of using wet lenses and changing them during the dive allows you to shoot a Whale Shark and a Nudibranch on the same dive! Something that can rarely be achieved with a DSLR. This is the reason some photographers prefer leaving their DSLR’s above water and getting a 2nd compact system dedicated for underwater use.
Nauticam WWL-1 Wide Angle lens mounted on RX100 IV housing
Let’s go over the main features of wet lenses:
Types of Lenses
The 2 most common types of wet lenses are Wide Angle and Macro (aka Close-Up).
This is derived from the 3 types of underwater photos – Wide Angle, Medium shots and Macro. Medium shots are also known as “Fish Portraits” and don’t require special lenses, since your average camera lens will usually be the ideal focal range to shoot that type. The other two are the ones we want to improve on. As long as you’re changing your FOV (Field Of View), you would probably want to go wider or get closer.
Mounting Options
Mounting a wet lens on your housing can be done in several ways and is generally determined by the type of mount the housing offers. Some methods can be combined or replaced using various adapters.
Thread Mount (Screw-on lenses)
The most popular method is threading on the front of the port, 67mm and 52mm are the most common thread sizes. With this method, the lens has similar threading and can simply be screwed on the front of the housing. If the threading on the lens and the port are different, a step-up / step-down ring is used.
Bayonet Mount
The Bayonet mount is a common attachment type in many industries, due to the simplicity of attaching something with this mechanism. It requires a simple “1/4 twist and press” action, which is usually locked in place with a button, lever or spring. It was quickly adopted underwater, to prevent unnecessary fiddling with the gear and making the lens replacement as simple as possible. The problem is that the standardization of this type of mount is not uniform among different manufacturers, and many of them tend to develop their own unique type of Bayonet, which doesn’t play nicely with other types.
Flip / Swing Mount
This is not a method by itself, but usually combines a thread mount along with a swing or flip mechanism to position the lens in front of the port or get it out of the way fast. This is by far the fastest and easiest way to switch between different FOV’s but it’s mainly effective for close-up lenses, since wide angle lenses are heavier and require more precise positioning.
The adapter itself can be pricey and if it’s not high-quality, it can swing / flip out of place involuntarily, which can be quite annoying. Nevertheless, it’s a valuable asset and very common among macro photographers.
Other Mounts
Some manufacturers create their own mount types for lenses, such as Fantasea’s excellent snap-on mechanism for the G7X / G16 housings. These custom mechanisms are usually very good and easy to use, but would limit the user to one type of wet lenses, made by the housing manufacturer.
How does it work?
Wet lenses consist of one or more optical elements and rely on a specific type of lens which they are to be mounted on. As mentioned before, they take into account the thin layer of water between the port and the lens, to deliver optimal quality and sharpness throughout the frame. Naturally, some lenses use higher quality optical elements, which raises the final price for the customer. They vary in size, weight, shape, contrast, sharpness, vignetting, corner sharpness, fringing and more. Not all lenses are created equal and not every lens is intended for all housings, or all photographers for that matter.
Wide Angle Lenses
If you’re a diver, or even a snorkeler, you have probably noticed that things look bigger underwater. 33% bigger to be precise (34% bigger in salt water) and 25% closer than they actually are. This is caused by optical refraction between air (in your mask) and water. The same thing happens with your camera. The housing serves as a “mask” for the camera, causing it to see things 33% bigger, which is translated to a narrower FOV, just like zooming in.
A wide angle wet lens is meant to fix that, or even produce a wider field of view, such as FishEye or Ultra Wide.
Dome vs Actual Lens
There are two types of wide angle lenses for underwater. The first one is simply a dome, made out of acrylic or glass, with trapped air inside. This type of lens has no actual optical element, so if you look through it above water, you won’t see any difference, but when it goes underwater, the magic starts to happen. The dome combined with optical refraction creates a virtual image on your camera which eliminates the 33% difference in FOV and returns the focal range to that produced on the surface. In short – adding a dome creates a 33% wider image underwater!
Inon UWL-H100 with Dome Unit II installed
The second type is an actual lens with one or more optical elements. Usually a wide angle lens is comprised of several optical elements, producing a definitive angle of view which is mentioned in the manufacturer specifications. These lenses will usually work both underwater and above, producing a certain FOV underwater and an even wider one above water. Some lenses will actually produce a FishEye angle, which is very wide and can reach up to 180 degrees. However, to reach a 180 degree FOV underwater, you will most likely require a dome port in addition to your wide angle lens, installed in front of it.
Some wide angle lenses, such as the popular Inon UWL-H100, have an optional add-on dome which can be purchased separately and installed in front of the lens itself, increasing FOV and significantly improving corner sharpness.
Other wide angle lenses have the dome included as one unit, such as the i-Das UWL-04 and the new Nauticam WWL-1. These lenses are bulky and heavy, but produce the best results overall.
Compatibility note: Wide angle lenses are engineered to fit a specific focal range on your original lens, such as 35mm or 28mm on the newer ones. Recently released compact cameras feature an ultra wide 24mm focal range, making it increasingly hard to produce wide angle lenses that fit without vignetting (black corners). As a result, you might need to zoom in slightly when using wide angle wet lenses on newer compacts, to avoid black corners (alternatively, you can crop in post processing).
Macro / Close-Up Lenses
This is probably one of the most popular additions to underwater camera gear. The underwater world is abundant with small critters which are both magnificent and bizarre. Taking photos of these wonderful creatures and enlarging them for the world to see, is one of the underwater photographer’s main goals and passions.
To create this type of magnification, all you need to do is get close to the critter, zoom in as much as you can, and shoot! Sounds easy right?
The problem is focusing.
Every camera lens in the world has a limitation called minimum focus distance. This is the closest you can shoot from a subject while still keeping the image focused. When zooming in, that distance grows even further away, making it impossible to get a sharp clear shot of the critter. Close-up lenses, aka macro lenses, aka diopters, are placed in front of the lens, altering that “minimum focus distance” and reducing it significantly. The effect is usually measured by +X units (+4, +6, +10, +15…). This is a relative measurement, which depends on the original lens. The longer the zoom of the original lens is, the more magnification you will get in the final shot.
Macro photography is generally considered getting your subject to have a 1:1 size ratio on the sensor. That means a 1/2″ critter will take 1/2″ of your sensor. Assuming it’s a 1″ sensor, a 1/2″ critter will take up half the frame.
While this is the “proper” way to determine exactly how much magnification you are getting, with all due respect, we are not scientists! We’re just a bunch of people who like taking photos. We don’t need exact figures…
What you need to remember is this – More Zoom + Stronger Close-up Lens = More Magnification
Sony RX100 III vs Canon G7X – Full zoom macro shot comparison
An important thing to keep in mind – the more magnification you produce, the smaller your DOF (Depth Of Field) will be.
DOF is the range that is in focus. When shooting macro, it can be as small 1mm (a bug’s eye), causing the act of shooting the photos quite an excruciating feat. You will usually require a lot of practice, excellent diving skills and quite a few tries to get one shot right.
Beginners are advised to start out with a lower magnification lens (+4 or +6), until they get the hang of it and can advance to the +10 or +15 lenses.
Insect View Lenses (aka Micro FishEye)
The last type is an odd combination of both previous types. It’s an Ultra Wide Macro lens! That means that’s it’s intended for close-up shooting, while capturing a very wide frame behind the main subject. This type of photography is called CFWA (Close Focus Wide Angle). You can create CFWA with standard FishEye lenses, but this one takes it to extreme.
The end result is very unique and cool, allowing you to demonstrate to your viewers how the underwater world looks like from the eyes of a bug.
Inon produces the most popular insect view lens – the UFL-MR130 EFS60 lens as well as the less extreme UFL-M150 ZM80 lens.
Common Compatibility Issues
Due to the large amount of manufacturers in the market, both for cameras and housings, as well as wet lenses, compatibility is something you should take great care with.
The easiest solution is to get a lens made by the same manufacturer as the housing. This will likely ensure compatibility and usually easy to figure out which lens you need for your housing.
If your housing manufacture does not produce wet lenses, you can usually find online which are the wide angle and macro lenses that are most recommended for your camera and housing. Our UW photo experts have a lot of experience with this, so it would be best to ask us!
Common issues which you might encounter are:
Noticeable black corners when using the UWL-H100 with a red filter behind it.
Vignetting (Black corners) – This is a problem which occurs in wide angle lenses, that are engineered for a different focal range than the one you’re using (e.g. wet lens made for 35mm, used on a 28mm lens), or if you’re using an adapter for matching different mount types, or adding a filter behind the wet lens, which causes the lens to be further away from the front port than intended.
Vignetting with Macro Lenses is not a problem! It simply means that you didn’t zoom in far enough on your camera. Zoom in all the way and the black corners will vanish.
Black sides – This might occur if your wide angle lens has a shade, which is misaligned. Make sure the larger flaps of your shade are on the top and bottom of the frame, and the smaller flaps (if there are any) are on the sides.
Trouble Focusing – Some lenses will require switching to Macro Mode on the camera (little flower). Mostly on underwater domes such as the Fantasea BigEye. This is because of the virtual image I discussed previously, which is created close to the lens and the camera needs to focus on that.
When using a macro lens, your focus range is limited, so you would need to get used to the closest and farthest distance from which you can shoot your subject.
Soft corners – Some wide angle lenses will cause the corners of your frame to be blurry and soft. This happens as a result of forcing optical elements to work together even though they are not aligned in an optimal way. Using a dome on your lens will help, but the best solution is closing down your aperture. This will reduce the problem significantly.
Strong purple fringing – Some purple fringing always exists in every lens and it’s not always noticeable. The higher quality your lens is, the less fringing you will get. Fringing can be either fixed in post processing (Lightroom does a great job on this) or simply getting a better, higher quality lens.
Related Accessories
Apart from the actual wet lens, there are several useful accessories which can be added to your system for increased comfort and usability.
Lens holders are an excellent addition which enables you to stow your lens on the tray or arms when not in use. These can be found for various types of arms and various mounts. Just look for the one that matches your gear. Using a lens holder is a good alternative to stuffing the lens in your pocket / BCD / wetsuit thus preventing potential damage to the lens.
Flip / Swing holders, which I mentioned previously in the Mounts section, are a useful add-on which can help you apply or remove the lens in the easiest way possible, instead of screwing it all the way in or out between shots.
Nauticam Flip Diopter Holder
Dome shades are a nice little add-on which is available for some lenses and reduces flare from the sun, enhancing the overall contrast of the image.
Filters can sometimes be combined with wide angle lenses for better results when using ambient light. Red or pink filters are quite common for correcting the colors underwater and some wide angle lenses allow the use of filters behind or in front of the lens. Keep in mind that this might reduce sharpness since the lens is not used exactly as intended, so it’s not always recommended.
The Inon UWL-H100 has been the market leader for many years now, since its release. The compatibility with 28mm lenses, the excellent sharpness throughout the frame, the availability of the Dome Unit II for extra wide angle and even better sharpness; all of these have made the UWL-H100 a top choice among compact shooters.
The Fantasea BigEye is a dome only, designed to restore the focal range lost due to optical refraction, effectively adding about 33% wider field of view underwater. It comes in a variety of models to fit different Fantasea or Canon housings and is a great affordable option for getting that entire shark in the frame!
The BigEye is available as a snap-on for Fantasea / Canon housings and threaded for 67mm housings.
The UWL-04 has been around for quite some time and still going strong. It includes both a wide angle lens and a dome unit for about half the price of the Inon or Nauticam alternatives. It’s designed for a 52mm thread, so 67mm threaded housings will require quite a lot of zooming in, sometimes rendering it useless. However, for the smaller compacts such as Olympus, it’s the perfect lens!
The W30 is a great solid lens, created to fit most of Ikelite’s compact housings (fits a 46mm or 67mm thread). Specifically designed for digital cameras with 28mm focal length. It’s also possible to use it on any other non-Ikelite housing with a 67mm thread!
This popular +6 lens has been a top choice among beginner underwater photographers for the past few years. It features excellent sharpness and contrast, ideal medium range magnification – enough to make the critters pop, but not too much that it becomes harder to shoot.
The great thing about it, is that it’s double threaded (on both front and back) so once you gain more experience in macro shooting, you can add a second lens, stack it on the first, getting a +12 magnification factor for extreme close-ups!
Nauticam’s CMC-1 was released in 2015 and designed to become the strongest and most high-end close-up lens in the market. This is the SMC’s little brother, engineered for optimal results on compact cameras.
With a staggering +15 magnification factor and razor sharp quality, this small lens delivers! It definitely won’t be easy for beginners to control it, but once you get the hang of it, prepare to be amazed by the results!
The Subsee is one of the most popular and well known lenses in the market. It comes in two different models – +5 and +10, but the +10 is by far more popular. It produces high magnification and fits a 67mm thread. High quality optics produce razor sharp images, but also make the lens bulkier than others.
If you’re looking for an affordable and strong magnification lens, this would be the best choice! This excellent +8 close-ups lens delivers the best bang for your buck and fits any 67mm threaded port.
I hope this article helped clear up a few things!
If you have questions about anything I discussed here, or anything else for that matter, feel free to reply to this post or contact me directly at ran@housingcamera.com
Whether you are new to the undersea world of diving or an old hand who has finally accepted that a dive computer is not just a fad, buying your first dive computer can be a taunting task. Dive computers range in price from a few hundred dollars to a few thousand. The basic function of the dive computer is to give us a real time guidelines to how much longer we can stay at the current depth while staying within the no decompression limit.
The dive computer will also give us information on how to safely recover if we exceeded that limit by providing decompression stop information. Beyond that primary function dive computers have a range of options such as dive planning, multiple gases, exporting data, breathing gas supply and consumption, time to fly calculations and surface intervals.
1. Technical boring stuff
The modern dive computer has its beginnings in the recreational dive tables that most divers were introduced to in their initial training. These tables, which were themselves based on US Navy dive tables, provided a framework to reduce the risk of decompression sickness (DCS) by giving us a maximum amount of time, referred to as No Decompression Limit (NDL), we can stay at a specified depth. Decompression sickness, under various names such as caissons disease or the bends, have been studied since the mid 1800s.
Workers building footers for bridges were frequently afflicted. Caissons were lowered into the water surrounding the work site. The water was pumped out and the caisson was pressurized to keep water from seeping in. Workers would enter into the work space by a airlock and proceed to the bottom by ramps. At the end of their shift they would proceed up the ramp and exit the airlock. Many of the workers would experience the effects of what we now call DCS. It was discovered that workers who rested a part of the way to the surface either did not get the symptoms or if they did they were mild. These were the first concepts that we now use in decompression diving.
Just a fast review of the concepts you learned or will learn in your open water training:
Our bodies has nitrogen in the blood stream, tissues and organs. Under normal atmospheric conditions this nitrogen poses no problems within our body. When we dive to depths, the pressure increases and the nitrogen molecules become smaller. This is expressed as partial pressure commonly shown as pp. The gases will flow from the higher pressure to the lower. The body will absorb this into the bodies cells. However, the rate of that absorption varies greatly between the different types of muscles and other tissues.
Scientist calculate the time for half of the nitrogen to move from the higher pp to the lower, they use the term halftime. Those tissues or body fluid with the lowest halftime will quickly absorb it and pass it on to other parts of the body with a lower pp or out the respirator system if the outside air has a lower pp. The halftime, the pressure difference and the amount of time the body is under pressure will determine how much nitrogen is in any given part of the body. For simplification, body components are looked at as groups with the similar halftimes.
The dive tables’ NDL represents the the time a diver can return from the depth without the need to stop going towards the surface to allow excess nitrogen to leave the body. The diver will have more nitrogen than normal in their body, however the extra should not cause the diver any problems as it works it way out of the body. The dive tables are based on the tissue group that is the most at risk. If diver exceeds the NDL and returns to the surface with nitrogen beyond a safe level, the trapped nitrogen and cause damage to cells and nerve and even block the proper flow of blood. This results in DCS.
The dive tables are static and assumes that the diver will descend to the planned depth directly, stay at the depth for the prescribed time and slowly but directly ascend to the surface. Divers seldom do that and as a result relying on dive tables can significantly reduce the amount of time allowed for the dive. A dive computer on the other hand is adaptive using real time depth data to constantly calculate the amount of nitrogen in the body. They use algorithms that are very complicated to apply the data to a number of different tissue groups and displays the remaining NDL for the controlling tissue group. Mares a leading manufacture has the following half times in minutes as the tissue groups they use: 2.5, 5, 10, 20, 30, 40, 60, 80, 120 and 240.
2. Algorithms are not all equal
While the concepts and science behind the algorithms are the same, there are a number of different algorithms that the manufactures of dive computers use. The result are similar, however, there are some variations. For about 17 years I have been diving with a Genesis Nitrox Resource. To save a number of negative comments, yes I know that the current Genesis Resource does not adjust for Nitrox, however, the early models did. It uses a modified Haldanean algorithm with 12 tissue groups and I have been very happy with it. I decided to replace it only because it did not export data.
I recently acquired a Aqwary Smart Console which uses a reduced gradient bubble model (RGBM) algorithm. On my first dive with the new computer, I also took my old one to compare the readings. When I dived to 90 feet the Aqwary gave me 10 minutes less NDL than my Genesis. When I returned to 60 feet there was still a 4 minute difference. The difference was shocking, so on my next day of diving I added a third dive computer a Suunto Zoop. The Zoop also uses a RGBM Algorithm and is considered a conservative profile. Diving at 80 feet, the Aqwary gave me 8 minutes less NDL than the Genesis and the Zoop 12 minutes less. The Aqwary and the Zoop are two computers among many that also has the ability to adjust the profile to be even more conservative with two additional settings for divers who feel they are at a higher risk than the average diver. When considering dive computer how conservative a dive computer is and whether it can be adjusted should be considered.
3. Multiple Gases
Our Open Water Diver Training has us diving on compressed air that contains 21% oxygen and about 79% nitrogen. Our dive tables base the nitrogen intake on these percentages. In certain circumstances, properly trained divers might use a different concentration of gases. One very common practice is the use of Enrich Air Nitrox (EAN). Simply put, EAN has additional oxygen added to the compressed air so that the nitrogen percentage is lower. The lower nitrogen level means it takes longer for the nitrogen to store in our body. To provide the correct NDL, the computer needs to know if you are using more oxygen. Some computers allow for this adjustment allowing the diver the rely on the adjusted readings. Diving on EAN is becoming very common so it is recommended to insure that your first computer contains this feature even if you are not currently trained.
Technical divers often use a mixture of three gases to overcome problems of high concentrations of oxygen. Their dive computers should be able to be programmed for multiple gases and even different concentrations during a single dive. Very few diver progress to becoming a technical diver and this feature can be very expensive, so it generally not a purchase for a first computer.
4. Breathing Gas Monitoring
One feature that many divers like is the integration of their breathing gas monitoring into their dive computer. Instead of using a Submerged Pressure Gauge (SPG) to track how much breathing gas is in your cylinder, a dive computer with this feature will display the information on your dive computer screen. It will also allow you to analysis your air usage after a dive.
5. Exporting Data
Most dive computers now have the ability to export data to your computer and even to online storage. The question for a purchaser is mostly on the method that it is done. Some computers will require a wired interface, some will use a Bluetooth connection and other a WIFI connection. This is mostly which one you are comfortable with. Also note that some models will sell a connection module separately from the computer, so that needs to be considered when looking at the prices.
This should give you a good overview to get you started as you look at different models. Just remember to consider the future. The dive computer you purchase now should meet what you think you will be diving a few years from now.
3 Great Dive Computers to consider
Cressi Leonardo
Top Product Features:
Leonardo is the first dive computer designed and built entirely by Cressi.
An elegant expression of simple, functional design, the Leonardo is a must-have for divers entering the sport and those who “just want to dive.”
A single button interface makes it effortless to program Air, Nitrox and Gauge modes the first time a diver picks the computer up, and an edge-to-edge, high-definition screen gives large numerical displays in a computer that is still compact and travel-friendly.
The clearly visible battery life indicator and distinct audible alarms deliver critical information as well as peace-of-mind during the dive.
Available in Black-Grey / Black-Yellow / Black-Pink / Black-Blue / White-Black.
With a case diameter of just 48 mm, Newton is a truly compact dive watch computer.
Itメs also the ideal tool out of the water as well, thanks to the option to deactivate the Dive program to prevent needless alarms or consumption while snorkeling, swimming, or just everyday use.
The face is mineral glass and the watch has a heavy-duty reinforced case for resistance in the water down to -150 m.
Rubber strap with stainless steel buckle.
Available in Black-Grey / Black-Blue / Black-Pink / Black-Black / Black-Yellow
If you still have any further questions regarding dive computers or any other Scuba gear, feel free to contact our team of experts via the online chat!
There are many benefits to owning your own scuba gear, but some of the most important reasons are the fit and the features. Owning your own gear lets you pick gear that fits you perfectly and has all the features you want. Whether you are a seasoned diver looking to replace your old trusty BCD or a newer diver thinking about making an investment into owing your first BCD, there are some important things to consider when you are shopping around.
If you really want to get the BCD that is best for you, you should start by thinking about the types of diving you will be doing and the conditions you will be diving in. A lot of guides will take you straight into picking this feature vs. that feature or this brand vs. that brand. If you aren’t clear on how you’re going to use it, how will you know which BCD or features are best?
Here are a few questions to ask yourself as you start shopping:
Do you dive in clear, warm water or cold northern lakes? If you will be diving in warmer waters, you will almost certainly be wearing less exposure protection. However, in colder waters you might be diving a dry suit or layers of wetsuits. As much as a lot of us would love nothing more than diving the Caribbean all the time, there are some of us out there (myself included) who like to dive in the colder waters of higher altitude lakes and sometimes even under the ice in the winter.
Do you travel often or do you usually dive at local dive sites? If you do a lot of traveling, BCD size and weight will be much more of an issue than if you spend most of your time diving locally. Nobody likes paying more in airline luggage fees!
Are you doing dives that are gear-intensive, like underwater photography, night diving, or search and recovery? All that gear should be tethered to something or stowed, and you’ll need a bit of extra buoyancy to lift all that equipment. Having pockets and D rings to tether and store gear will help keep you streamlined and stay organized.
If you are a female diver, do you find yourself having a difficult time locating a BCD that fits your anatomy? There are BCDs now that are designed specifically for women, and these can really make a big difference in your comfort while diving.
Now that you’ve made a few decisions about what the main characteristics of your diving are going to be, let’s get started!
The two most important features of a BCD are fit and reliability. If a BCD doesn’t fit properly, it won’t be stable in the water and you’ll use more air inflating and deflating it as you try to achieve neutral buoyancy. If your trim is off, you will have to work harder to swim and you’ll use more air that way. The better your air consumption is, the longer your dives can be! Since I assume one of the main reasons you’re buying your own gear is to do more diving, this is definitely moving in the right direction!
If a BCD is not reliable, it is not safe. Bottom line, you need to be able to trust your equipment with your life. The major manufacturers today take great pride in the durability and reliability of their equipment, and many offer excellent warranties. However, be cautious of buying from sites or stores that are not authorized retailers of the equipment they sell. They are known as “grey market” retailers, and buying from one will often void the warranty on your new gear. Aqua Lung and Apeks, Tusa, Zeagle, ScubaPro, Mares, Cressi, Hollis, and Sherwood are all manufacturers that have a history of making great gear.
Design
Since the purpose of the BCD is to let you control your buoyancy, let’s start by looking at the different designs of the BCD bladders. The three main styles are jacket BCDs, where the entire BCD inflates; back (or wing) inflate, where a separate bladder only on the back fills with air; and hybrids, where there is some inflation in the body but most is on the back. There is a final option of a backplate and wing, which is a harness attached to a rigid backplate that you build to suit your particular needs; this is very popular with technical divers and other advanced divers, but is not necessarily a good option for a beginner without instruction in proper setup. Dive Rite, Halcyon, and Hollis make a variety of wings and backplates, but you should definitely talk to your local dive instructors or shop staff, or start looking here for more info on this setup. Look for an article in the future all about the many options, benefits, and configurations for backplate and wing setups.
Jacket BCDs tighten around you as you inflate them, so if you like a more open feel and less constriction you will want to consider a back inflate or hybrid. Since a back inflate BCD has the bladder separate from the harness system, you won’t get squeezed as you fill the BCD. These BCDs usually have a higher lift capacity. One good feature to look for on back inflate BCDs is a retraction system of some kind for the bladder. The retraction system will use bungee cord or a similar material to squeeze the bladder as it fills and deflates, keeping the cross section as small as possible to reduce drag. Although back inflate BCDs tend to naturally streamline you horizontally while you are in the water, at the surface they will push you face forward and may require more effort to float upright. Hybrids are a compromise between the jacket and back inflate styles; they have a lot of the streamlining ability and trim of the back inflate but also have some buoyancy in front to balance you out. A great feature to have on all of these styles of BCDs is a rear lower exhaust valve. Located on the lower corner of the bladder near your hips, the rear exhaust valve will allow you to let air out of the BCD without moving out of your horizontal trim position.
You may have seen BCDs labeled as “sidemount”. What does this mean? Sidemount is a system of rigging your tanks and other equipment on the sides of your body rather than having your tank on your back. There are some big benefits to diving sidemount, and you can read about them here. In the same vein as backplates and wings, there is additional training and knowledge you’ll need to use this configuration safely, so consult your local dive shop and dive professionals for more info.
The rear exhaust valve brings up the next consideration: inflation and deflation. All BCDs have an inflator valve that connects to the first stage of your regulator to add and release air, and an oral inflation mouthpiece as a backup. The designs of these vary from model to model and manufacturer to manufacturer, so make sure to familiarize yourself with the operation of the inflator you are looking at BEFORE you dive. Some inflators offer a secondary regulator built into the BCD inflator hose, or divers add them as an aftermarket mod, like the Atomic SS1 or the Scubapro Air2. The functionality and dive procedures for sharing air with this design are topics of hot debate, and you will want to do some more research on ScubaBoard or other forums online. Personally, I like having a third backup regulator after my primary and octopus; I always like to have at least two solutions to any foreseeable problem.
Lift
Now that we have talked about where the BCD stores air, and how it gets air in and out, we should take a minute to talk about lift capacity. This is the amount of buoyancy your BCD bladder provides when fully inflated, measured in pounds (or newtons). Smaller BCDs are going to have smaller lift capacities just due to their size, and back inflate or backplate and wing designs are going to generally have higher lift capacities, especially if you are adding larger aftermarket wings. You need to make ABSOLUTELY sure that the BCD you choose has enough lift capacity to give you positive buoyancy if needed, as well as maintain your neutral buoyancy during the dive. Another thing to remember is that as you use your air, your buoyancy will change throughout the dive. The amount of gear you carry, what kind of tanks you are diving (steel vs. aluminum, LP vs. HP), and what exposure protection you are wearing (drysuit vs. wetsuits) will all affect your buoyancy and weighting. As a safety measure, it is also a good idea to have extra lift available in your BCD in case your drysuit floods. You can usually find the buoyancy characteristics of most dive equipment in the manufacturer’s descriptions. If all of this sounds confusing, don’t worry! Your local dive pros will help you figure all of this out, and while the math is available on several scuba forums it is not as complicated as it sounds. The small amount of time you’ll spend before the dive figuring out your buoyancy, weighting, and trim will pay off as less effort while diving and using less air maintaining your buoyancy.
Weights
Weight integration is the next big feature. Some BCDs come with an integrated weight system, which means depending on how much weight you need you may not have to wear a separate weight belt. Sound awesome? That’s because it is! These systems have special pockets or pouches that are designed to carry weights but are able to be quickly ditched in an emergency. There are different designs for these quick-releases, like the zip-cord style of the Zeagle as opposed to the mechanical latch of the Mares Dragon and most other manufacturers’ BCDs. I would advise against Velcro based quick-release systems for two reasons: the Velcro will lose its adhering strength over time, and this type of release is easy to accidentally release, creating a dangerous underweighted situation. You do need to look at how much weight the system will carry, as some integrated weight systems have smaller capacities than a normal weight belt. If you arediving dry, you may have to split the difference between a weight belt and the integrated weight system. A lot of BCDs will also have trim pockets, where you can put smaller weights to balance your trim and help you streamline. These pockets are not easily detachable in an emergency, so you will need to make sure that a majority of your weight is stored in the main part of the integrated weight system. Manufacturers are moving more and more towards this type of system on a lot of BCDs, so you will find this to be more common than it was a few years ago.
The amount of exposure protection that you wear will affect both your BCD fit and your buoyancy. If you are normally right on the edge between one size and the next, then stepping up to drysuit diving or diving with thick wetsuit layers will require extra room, and thus a bigger size, for the BCD to fit properly. When you are looking at fit, look at the way the BCD attaches to your body. Does it have a Velcro cummerbund or just a waist strap? Are the shoulder straps wide enough to be comfortable in and out of the water (where you are carrying the full brunt of your tank and weights)? Does the sternum strap keep the shoulder straps in proper position? How do the straps and waist band adjust; namely, do they stay secure once adjusted, and are you able to adjust them easily? These are all questions that you can really only answer by trying on gear in person at your local dive shop, where the staff will (as usual) be able to help you find a BCD that fits you well. Women, do not fear! The BCDs I was talking about earlier that are made specifically for you have just as many features as the non-gender specific ones and are just as rugged and reliable. The ScubaPro Ladyhawk is a great example of this; it is identical to the ScubaPro Knighthawk except the female-specific anatomical design.
Mounts and pockets
Ok, we are getting a lot closer to finding the perfect BCD for you, we only a few things left to go over (I promise). Now that you have the BCD design and size that will suit your type of diving, the lift capacity you need for you and your gear, and you are ready to go with your inflator (and inline regulator if you like), the next question is: where are you going to put your dive tools and equipment? There are two ways to approach this: D-rings and pockets. D-rings are great for attaching small pieces of gear like flashlights for night diving, knives or other cutting tools, slates for communication, and perhaps a compass or something similar. A detail to look at here is the design of the D-ring. Most D-rings will lay flat against the BCD when not in use; the best ones in my opinion have a slight bend to them so they protrude away from the strap they are attached to. This bend lets you find and clip gear to the D-ring much more easily. Look at this BCD for an example of the bent D-ring design. For clipping gear to D-rings, I always use bolt snaps. They are secure once fastened, do not easily come open and tend not to tangle in lines or other filament, and can stand up to the rigors of fresh and salt water. Here are a variety of bolt snaps to get you started. Retractors are also great for keeping gear close at hand.There is a tutorial all about how to safely stow and connect gear to yourself in another article. Pockets are also useful for stowing small gear that does not have a way to clip to a D-ring, like notebooks or pocket masks. The main thing to remember is one of the main themes I have been talking about throughout the article: streamline, streamline, streamline! If you have lots of gear dangling from every D-ring, you are going to have more drag in the water and swimming will require more effort. You will also have a higher likelihood of catching or dragging your gear against the bottom or anything else you swim close to. Consider whether you really need those items before you take them on each dive.
Travel
Travel BCDs have some general design features that set them apart from other BCD setups. They are usually much lighter and more compressible than standard BCDs. What do I mean by more compressible? They are minimalist in design with less bulk, and are easier to pack into your luggage as they take up less space. However, the trade off for less weight and less volume is usually less pockets, less D-rings, and possibly no weight integration ability. Take a look at this ScubaPro Litehawk for a better idea of what I’m talking about. The lack of weight integration should usually not be a problem at almost every dive shop around the world, weight belts, tanks, and regulators are pretty much standard issue. You will have to weigh what you have learned about BCD features against what you are willing to sacrifice for space and ease of packing.
So, in conclusion, here are the main points we have gone over to use while for shopping for the perfect BCD:
Figure out what kind of diving you will be doing and use that to guide you
Jacket vs. back inflate vs. hybrid; there is a tradeoff between fit, trim characteristics, and lift capacity
What about side mount or backplate and wing? Take some classes and talk to your local dive professionals
Inflators: know before you go!
How much lift capacity do you need? Read: how much are you lifting with your BCD?
Weight integration: ease of use vs. safety and reliability; how much weight are you bringing?
How does it fit? No such thing as too many questions here!
How will you attach your stuff? D-rings vs. pockets, and get some bolt snaps! Retractors are nice to have too…
Travel BCDs: weight and space vs. features; is it worth the extra luggage fees?
I hope that this guide helps you have a pleasurable experience while shopping for your new BCD, and that you use this knowledge to get the perfect one for you. Safe diving!
This Sunday is going to be a very special day! The only day when your father is going to babble on about his recent dive trip and you don’t get to say “Dad, you told us that story already….”. You HAVE to be nice to him because it’s FATHER’S DAY!!
If you dad is a scubaholic, returning from one dive trip only to start planning the next, wasting all your precious future inheritance on hanging out with Sharks and Rays, perhaps you can at least help him by getting him some decent gear to document his adventures!
We’ve gathered here a few Father Favorites, which we assure will put a smile on Dad’s face when he gets them!
FREE BONUS – Father’s day only! Buy any of the items below, and receive a FREE dive mask*
* Valid on orders over $200, offer ends at 11:59pm, June 19th. To get your free mask, enter this coupon code on checkout: MASKFORDAD
The TG-4 is the ultimate Tough camera! Waterproof, Dustproof, Shockproof, Freezeproof, you name it! This camera can handle the most extreme dad (and the one who keeps dropping stuff)! Bundled here with the additional housing, this baby can go as deep as 45m / 150ft and take INCREDIBLE macro shots of the smallest critters underwater, without any additional macro lenses or accessories!
The FG9X has just been released and it’s already a hit! For those dads who like to travel light, this compact camera can produce photos and videos just like it’s bigger brothers! Equipped with a 1″ sensor, sleek design and robust housing, your dad will return home with several Gigabytes of underwater shots, and a huge smile on his face!
Underwater Photography is all about light. If you dad gets back from a dive every time and complains that his photos are blue and green again, THIS is what you need to get him! The Inon S-2000 strobe is a solid choice and has been leading the market for several years now, as the smallest and lightest strobe you can get, without compromising on power and specs. Mounted on the Uni Tray universal tray, which fits almost any housing in the market, this is a great bundle to get for daddy, and add some color and light to his life!
Let’s say your dad isn’t tech savvy, to say the least. He likes it when things just WORK, and you don’t need to mess around with them too much. The YS-03 is the perfect strobe for him! It only has one button – ON / OFF. The On mode is named TTL, which means it will provide automatic exposure, with almost any camera and housing available. The bundle comes with everything included, to make it super easy to start shooting as fast as possible!
You can’t go wrong with the YS-01. This excellent strobe is the ultimate entry level strobe for those avid UW photographers who are ready to take their photography up a notch. Equipped with a universal tray, flex arm, and fiber optic cable included, this kit has it all. The great thing about it is that it features both TTL (auto) mode and Manual mode as well! So your dad can take it easy when he starts out, and start getting creative as he gains more experience with the strobe.
Pimp up your Dad’s GoPro with this ultimate Pro Filter Package!
There’s a filter in there for any occasion – Deep, Dive and Shallow, as well as a macro lens for getting closer to those tiny Nudibranchs, Crabs and Shrimp. Kit includes two flip adapters, 3 different filters, lens adapter and the macro lens. Your Dad can pick his two favorite ones before the dive and easily switch between them underwater with an innovative flip mechanism, which locks perfectly in place whether it’s in use or in stowed position.
It’s time for a new BCD for Dad! He can’t keep diving with that 15 year old rag just because he’s used to it!
This is the BCD he wants. Trust me.
The Cressi Aquaride BCD features a classic design, integrated weight belts, plenty of D-rings for accessories and large easy to reach pockets. It’s also very light, so it’ll be easy to travel around the world with it without paying those pesky excess baggage charges!
When lighting up the Video 2000, you can’t help but be amazed with the sheer power this tiny light can produce! 2000 lumens in a 110 degree beam is all your Dad needs to light his way underwater and add the much needed colors to his blue / green footage. With this light, he can finally produce videos that will make you proud of him. After all, that’s all he wants…
I-Torch has included the red LED’s to make focusing on those shy critters during your Dad’s night dive a breeze.
That’s it! If you’re looking for anything else, we have something for every budget! Simply ask us via the online chat and one of our agents will be happy to assist
They may not be your Sunday best, but the suits we wear as divers can make or break the fun of a scuba adventure. There are plenty of options and situations which require the use of a wet or dry suit, so for this article we will review the different ways to protect yourself in the water, and out of the water.
Pieces of the Wetsuit Pie
Before we get too deep into preparing you for your next dive party, let’s start with an overview of your dive party ensemble. The first and most obvious piece is the body suit. A one or two piece suit that comes in different coverage classes.
The one piece full body suit covers the diver from neck to ankles, and all the way down to the wrists. The one piece is the most common type of suit you see divers wearing. They offer substantial thermal protection while diving in temperate and cold water, and when properly fitted have minimal water transfer. Minimizing water transfer in and out of a suit is vital to keep your body warm in all water types. These full suits will range in thicknesses as thin as 0.5 mm to thicker than 7mm.
Cressi Tahiti 3mm Shorty
The other common type of suit is the “shorty”. Basically a T-Shirt and shorts combined together and made out of neoprene. Shorties are great suits for warm water, and are much easier to put on than a full suit.
Choosing what type of suit to wear depends on a few important factors.
First: You need to determine where you will be getting wet.
Colder water means you will need a thicker suit. The beautiful kelp forests of the California and Washington coasts call for at least a 7mm suit to experience the rush of flying through a canopied forest among sea lions, giant black sea bass, and whales.
The warmer, more tropical waters of the Caribbean call for thinner suit, around 1-3mm. While a thicker suit is usable, having too thick of a suit can cause a diver to get too hot in the water. Have you ever tried sweating 60 feet underwater? It’s a strange sensation.
Second: What kind of constitution do you have?
If you are like me you can get away with wearing a 3-5 mm suit in 55F degree water. I love the cold, and my body keeps me nice and toasty, so a 7mm is often too hot and uncomfortable for me. Most people aren’t quite so cold inclined as I am, so as a diver you need to understand how well you weather different temperatures. If you are a person who wears a sweater in low 70 degree weather, you may want to consider a thicker suit.
Third: How much diving will you be doing?
One of the wonderful properties of water is how it absorbs heat, and works to bring objects to an equilibrium of temperature. What does this have to do with diving? The more time you spend in water the lower your body temperature will become. If you are a multi-day multi-dive adventurer then even in the warmest waters of the South Pacific you can start to get chilly. However, using a 3mm suit will help keep the chill off, and will keep you diving comfortably.
Cressi – Castoro 5mm Wetsuit
If you plan to visit the colder parts of the magnificent underwater world, I would recommend trying a drysuit out. As discussed a moment ago, your body temperature lowers while in the water. If you aren’t getting wet then your temperature doesn’t drop. A drysuit prevents the water from zapping away your heat, leaving you with more energy for more diving.
Bare TRILAM TECH DRY
Drysuits come in two types; nylon shell and neoprene. Each has their advantages and disadvantages. The nylon shell doesn’t offer thermal protection to the diver, but it is more versatile in different water temperatures. Like you would layer your clothes on a regular day at home, you can layer your clothing (yeah clothing, like when James Bond walked out of the ocean and was immediately in his tux) to suit how cold the water is.
Neoprene suits keep a diver warmer, and can be used in the most extreme reaches of cold water. They too can be layered to increase the toasty feeling.
A little extra wetsuit advice:
Regardless of where you are diving, consider using a suit or combination of suits that will cover your entire body. When diving in tropical waters we are tempted to think that we don’t need to be fully covered, but you will still want to make sure your body is protected from other elements not related to water temperature. The first, and worst, is the sun. Nothing will put a stop to admiring sea turtles and nurse sharks off the shores of the Virgin Islands than a nasty sunburn. Sure you can wear sunscreen to help protect you, but sunscreen wears off, and the chemicals can bleach and damage fragile coral reefs. Putting a dive skin underneath your shorty will block out the sun, help protect our wonderful marine playground, and protect you from our next reason; physical contact.
Cressi 1mm Nylon Skin
Have you ever been so focused on the mesmerizing colors of a school or angel fish that you drifted along into a rocky outcrop or a colony of corals? Layering yourself with a diveskin, or a full wetsuit, will protect you from the bumps and scrapes that can happen from time to time, even to the most aware and conscientious diver. Think of a dive skin like putting on a pair of gloves before cleaning the bathroom.
So, regardless of where or when you will be diving make sure you pack your diving best. If you are a wanderer of the wilds like me you may need to pick up a couple suits (I have four) so you can be prepared to get wet wherever you find a puddle. From lakes and rivers to the vast expanse of the oceans, preparing the proper suit will make all the difference.
This is me all dolled up and ready to enter that water in Monterey Bay, California. I am wearing a 3mm full wetsuit. My dive computer recorded a steamy 57 degree water temperature. Dive was great, lots of crabs out patrolling the old cannery pipes that day.
The very first piece of equipment you will need to really go exploring in the waters of the world is a good mask and snorkel.
With a good mask you will be able to see all of the creatures, shipwrecks, and coral that you like while being comfortable and confident. You need to be able to see well in order to be able to enjoy snorkeling and experience your aquatic environment to the full potential, and you need to be able to breathe comfortably at the surface to be able to see all those beautiful things!
The best snorkels are well balanced, comfortable in your mouth, and breathe effortlessly. As in all of my articles, we will go through all the key features and things to think about when you are buying a mask and snorkel so that you can get the perfect fit and function.
Yes, I am going to recommend that you spend a bit more money to get a well made mask and snorkel that is backed by a known manufacturer. Why do I keep harping on this? Because it really does make a difference; I have owned quite a bit of equipment over my dive career and the gear that’s a bargain in the beginning usually ends up being the stuff I have to replace a lot sooner.
Masks
Now don’t get me wrong, there are a lot of masks out there that are affordable, durable, and most importantly comfortable. Price does NOT always imply quality, but I am saying that if you buy a mask for ten dollars at your local sporting goods supercenter, you are definitely going to get ten dollars of performance and life out of it. Scuba masks are made to much higher standards than discount pool toys. Starting your dive kit with an expertly made mask and snorkel will have your first step on every dive going in the right direction.
Everyone has a unique face; the shape, curves, and size all play a factor in getting mask to fit properly and comfortably. You are probably thinking “How am I supposed to know which masks are better for which faces and how do I know what type of face that I have?”
The first and foremost feature is fit. Without a great fit all the other features will be a secondary consideration. It won’t matter the volume or the lens coating or the field of view; if you have a leaky mask it will constantly distract you and can actually pose a safety hazard. When you are concentrating on clearing your mask throughout the dive, you will not be paying as much attention to things like your air consumption, depth, buoyancy, and buddy. Of course, you will also miss all the cool things that are the reason you went diving in the first place. Different frame sizes, skirt designs, lens configurations, and straps can make for a dizzying array of choices, so let’s get started!
The main parts of a mask are pretty simple: you have the lens(es), the strap, the buckles, the frame, and the skirt.
The Skirt
This is the flexible part of the mask that fits to your face, and is the key to a perfect fit. You are looking for a comfortable skirt that seals smoothly onto your face with no gaps whatsoever. Manufacturers these days are inventing proprietary methods and materials to make skirts as flexible and comfortable as possible. The Cressi Big Eyes Evolution Black is a great example of these technologies.
A good test is to place the mask on your face without the strap on and inhale through your nose. A well-fitted mask will suck up to your face and will remain there even when you move your hand away. If the suction breaks, then the mask is not sealing properly.
A point of detail on this: if you have a mustache or beard, you may find that some of your facial hair is trapped under the skirt and not allowing the mask to form a complete seal. There are two ways that I have had success with in dealing with this problem. First (and much more reliably), if you wish to keep your beard or mustache, you can shave a thin strip clean directly under your nose that is just wide enough to allow the skirt to touch your bare skin. This will let the mask seal properly without requiring you to shave completely. If you do not want to shave (if you have a particularly fine example of facial hair I don’t blame you), there is another option. Although not as successful, this has worked for me a few times when I have forgotten to shave the strip below my nose and I am out on a dive boat. Simply smear a generous amount of silicone grease into your facial hair on the area underneath your nose where the skirt comes into contact with it; this will temporarily fill the gaps in the hairs and allow the mask to seal. THIS IS NOT the same as silicone sealant! Petroleum jelly can damage the skirt over the long term, so I don’t recommend it. This latter method does have a significant drawback; if you have to remove and replace your mask, or repeatedly move the skirt, the water will wash away the silicone grease and you will lose your good seal. I recommend this method only as a stopgap measure when you have no other option, as it is no substitute for a properly sealed mask. Take special care to make sure that you are completely comfortable with clearing your mask with this method, and that you are prepared to deal with the mask seal becoming suboptimal during the dive. I do not recommend cinching the mask strap down extra tight to hold the mask against your face. You will not be comfortable and if your mask strap breaks you have a whole new situation to deal with, easily ending your dive and possibly your day if you do not have a replacement strap (this is one of many reasons to have a save-a-dive kit!!). Unfortunately, there is no magical formula to determine what mask will fit you without trying it on. The pros at your local dive shop will be more than happy to assist you in finding the perfect fit for you.
Skirts can be further divided into a few more sub-categories. There are translucent skirts and opaque skirts. Translucent skirts are clear or lightly tinted, and will allow lots of light into to the mask as well as allow some more peripheral vision. Keep in mind that since the silicone of the skirt is not designed with optics in mind, this peripheral vision will not be very precise. Some divers prefer these kinds of skirts because they feel more open. The extra light is also a good feature for those divers who have some issues with claustrophobia or feel as though masks constrict their vision. Opaque skirts do precisely the opposite and block light from coming into the sides of the mask. Photographers and divers who are interested in videography often prefer these masks because they reduce distractions and allow them to focus on the field of view directly in front of them. The functional seal of the mask should not be affected by the visual qualities of the skirt. Personally, I own masks that have both kinds of skirts and I use them for different kinds of diving. For a good comparison, look at the Cressi Air Crystal versus Air Black regarding clear versus opaque skirts. For the beginning diver, I have seen more success and comfort with my students when they have translucent skirts, but this is a matter of personal preference.
Frame & Lenses
The frame and lenses are the next consideration. The frame is the skeleton of the mask that connects the lens to the skirt and provides the main structure of the mask. Frames are available in several shapes. Frames should be sturdy and securely attached to the lenses. A cheaply made frame will not stand up to the rigors of diving over time, and will be no match for rough luggage handling if and when you do travel to dive. For a VERY rugged framed mask, the Aqua Lung Teknika is hard to beat.
There are two main kinds of lenses for masks: single and double lens. A single lens is a continuous piece of glass that goes across the entire visual field. This type of mask offers a wide field of view and no gap in the center of your vision for a center frame support. The other option is a multiple lens mask. This kind of mask will split the visual field into two separate lenses. A major benefit of this kind of mask is the lower volume or air space inside the mask. A lower volume mask will be easier to clear since you have to move less air to much the water out. There are some single lens masks that are relatively low volume, but as a general rule the double lens masks are the smaller volume of the two.
Double lens masks offer excellent fields of view as well, but there will be a divider in the center of the mask that may obscure your vision. Most dive mask manufacturers take this into consideration, and go to a great deal of effort to minimize the visual obstruction. The Cressi Nano Black is a very low volume mask designed for spearfishers and free divers.
As far as the shape of the lens or lenses go, this is again an area of personal preference and depends on the mask design. For example, lenses that are teardrop shaped will have a longer visual field from top to bottom, so looking down may not require as much head movement. Other masks have smaller lenses, but since they are so low volume, the lenses are closer to your face and so the field of view is still fairly good. For those of you who wear glasses or contacts, replaceable corrective lenses are available for these types of masks. If you use reading glasses, you can get smaller reading lenses that stick to the inside of the mask without needing to go through the effort and expense of full corrective lenses. These corrective lenses are available as standard prescriptions direct from the manufacturer or you can have them custom ground to your exact specifications by a few aftermarket suppliers. A good lens maker will take into consideration the natural magnification effect of the water into their procedures. I spent the extra money and ordered a pair of lenses ground to my exact prescription and I love them! Since I wear contacts, this mask is wonderful for when I am diving on a boat; no need to worry about losing a contact if my mask floods, and no need to keep track of contacts on the boat. I just bring a pair of glasses for when I am topside and I am good to go! Lens coatings are also available on some masks; much like driving glasses, these lens coatings are usually designed to do one of a few things: they will increase contrast in cloudy water or other specific conditions, or reduce reflections and glare. The Mares X Vision is one to look at for both the prescription lenses and the coatings.
The third category of masks are referred to as “frameless”. In these masks, the lens is bonded directly to the skirt without a frame. These masks tend to be very low volume and just as comfortable as framed masks, with less weight on the face than a framed mask. However, the lack of a frame does make them more susceptible to breakage in my experience, and since they have no way to remove the lenses, you cannot replace them with corrective lenses or if the lenses are damaged. I have an Atomic Aquatics Venom frameless mask that is a dream, and Cressi’s F1 is also a frameless mask that I really like.
Buckles & Strap
The last feature to look at is the buckles and the strap. There are several buckle designs on the market today, but there are some key features to look for if you want your mask to be as trouble free as possible. First, look for sturdy construction. Thin plastic studs where the strap threads through will be more likely to break and wear out, and it is NOT a fun day when you have to end diving because of an inch long piece of plastic failing. I have had this happen to me after hiking down a very long staircase to the beach with all of my gear, only to break the buckle of my mask when putting it on; to say I was less than happy would be an understatement. So, take the time to really look closely here. You want solid construction of all the components of the buckles.
The next thing to look at on the buckles is their freedom of movement. Do they just fold in and out; do they pivot; are they hinged? Not all buckles move in the same ways, so do not make the mistake of thinking all the buckles are the same. If you have a larger head, or if you prefer to wear your mask strap a little higher or lower than the average diver, you will want buckles that will allow you to do this without relying on the strap to do the flexing. Are the mounting points of the buckles to the mask rugged? A perfect buckle is useless if the post it is on is flimsy or fragile. The strap itself should be thick yet flexible, and the ribs where the strap adjusts in length should be substantial. Thin straps will stretch out and fail much more quickly than a more robust strap, and everyone has heard me talking on and on about how ruthlessly harsh salt water is to equipment. Thin ribs will not hold the strap length securely, and it is irritating to have to constantly adjust the strap to get it to the proper length for your head.
The area where the strap widens in the back is another consideration. If the strap splits into two here for a section, are the split strips wide enough to stay put and not dig into your head? The split is designed to work with the curve of your head to keep the mask fitted snugly, but if the split is too long for your head or the split section widens at the wrong angle, you will be back to the section above where you are having to regularly adjust your strap. The straps on TUSA masks curve in three dimensions instead of just a flat strap, so they will do a great job curving to fit the natural contours of your head.
To sum it up, if you are getting a mask and you only have one feature that you really care about it should be HOW THE MASK FITS YOU. A mask will all the latest bells and whistles made of mermaid scales and gold will be useless if it fills with water every dive and isn’t comfortable to wear. The second points to look at are the lenses and frame. You are looking for lenses that do not obstruct your vision and a frame that is sturdy and securely attached to the skirt. Third on your list is the strap and the buckles. You want a strap that is thick yet flexible, with rugged adjustment ribs and a good fit for your head shape. The buckles should swivel enough to allow the strap to move to a comfortable and secure position on your head, securely hold the strap at wherever you adjust it to, and be ruggedly attached to the mask.
Snorkels
Now that you have a good primer for mask shopping, you will need a snorkel. You might think that all snorkels are the same: a generic mouthpiece and tube that goes on the mask. Quite the opposite! Snorkels, like all other dive gear, have very specifically designed features to make your dives comfortable and enjoyable. These are simpler than masks, so let’s get started!
Mouthpiece
The first thing to look at is the mouthpiece. There are two big differences (and lots of little ones). The usual style you will see on most snorkels is the standard bite mouthpiece. Much like a mask, FIT is king. Everyone has differently shaped mouths, and you need to look to make sure that you are getting the right size for you. The length, arc, and thickness of the bite wings are what will make or break the fit. If you have a smaller mouth, you will want the arc to have a smaller radius and length. The thickness of the bite wings is also personally specific.
If you have a how that gets tired easily, or you suffer pain or soreness after snorkeling or diving, there is another type of mouthpiece available that may help you. This is a bridge mouthpiece; it is the same as a regular mouthpiece except that it has a strip of rubber that runs across the top, resting against the roof of your mouth just behind your top teeth. This allows you to keep the mouthpiece in without actively having to bite down on it during your adventures.
Much like in sports, there are also mouthpieces available in both types that you can mold to your personal bite; heated in water, they take the shape of your teeth as they cool. Almost every mouthpiece will be held on by a zip tie; carefully cut this at the latch so as not to damage the snorkel or mouthpiece with a pair of wire cutters and remove the mouthpiece if you want to upgrade, then snugly replace the zip tie and clip the excess tail.
Breathing Tube
The next is the breathing tube; this should have three sections, an angled hard turn from the mouthpiece, a flexible lower section, and a rigid upper section. All three of these should have a generous bore size so that breathing is not restricted. If the tube is too small, it will limit air flow and make breathing more difficult. The angled section should keep the mouthpiece in a position that doesn’t put strain on your mouth or jaw when your head is in a natural viewing position. A valve at the end of this section will help make clearing the snorkel easier, but is not absolutely necessary. The flexible section will probably be ribbed on the outside; this is not what you should be concerned with. What you want to look for here is a smooth interior. Baffles on the interior of this section will cause turbulence in the airflow and make the snorkel less efficient at exchanging air. You also want to make sure the transition to the angle and the rigid section is securely bonded, you will be stressing these joints repeatedly as you look around and as you swim.
The upper section has a few different possibilities; there are dry, semi-dry, and regular snorkels. “Dry” and “semi-dry” snorkels have devices on the top of the snorkel to prevent water from coming in the top. In my experience, there is no such thing as a completely dry snorkel. Some semi-dry designs like the Aqua Lung Ergo Splash or the Cressi Sigma have vents in the top to let some of the water from a wave wash out to the sides instead of down into your mouth. Other designs have a float that seals when you dive like the Aqua Lung Ergo Dry or the Cressi Alpha Ultra Dry; as long as you keep your mouth on the mouthpiece very little water will get into the tube. As with a regular snorkel, you should still take your first breath cautiously regardless of what claims the manufacturer makes.
As with a mask, your main concern is comfort. If the mouthpiece causes your jaw fatigue or pain, you’ll be distracted and not having fun. You are looking for study construction, and simplicity is key here. Now that you know what to look for, I wish you safe and happy diving and snorkeling! See you next time!
There are two types of lighting which are used underwater, strobes (AKA flashes) and Video Lights (Constant LED Lights). After creating the Ultimate Strobe Guide, we wanted to share our thoughts on the second type, and help you choose the best underwater video light for your needs.
Strobe, Flash, Flashlight, Torch, Video Light… HELP!
Let’s set things straight. As we mentioned, there are only 2 types of lighting underwater:
Strobe – A Xenon based light bulb which can emit a very strong pulse of light for a brief moment.
Also known as “Flash” (not flashlight!)
Constant light – A device which can emit a constant beam of light for minutes to hours, today commonly based on LED technology which can be focused to perform as a dive light or spread out to perform as a video light.
Also known as “Torch”, “Flashlight”, “Dive Light”, “Video Light” and unfortunately even “Strobe” in the topside industry, which is incorrect for underwater photography lingo.
An underwater video light is basically a waterproof flashlight. There is some confusion due to the use of the word “flash” in “flashlight”, but don’t let linguistics mess with you. “Flash Light” and “Flashlight” are two different things!
Now that we got that out of the way, we’ll continue to discuss video lights!
Main Features of Video Lights
There are several terms and features commonly used when comparing video lights. Let’s go over them.
Lumens
This is perhaps the most important feature differentiating between video lights.
The power emitted by a light is measured in units known as Lumens. Without getting into the science of it, the more lumens a light outputs, the stronger it is. Common lumen ranges today are 500-1000 for a basic light, 2000-3000 for a medium range light and the most powerful ones can even reach 25,000 lumens (!!!).
An important thing to remember is that Lumens are measured by collecting all the light the device emits, so the actual brightness of the subject lit by the light will vary according to our next feature – Beam Angle.
Beam Angle
A video light can be engineered to focus or spread out its light output in different manners. Focusing all the light to a very narrow beam with lenses and mirrors, will actually create a dive light, which is great for spotting out things or signalling to other divers. On the other hand, spreading the output to a 60 degree, 100 degree, or even a 120 degree angle, is much better for lighting up videos, so that you can cover the entire frame with 1-2 wide (aka flood) lights.
Most video lights will feature a 60-120 degree beam angle. This factor will determine how bright your subject would be in the frame just as much as lumen output. For example, lighting up a Grouper in blue water with a Sola 2000 Flood on 60 degree beam angle, will probably be more effective than using a 90 degree Sola 2500 Flood, even though it has lower lumen output.
However, when lighting up an entire coral system, you may prefer to get closer and use the wider beam light.
There are several types of lights available: Flood only / Spot Only (dive lights) / Flood & Spot / Variable Beam
The variable beam lights seem ideal but they usually can’t reach a very wide beam angle for video. There are add-ons available for some lights which modify the beam from flood to spot or vice versa.
Flood & Spot lights are the most versatile option and allow you to switch from dive light to video with a quick press of a button. This leads us to our next feature.
Controls
Over the years, manufacturers have created several types of controls for underwater lights, each with pros and cons.
1. Twist method – This method is quite straightforward. Twisting the light head all the way in will turn it off and unscrewing it slightly will turn it on. This is the easiest for the manufacturer to implement and lowers the cost of the light significantly, which is a big plus. However, this method risks corrosion of the O-ring after some time, increasing the risk of flood as well as risking potential flooding by human error – unscrewing it too far underwater without noticing and effectively destroying your light.
The early I-Torch Pro 5 used the twist mechanism
2. Push Buttons – The is the most common method used on most video lights. Using either 1 or 2 buttons to control the light is a safe and efficient method for powering up/down and switching between modes. A 1 button light will be more affordable than a 2 button light, but usability is greatly improved when using 2 buttons. A single button allows 2 types of presses – short press, usually switching between modes and long press, usually to power on / off. A 2 button light will allow more options such as one button for mode switching and the other for switching output levels, making the overall experience easier and faster.
Fantasea Radiant PRO 2500
3. Other – Some manufacturers have developed their own signature controls such as Sola’s sliding lever, which functions in a similar fashion as 2 buttons, but in a much more elegant way of gently pushing a single switch back and forth. FIX Neo lights come with 3 buttons and an LCD screen, creating a little control panel on the top which is incredibly useful.
4. Remote Control – This is a fairly new method, developed by Nauticam on their FIX Neo light system, as well as by I-Torch on their Venom series. By connecting fiber optic cables to the lights, as single master remote controller can control several lights at once, making it much easier and faster to change your lighting instead of setting each light separately.
Modes and Levels
We have already discussed the two main modes – Spot (narrow beam) and Flood (wide beam). Another common mode included in video lights today is a Red light mode. The red light is very useful as a focus assist beam, since the camera can read it easily and use it to facilitate focus, while marine life are not disturbed by it, since it’s out of their visible spectrum. The red light is also to weak to show up in most photos so it won’t affect your overall lighting.
A cool mode introduced lately is UV or Blue Light. This is similar to black lights which are painfully familiar from those underground parties back in the 90’s. Essentially it’s an ultraviolet light which excites bio-luminescent organisms underwater and when paired with a barrier filter (yellow filter) it creates a unique glowing effect which looks great on photos and videos.
Another mode which is included on some lights is SOS or Emergency. This causes the light to randomly flash a white light, indicating that you have a problem or you are lost. This can be very useful in emergency situations, but also very annoying if one of the divers sets it off accidentally and can’t figure out how to power it down…
Power levels are almost always implemented in some way, allowing you to control the power output from low, medium and high. Some lights have 3-4 modes and some have complete control from 0-100 in 1 unit steps (FIX Neo). Most lights are set to operate for about 1 hour on full power. Using the light on lower power settings increases usage time significantly, allowing you to use it for several dives before charging / changing batteries.
Generally, more modes and levels are great! However, this affects the complexity of the using the light and if you have just a single button to control many levels and modes, you may find yourself scrolling frantically between them while the once-curious-now-bored Hammerhead swims off to the deep blue.
Beam quality
Beam quality is usually measured by how even the beam is across the output circle.
Using multiple bare LED’s may result in a less even beam than one single LED or a diffuser dome spreading the light out evenly. Some LED’s create a more even beam than others. Video light manufacturers will always need to compromise between an even beam, power output, price, heating and more factors which create various types of LED formations.
Another important factor is CRI rating (stands for Color Rendering Index). This number indicate how accurately the light will reproduce the true life colors of the subject (Ideal light = Daylight/Tungsten). The higher the number (closer to 100), the more accurate the color rendering will be. Check out this excellent video explanation of CRI.
Mounts
Just imagine getting a new $1000 light which you intend to use on your $3000 system which you are taking tomorrow to a week in the Galapagos Islands, just to find out the mounts don’t match! Before you start creating MacGyver solutions with tie-wraps and sticky tape, go back a few days in time and order the correct mounts for your system! Most lights will come with one mount as default and additional mounts optional. Some arms will support one type of light mount or several.
Usually you can’t go wrong with a 1″ Ball mount, or a YS mount which are easily interchangeable between them. Make sure you add a mount to your Sola lights since most of them come without.
It might be a good idea to get a second type of mount upon purchase. You never know when you might switch trays or lend the light to a fellow diver who wants to try it out before buying.
When creating cross brand systems, you might not be sure if the light will match your current setup or vice versa. Consult with our experts and they will figure that out for you.
Batteries and Charging
Most lights have a fairly similar battery life on full power of about 50-70 minutes. However, there are several different battery implementations:
1. Interchangeable rechargeable battery – The light can be opened and the batteries changed as needed. Each battery can be charged individually. This is the standard method and has the advantage of getting several batteries and switching them between dives. This method also increases the risk of flooding due to human error or bad O-ring maintenance.
2. Factory Sealed lights – Sola lights are factory sealed, which means they are less prone to leakage due to human error. That’s a huge advantage and insures hassle free use for a long time. The downside is that you can’t replace the battery. That means you have to remember to charge between dives and if you aren’t near a power outlet for the whole day, chances are you will not use the light on the last dive. Light and Motion have implemented a new Fast Charge technology on their new lights, reducing the charging time significantly to about 1:45 hours, but this still doesn’t help if you forget to plug it in or if you don’t have an available power source.
3. Interchangeable Light Heads – Nauticam’s FIX Neo and I-Torch’s Venom series have created a line of interchangeable light heads which mount on the same base. This means that you can get a second light body without getting a whole new light as a new battery. It’s pricier than just a battery but still more affordable than getting a second light. You can also get several light heads and use them as needed on your light bases.
Price
We can babble on forever, but in the end, it all comes down to price. All the features we discussed here, may lead you to believe that you want the best, strongest, most versatile option available, but then you find out that it either doesn’t exist or will set you back a few thousands of dollars more than you expected. Indeed, creating a quality product doesn’t come cheap and you have to prioritize. Video lights range from $100 to $3000+ so you need to decide on your budget before hand and then consider your best options within that budget.
We gathered here some of leading video lights in the market (Updated Oct 2016) to help you choose:
Kraken Hydra 2800 WSRU | US$499
This excellent and versatile video light by Kraken (A brand made by I-Torch) is capable of producing 2800 lumen of flood and 800 lumen of spot light. In addition, Red light is also available for focusing at night without scaring off the critters, and UV light for an exciting fluorescence dive. Easily controlled by two push buttons, YS and Ball mounts included, waterproof lighthead and more cool features. Did we mention the cool carrying case it comes in?
This is truly one of the best value lights you can get.
The Radiant Pro 2500 Video Light is a durable and powerful video light, designed to significantly enhance color and light in underwater videos and still images. It offers a variety of advanced features for creative photographers. Flood, Spot, Red, UV & Blue, all in the same light!
The Sola video 2500 Spot/Flood is Light & Motion’s best-balanced Sola video light, combining 2500 lumens in a 60 degree flood beam with a piercing 1200 lumen 12 degree spot beam. Factory sealed with fast charge technology for 1h 45m for full charge.
The Sea Dragon 2500 uses flat panel COB LED technology to closely mimic natural sunlight, bringing out amazing colors in underwater photos and videos. With a Color Rendering Index of 90, the Sea Dragon 2500 solves the issue of blue underwater photos and videos by giving divers the ability to add light down to 200 feet/60 meters with portable sunlight.
The incredibly wide 120-degree beam of the Sea Dragon 2500 ensures maximum lighting coverage and is ideal for cameras with a wide field of view, like the SeaLife Micro HD or GoPro. With a lab verified lumen output of 2500, the light has a 60 minute burn time at full power – making it incredibly efficient as well as bright.
Small and highly sophisticated light with 2 sets of LEDs featuring a flood and spot mode. This light is 2 in 1, a video light and a dive light. Depth rated to 100mts/330ft.
Wide beam can be set at 4 power levels. Red beam is offered in one low power level and SOS mode is also available.
Small and powerful light by Fisheye FIX. 6 High intensity LEDs deliver up to 2000 Lumens of white light. 1 LED for 720 lumen spot light and 4 red LEDs provide 200 lumen red light. The light features an advanced LCD display and control panel for simple operation. Comes with plenty of mounting options, best control panel in the industry and excellent build quality.
Big Blue AL2600XWP (AKA “Black Molly 3”) | US$289.99
Big Blue Black Molly III (AL2600XWP)
This is one of the best value lights available in the market. It’s tiny, it’s powerful and it has amazing battery life!
Capable of 2600 lumens, 120 Deg beam and even red light feature in a surprisingly small package! You can take it down to 100m, and max burn time on full power is 2hrs!
Yes and no. A video light can never replace a strobe as a main lighting source for photography due to a much weaker output. A medium range strobe would be about 10 times as powerful as a medium range video light. That’s because video lights produce constant light while strobe give just one short pulse.
However, for macro photos or even closeups, you definitely can use a video light or even a dive light (spot mode). For more info on that, read this.
Recently, I-Torch have released a dual purpose lighting unit – Video light and Strobe in one light! The Symbiosis comes in two models – SS-2 and SS-1. Read our review on it here.
How many lumens do I need?
The more the merrier. Even very high output light will have a lower output mode, so you probably won’t encounter a problem of having too much light. However, high power output comes at quite a price, as well as size and heat problems. You need to find the right balance for you, which fits your budget and look at other important factors such as modes, controls, beam quality and more of what we discussed above.
These days the standard is 2000 – 5000 lumens, but remember that actual intensity varies with beam angle. That means a 60 deg 1600 lumen light, would actually feel stronger than a 120 degree 2500 lumen light, but with less coverage.
One light or two?
If you want to go as compact as you can, one light is definitely enough. You can get a strong light with a very wide angle to cover all of your field of view, if your are shooting with a wide angle lens.
If you get two lights, you will have better coverage and better illumination of your subject, especially if they are hiding. Trying to get a hiding sea horse or blenny lit properly with just one light might be much harder than two opposite directions.
Which is the best setup for my GoPro?
Remember that a GoPro has a very wide view angle, so you want a light that will cover your entire frame. 2 lights here might be a good idea, especially with BTS’s excellent boomerang tray, the GPT-4. It adds stability to your footage and gives you excellent coverage from both sides, with whichever lights you choose. If you wish to stay even more compact, a single light with a pistol grip tray will be great, especially for those harder to reach places. Get a light that has a 120 degree beam to cover the entire frame. 2000 lumens will be a great number to start from in total, so either one light of 2000+ or two lights of 1000+. As we mentioned above, the higher the output the better reach you will have.
Today there are a lot of options available for shooting underwater. Many prefer shooting with a GoPro or Waterproof all-around cameras which are terrific and great fun! But lets face it – when it comes to professional photography, high end optics and good low light capability are a must such that can only be found in DSLR’s or similar mirrorless cameras.
It is clear why many choose a compact system. It’s cheaper, much easier to carry around, and most of us don’t dive in our backyards… It produces good quality photos and video. It’s much easier to handle and operate BUT eventually, when you progress with underwater photography and get past the initial enthusiasm of “Look at me! I’m taking pictures underwater!”, you realize that your gear is limiting you and in order to get the shots you really want, you need a DSLR.
The first thing that I want to emphasize, is that getting a dSLR does not guarantee good photos! It really is the photographer that makes the shot. You need to be highly familiar with your dSLR above water to actually be able to control it underwater. Remember that underwater is probably the most challenging environment for photography and there is no room for error.
Important to note that mirrorless cameras are becoming extremely popular nowadays and being very similar to dSLR, they entail many of the advantages while being more travel friendly. As such, many of this article also applies to these new type of cameras.
That being said, let’s get down to business:
Where to start?
Assuming you followed the path I mentioned above, you should already have a dSLR body and lens(es). This should be a good starting point. If however, you decided to jump straight to getting the whole system, camera and underwater equipment included, Canon & Nikon would be a good bet. Other manufacturers are also supported. Olympus for example make their own dSLR housings, but Canon & Nikon are the most popular and have a wide variety of housings, lenses, ports and accessories.
As you have probably already found out, dSLR housings aren’t cheap. They will, in most cases, out-price your camera body and lenses all together. This should lead your decision making -if you already are investing in a housing, don’t get one for an older camera. If you already have a dSLR, consider selling it and getting a newer body, so that you extend the life of your entire setup. If you are getting your first dSLR, get a new model within your price range.
Choosing lenses
Once you decide on a camera body, the next step would be lenses. Not all lenses are good for underwater. Usually many dSLR photographers above water prefer traveling with zoom lenses such as the 18-200, 18-105 etc. These lenses are just too long to be useful for underwater (Due to the limiting lens port). UW photographers prefer prime lenses (fixed zoom), or Ultra-Wide zoom lenses such as the Tokina 10-17mm. Read our guide on Choosing the Best Lens for dSLR Underwater to help you decide. It is not recommended to “force” your top-side lenses underwater because you won’t be pleased with the results.
Choosing a housing
Here are some good news! Most dSLR housings available from known manufacturers are excellent. These housings are built to fit like a glove to your camera and most have access to all the functions, command dials and buttons on the camera. They are built from strong durable materials and are top quality.
The leading options available are: Nauticam, Aquatica, Sea & Sea and Ikelite. Our most recent addition are the Nimar housings, which provide a more affordable solution without compromising on quality.
The first 3 are made of high-grade Aluminum, while the Ikelite and Nimar are made of Clear Polycarbonate.
* Sea and Sea produce both Aluminum housings (MDX) and Polycarbonate housings (RDX).
The Aluminum housings are considered more durable, and usually pack more features and excellent ergonomics, while the Ikelite’s are lower in price, provide good value and support the most lenses.
When choosing between these, first consider your budget, then check compatibility with your lenses, warranty and service available depending on your location and read some reviews on forums by actual photographers using them.
Adding Lens Ports
The housing itself is not enough for dipping your camera into the water. You also need a lens port, which is the additional tube on the front that covers your lens and completes the housing. Usually for macro lenses you will use a flat port and for wide angle you will use a dome port. Some ports are made of glass and some of acrylic. Glass is considered better optically and costs more, but acrylic is easier for fixing scratches and weighs less.
Usually manufacturers will have several types of ports, and many types of extensions to fit various lenses. An extension ring is a basic aluminum ring that extends the port further from the housing. The extension + port combination is pretty much unique for every lens supported, so each additional lens will require getting more parts, either another extension or a new port altogether. This is because every lens has different length, and its own “sweet spot” relative to the port itself to maintain optimal quality, sharpness and focus.
To figure out which combination is right for your chosen lenses, you need to use each manufacturers updated compatibility chart, and search for your lens.
Some are easier to look at than others, but in any case of confusion, we are here to help! Just Contact Us and we will figure out the right combination for you.
There might be several combinations for a single lens such as flat / dome port, or different size of dome. Generally speaking, dome port is for wide and flat is for macro. The wider the dome, the better sharpness on the corners and easier over & under shots.
Arm System and Mounting Options
There are two major options for mounting lighting underwater – flex arms and ball-joint arms. The first is quite common with compacts and the latter being much more popular for dSLR’s.
Ball-Joint arms come in many sizes and types depending on the manufacturer, but they are all essentially the same – strong, light-weight, metal rods with 1″ balls on their ends. They are connected together using clamps that twist to fasten the grip. This method allows easy positioning underwater and as long as you have 2 arm sections, your strobe / video light can be placed almost anywhere you want it. Keep in mind that for macro shots you will want your strobes close and for wide angle you will want them far away to prevent backscatter and to achieve flattering lighting.
Housing are designed to have more or less neutral buoyancy, but once you add your lighting, you will probably start getting negative buoyancy. To help fix that, you can use Buoyancy arms instead of regular ones, or compensating float foams, which will help get it back to neutral.
Most housings include a top-mount or cold-shoe (similar to hot-shoe but no electronics) that can be used as an additional mounting point. Common accessories mounted on the the top-mount are focus lights or action cameras such as GoPro, to provide footage of the dive while taking still photos.
Strobes and Video Lights
It’s safe to assume that if you decided on getting a dSLR, you probably want some decent lighting options. Otherwise you won’t be using the full potential of your system. The importance of a strobe underwater cannot be stressed enough – strobes are the reason that awesome underwater photos are awesome!
The first thing you need to check is how you plan to sync your strobe. There are 2 options – either optical sync or using pin cords and a bulkhead on your housing.
Keep in mind that some combinations might sync on manual mode only and some can achieve TTL sync (that means your strobe will put out just the right amount of light for your subject, read more about it here).
Usually when getting an Ikelite housing you would also want to get Ikelite strobes because they use their own TTL system that isn’t compatible with other manufacturers.
Sea & Sea strobes such as the YS-01 and YS-D2 work with almost every housing and can be optically triggered or the latter via 5-pin sync cords. Both have TTL abilities.
Ikelite DSLR housings usually cannot be optically triggered because they are designed so that the pop-up flash can’t be popped up. This is done to further reduce the size of the housing.
This is where Nimar housings shine – they all include 2 fiber optic ports for triggering strobes via fiber optic cables, allowing you to use the YS-01, Inon S-2000 and other optically triggered strobes.
Video lights are easier to choose since they don’t need to be synced in any way. Just attach them to your rig and point them forward. The more Lumens (Light units) the merrier. You can read more about video lights here.
Adapters & Accessories
Most DSLR systems are built to be versatile and adaptable to fit different accessories and add-ons.
There are quite a few relevant accessories: Focus lights, wet lenses, filters, lens holders, viewfinder, straps, handles and more.
Macro lenses
Even if you got a flat port with a dedicated macro lens such as the 100mm or 60mm, you can further improve your magnification using a wet macro lens. Macro lenses such as the Subsee +5 and +10, the Nauticam Super Macro Converter or Inon UCL-165 are quite common and can be fitted via special adapters, depending on your port. Note that you cannot attach filters or wet lenses to dome ports!
Viewfinders & Monitors
Live view mode in DSLR is a fairly new technology, and there are still many advantages for using the viewfinder and not the screen for framing your subject. Mainly faster AF and less shutter-lag. Even though many manufacturers have solutions for this built in their housings (such as optical magnifying glass), there is still a need for better access to the viewfinder underwater. External Viewfinders, attached on the back of the housing,provide a perfect 1:1 view of the actual viewfinder and make it much easier to frame and focus on your subject.
External HDMI monitors, such as the DP4, also provide a similar solution for video, and significantly improve your framing while shooting underwater footage.
Small Adapters
You will notice that as your system grows, you will need very specific adapters, especially if you mix and match gear from various manufacturers. Adapters go by peculiar and random names so it’s not always easy to find them yourself. The best way to know which adapters you might need is to maintain a good relation with your supplier and trust them to remind you about parts that you might be missing. It’s incredibly annoying to receive your brand new strobe and not be able to attach it to you rig.
Some manufacturers such as Beneath the Surface or Inon specialize in adapters and usually have solutions for most mixed gear issues.
Oy Vey…
Secure your gear
Remember that after getting such a complex and pricey setup, you will want to secure it and make sure it stays in good condition. Neoprene Port Covers are highly recommended, so you don’t scratch your expensive ports.
It is also quite important to secure your gear so you don’t drop it to the ocean floor, or if you lose a fight with a curious octopus like this guy. So get a Lanyard!
That’s it!
You are now ready to construct your first DSLR setup. Remember that it’s very helpful to get advice from a professional and it will save you a great deal of headache. Chat with us (Little tab on the bottom right side of your screen) and we will gladly answer any question! All our agents are divers and photographers.
Read the FAQ below!
If after reading this post, you wish to make your life easier and choose to trust our experts, we have assembled a line of Complete DSLR Underwater Systems, Ready-to-dive packages. These packages are guaranteed to include everything you might need to get started and are fully customizable if you wish to use different lenses or other lighting options.
Complete Sea & Sea 5D Mark III Awesome All-You-Ever-Need Package
FAQ
Why are DSLR housings so expensive?
Good question. The ocean is one of the most harsh environments in the world. Making a reliable case to protect valuable gear while keeping it ergonomic, user friendly, versatile and lightweight is not an easy task. It’s also a matter of supply and demand. Read more about it here. And here.
Will the XX-XXmm lens and the YY-YYmm lens fit under the same port?
As we specified before, you will usually need a specific port / extension combination for each lens model. That being said, there are similar sized lenses which may fit under the same port combination, requiring only a different zoom gear or not even that. Some lenses might just require a different extension. Some lenses might be recommended under a specific port but work fine under a different port, even if it’s not ideal.
The best way to figure that out is by contacting one of our experts via the online chat. Yep it’s the one on the bottom right corner of your screen!
Can I shoot with a macro lens under a dome port?
Usually, yes. It might not be ideal, but if it fits, it should work. Read more about it here.
Do I really need the Vacuum System?
Nauticam and Aquatica are both offering a vacuum detection system for their housings.
As you probably know, leaks are just about the worst thing that can happen to an underwater photographer. Until the release of the vacuum system, there was no way to guarantee that your system would never flood.
While nothing can give you true 100% guarantee, the vacuum detection system is the most reliable method of preventing floods on underwater housings. The method is simple – create a vacuum inside the housing by pumping the air out. If that vacuum holds for 15-20 minutes above water, your gear is sealed and safe! Any loss of vacuum will be detected and an alarm will sound (and flash), giving you more than enough time to react, end the dive and save your precious gear.
Bottom line – Get it! You won’t regret it.
Do you have any more questions? Ask us in the comments and we will update the FAQ accordingly!
Whether you have been diving for a while now, or just starting out fresh after finishing your open water course, you’re probably starting to think “I need a camera!! Otherwise nobody will believe me that I saw that 10ft shark right next to me!”. So we created this guide to help you make the decision on your very first Underwater Camera!
The first thing you need to ask yourself is:
How Good Are My Diving Skills?
In the beginning, diving is hard enough as it is. Keeping yourself in a fairly neutral horizontal position, keeping distance from corals and sea urchins, minding your air, noticing your dive buddy and more… That’s already plenty to handle. If you add a camera to that equation too early, something has to give and you might be risking yourself, others or the delicate marine life around you.
If you have just finished your Open Water, and only have 5-10 dives, practice a bit more before taking a camera with you. Trust me on that one…
If you already have 20-50 dives, you might consider a simple Action Cam which won’t require changing many settings underwater.
For those of you with 50+ dives, who are feeling fairly confident with your buoyancy skills, you can consider a Compact Camera, maybe one strobe or video light.
I wouldn’t consider a DSLR or Mirrorless before 80-100 dives and mastering your buoyancy skills.
That being said, these numbers are quite arbitrary and each has his own personal learning curve, but try not to over-estimate your diving skills. Even if you have no trouble in pool-like conditions and perfect visibility, you might find it harder when currents are involved, poor visibility, gear malfunctions and other unexpected things which may occur underwater.
So what are my options?
Action Cams
Action cams are small, simple cameras, designed to withstand various conditions including wet environments, capturing a wide angle of view with pretty decent quality. They usually have very few buttons and controls, for ease of use while performing an extreme or less than extreme (diving ) activity.
These cameras are mostly recommended for videos since focus is infinite, resolution is great (Full 1080 HD to 4K) and you can turn them on and forget about them.
Shooting stills is possible, but with a few limitations:
1. You can’t zoom in. All of your shots are extra-wide fisheye shots and your subject might look a bit small in the frame.
2. You can’t connect an external flash unit, since you have no way of triggering it.
3. Low light will most likely cause a blurry photo.
4. You can’t control focus. It’s basically infinite.
Keeping these limitations in mind will help you avoid bad photos when using an action cam.
Action Cams are great for beginner divers since they are very simple to use, and can even be mounted on your mask / BCD / Tank for handsfree shooting. They are awesome for creating souvenirs, sharing with your friends and documenting cool marine life that you saw. However, keep in mind that you probably won’t be able to produce contest winning imagery with these…
Compact cameras are currently the most widespread choice for underwater photography. The latest technological advancements for the past few years have shot the compact quality to the sky. Small cameras which can fit in your pocket such as the Canon G7X, G7X Mark II, Sony RX100 IV and Panasonic LX100 can produce outstanding imagery while keeping the housings small and the complete package very travel friendly.
This is probably the best choice for most divers looking to enter the world of underwater photography, thanks to their versatility. You can use them on complete Auto Mode or even UW Mode if they support that, getting pretty decent shots without putting too much thought into it. With the same cameras, you can switch to Manual mode, shoot RAW, add strobes, video lights and wet lenses, producing contest quality shots and high quality videos.
Compact bundles, including camera and housing, start from about $700 and can reach up to $1800 with a high-end Nauticam or Sea & Sea housing. They are compatible with a huge array of add-ons and accessories, such as macro lenses, wide angle lenses, filters, video lights and strobes mounted on many types of arms and trays. Each add-on opening a whole new world of imagery and creative options. This is really a system you can grow with.
Once you have purchased your new underwater compact camera, use our Beginner’s Guide to UW Photography to shorten your learning curve and learn from our mistakes
These are the big guns. The SERIOUS cameras for people who dare call themselves Underwater Photographers.
DSLR Cameras, also known as interchangeable lens cameras, which have lately been reduced in size to become Mirrorless Cameras, are capable of producing the best quality photos and videos in the industry. High quality optics, advanced settings and large sensors help the photographer achieve top quality both above and of course under the water.
Since these cameras are naturally bigger, the housings which accommodate them tend to be bulkier, pricey, and not suitable for everyone. When taking an interchangeable lens camera underwater, you will need to deal with interchangeable ports, extensions and gears, making the process more complicated and more prone to human error and leakage. The advanced settings allow more things to be changed underwater, which requires good diving skills to focus on camera operation without endangering yourself and others.
Oops, hope I didn’t scare you off there
The great things about them of course, is that you will be able to produce amazing images and videos, tack sharp macro shots and colorful vivid wide angle shots, as well as production quality videos. As a bonus, you will also be the envy of all the divers around you, which is always great.
When choosing such a system, it’s usually best to choose the housing first, and only then the camera body and lenses, since the housing is usually the larger investment in such a purchase.
Mirrorless systems usually lower the cost a bit, since the housings are smaller and less expensive, but other than that it’s very similar to DSLR systems.
You can read more about getting your first UW DSLR here.
If you currently own a DSLR and just want to use it underwater, while still minding your budget, check out this post about Affordable DSLR Housing Options.
If you are oriented towards video, with the intention of concentrating only on that type of photography underwater, you may consider a dedicated camcorder or video camera with a video housing.
These housings are usually elongated to accommodate the shape of video cameras and they are divided into mechanical or electronic housings. Mechanical housings use the same principles as the above housings we mentioned, using levers and buttons to press on the camera’s controls. Electronic housings connect to the camera itself via hard wire, and transfer all controls to an external control panel on the housing, which is many times relocated to the tips of your fingers, so that everything is easily within reach.
Some of these housings feature interchangeable ports and some have fixed ports.
Many of the relevant camcorder models can be fitted with a Mangrove housing which is an excellent option for dedicated video shooting underwater.
Mangrove Housing for Sony HXR-FS100 | US$3652.10
If you’re still having a hard time choosing which camera to buy, consult with the rest of our Buying Guides, or simply contact our agents via the online chat and we will help you out!
Many of our customer inquiries are by photographers / divers looking for a way to use their Canon / Nikon dSLR’s underwater without breaking the bank. I created this post to summarize all the options available and what are the pros and cons of each.
What does it take to create a DSLR Underwater Housing?
The first things one must realize regarding using DSLR’s underwater, is that they are fairly complex and large devices, with many different controls of various types – buttons, levers, rotating dials and more.
Also, DSLR’s are divided into 2 parts – body and lens.
In order to create an underwater case for a DSLR camera, the manufacturer must create a housing larger than the camera itself, with two separate parts (body housing and ports) to support different lenses. The housing must also support most of the controls if not all of them, demanding hundreds of hours of engineering and testing, only to support one camera model only, which usually have a product life span of 1-2 years and are sold in much smaller quantities than the actual cameras.
All the above, makes it pretty darn expensive to create a good quality underwater housing for dSLR’s! Both for the manufacturer, and of course for you, the customer.
So what are my options?
Ikelite DSLR Housings
The best value option you can get is an Ikelite housing. Ikelite have been around for a long time and have plenty of experience with creating quality and affordable housing, making them one of the most popular manufacturers worldwide. Their port system is very extensive supporting almost all relevant lenses for underwater photography, and their DSLR housings have a fair price tag of US$1600-US$1800 for the body housing only, no port included.
Ports vary from US$250 – US$600 and the zoom gear is usually included in the housing, so your total for taking your DSLR underwater will be US$1850-US$2400, depending on your choices and camera.
Given the amount of engineering put into these housings and the great reliability and usability they provide, this is a great price.
Update 2017: Ikelite has revamped their DSLR line-up with new and more affordable housings (grey instead of clear), adding great new features such as a vacuum valve and additional port options.
You can browse Ikelite housings for your DSLR here.
Nimar DSLR Housings
Nimar are an Italian manufacturer, with over 25 years of experience. They make excellent quality, affordable, polycarbonate DSLR housings. Nimar has a very extensive port system to support all the popular lenses for underwater, and even some of the less popular lenses.
The great thing about Nimar, is that they offer underwater housings for older DSLR models, such as Nikon D3000 or even D70 and D50, as well as Canon 350D /450D etc.
All of the Nimar housings are priced between US$1275 – US$1385. Add one port and you can take your DSLR underwater for as little as US$1500 USD. That’s not a bad deal at all!
Most zoom rings come included with the ports, which range between US$230 – US$440, with a few special glass ports priced around US$800-US$900.
Another significant advantage, is that on the entry level DSLR’s, Nimar has left space for the built-in flash, so you can trigger external strobes easily via fiber optics, using the pop-up flash on the camera. In addition, all of the housings included a 5-pin bulkhead for standard sync cord triggering.
As a solution for photographers looking to take their DSLR’s into wet environments, such as lakes, rivers, ocean, pools or shooting in the rain, soft flexible housings were created. The housings are made in a few generic models to fit various camera models and lenses, making them more affordable, since they are not made per model.
There are plenty of these options made by many manufacturers, but none share the same quality and experience in the field as Ewa Marine. Ewa Marine is a German company, with over 40 years of experience in making flexible underwater housings. Each of their products goes through rigorous testing before leaving the factory, ensuring maximum customer satisfaction.
When considering these, it’s important to understand their Pros and Cons.
Let’s go over the most frequently asked questions regarding these housings:
– Are they reliable? Will my precious camera stay safe and dry?
As mentioned above, Ewa Marine have 40 years of experience, so they know what they’re doing. As long as properly maintained and handled, with periodical integrity inspections to make sure the housing is still sealed, your gear should be safe. Most floods occur due to human error, such as installing in a rush, forgetting pre-dive checks, using excess force when inserting the camera, etc..
It’s important to remember that the ocean is the world’s harshest environment and no housing in the world can ensure 100% guaranteed seal for life.
– Can I use all the camera’s functions?
No. However, most of the controls will be within reach, some of them easier to reach and some harder. Zooming is possible but not always easy and might get harder in depth. Shutter button is always accessible with a special finger pocket. It’s important to follow the guidelines for adding initial air before going under according to manufacturer instructions, to make the controls easier to reach.
– Can I fit the XXX lens in the housing?
The housings come in two different types – the 100’s or the non 100’s (for example, U-B vs U-B100).
The “100 type” can fit lenses with a thread of 77mm or 82mm while the “non 100” can fit lenses with a thread of up to 72mm.
The Z types (Such as U-BZ) have longer lens compartments to fit zoom lenses such as 70-300mm.
– What’s the best lens to use with the housing?
That depends on your type of photography. For videos it would be best to get a regular wide angle lens. For photos you can try an ultra wide such as Sigma 10-20mm or even Tokina 10-17mm but remember that you will probably encounter significant vignetting on the widest mode.
If you just want mid range shots, even a 50mm could work, as well as macros with the 60mm lenses.
If you are using this for outdoors, such as Kyaking or hiking in the rain, perhaps a telephoto lens might be in order with the zoom housings.
– How deep can I go with them?
There are 2 different types for different depths.
Most of the housings are good for down to 65ft/20m. The ones marked with P can be used deeper, down to 150ft/50m. (Such as U-AXP100).
However, the best environment for these housings would be shallow water and pool dives, since the controls become harder to handle at depths and the risk of improper installation and insufficient air added before the dive, can cause harmful stress on the camera itself.
– Which model would fit my camera and lens?
You are welcome to consult with our experts on that. Another option would be to use Ewa Marine’s website which has a product finder on the top right side. Simply search for your camera model and see the compatible options, then search for them on our store.
If the above options are still not suitable for your needs, perhaps you can try to find a complete UW system sold as used. Many UW photographers take very good care of their gear, and you can find used systems at 30-50% of retail value. These will be older models of course but they took excellent photos a few years ago, so no reason that would change now.
You can visit our used section to see if we are offering anything at the moment or any other online resource.
Not Getting A Housing For Your DSLR
If none of these options matches your needs, then maybe you should consider leaving your DSLR above water and getting an alternative for your underwater adventures. Read about the many advantages of compacts for underwater photography HERE.
Getting A Cheap Generic Housing For Your DSLR
This is my least favored option. There are many manufacturers out there creating very low cost DSLR housings. While this may sound tempting, most of them aren’t reliable enough and have a higher risk of flooding.
For me the worst part is not the damage to the camera, but mostly getting stuck without a camera in the middle of a dive trip which I was waiting to go on for a year or more. That’s why I prefer not to take chances on this.
If you dive regularly and you have an older DSLR which isn’t worth too much now, then perhaps that’s a risk you’re willing to take.
Other Ways To Save $$ When Buying An UW DSLR System
When choosing Ikelite you can opt for the more extensive and versatile port kit, which includes the modular 8″ dome and extension, or get the basic fixed-length port which will work with your lens and save about $300.
Flat ports are usually cheaper than dome ports, so you can settle for a basic flat port for your kit lens. If you’re mostly interested in macro photography, you can opt for a dedicated flat port for a macro lens such as 60mm or 100mm/105mm.
Use a macro lens behind a dome port – Yes it might not be ideal, but it can usually be done, saving your the money on an extra port but still getting nice close-ups and a different angle than your usual wide lens under the dome.
Get a “Mini DSLR” system – Ikelite has started offering this incredible value system a while ago, and after trying it myself, I believe it’s one of the best UW systems you can get, allowing you to use a DSLR underwater at about half the regular cost.
I hope this article helps some of your considering to take the next step in UW photography but held back by the price.
If you have more ideas on how to save money on an UW DSLR system, feel free to share with us in the comments!
If you landed here, it means that you are ready for the next step in underwater photography, and boy what a huge step it is!
For those who still don’t appreciate the importance of an underwater strobe for your photos, read this.
To sum it up – Strobes are the reason awesome underwater photos are so awesome!
Now that we all agree about the necessity, let’s discuss the options:
Before Choosing a Strobe
Prior to choosing a specific strobe (or two) out of the many options out there, the first thing you need to ask yourself is which camera & housing you are using.
The type of camera, housing, trigger options will narrow down the options for a strobe due to compatibility issues and allow you to find your strobe easily. For example – Ikelite TTL strobes can only be used on TTL with Ikelite TTL housings. (As of recently, new Aquatica housings as well).
Another thing you should ask yourself is what do you intend to shoot. You might need more power to light up wide angle shots from a distance, or 2 strobes if you are shooting fisheye and want to get full coverage. If you plan on shooting wrecks, you may want to place your strobes inside the wreck and trigger them as slaves. All theses are things to consider…
Of course, another important consideration is budget. There are strobes ranging from $99 to $1200. You may not necessarily need the best out there, but rather the best FOR YOU.
Terminology
Before we start going through the options, lets go over some basic terms to help you better understand the features of each strobe. (Already familiar with these terms? Skip to strobe options)
Strobe or Flash
Lets get this off the table – Strobe = Flash! These two terms mean exactly the same and they are words that define an electronic unit which emits a large amount of light in a very short amount of time. For some reason the term “strobe” has been used more for underwater flash units and studio units because it sounds fancier, while the word flash is reserved for the camera’s internal flash and for external hot-shoe flash units. We will use the term “Strobe” for the underwater flash unit and “Internal/On-Camera/Pop-up Flash” for the on-camera flash unit.
Guide Number
The Guide Number (sometimes noted as GN) is quite simply the power output of the strobe. The higher the number – the stronger the strobe. It is defined as GN = Subject Distance from Flash Source x f/Stop which achieves good exposure on the subject, and is usually measured at ISO 100, on land.
That can be slightly confusing but if you think about it for a bit, it makes sense. To measure it, the manufacturer would set the ISO to 100, put a subject at a known distance (10ft for example) and change the aperture until the subject is well lit (Let’s say f/11). Then he will multiply the f/stop by distance to get 10×11 = 110 GN [feet] = 33 GN [meter].
Note that guide numbers can be measured in Meters or in Feet, so make sure you have the same units when comparing two strobes.
Underwater there is no real way of determining GN since the visibility changes significantly which directly affects the reach of the strobe.
Powerful strobes are important for getting full coverage on wide angle shots like this one
Beam Angle
This is quite simple – the spread of light emitted from the strobe. Usually 80-120 degrees in a circular / oval pattern, and increases by 10-40 degrees when using a diffuser.
Color Temperature
Measured in Kelvin and similar to the numbers you know from WB or from light bulbs. Underwater strobes vary between 4300K and 5600K while most are around 5400K-5500K. The important and confusing thing to understand here is that this will basically determine the color of the element which are not lit by the strobe (?!?). Why is that? Because white balance will most likely be adjusted (either manually or automatically) according to the lit subjects to show them in the most natural way, but because WB affects the whole frame, the unlit elements in the background will vary in color according to the adjustment made (the strobe used), while the lit subjects would be the same.
Confused? Don’t worry about it. Most photographers don’t really pay attention to this and still get amazing photos
For more advanced shooters who want to experiment with this, try putting blue or orange gels on your strobe to change the hue of the background. Ask me about this if you want to learn more!
Recycle Time
This is one of the most important features. It determines how fast the strobe regenerates for a second shot. It will be measured in seconds and assume full power output was used.
If you don’t want to meet a shark up close and get one well-lit photo among 5-7 dark ones, pay attention to the recycle time!
Naturally when using a lower output, every strobe will recycle faster. Another thing to consider is that when triggering optically, you are limited by your internal flash recycle rate which is usually slower than the strobe at full power.
Helpful Tip : Use the strobe on manual and trigger it using the lowest setting on the internal flash to enjoy better recycle rates.
Target / Focus Light
This feature which either exist or doesn’t exist in strobes, can come in very handy. It’s basically a low power LED light which helps you to see where the strobe is pointing at, helps the camera focus and can even be used as a secondary dive light at night. It will usually go off when the strobe fires to avoid modifying the final lighting in the image.
Strobe positioning determines if the subject is in the light or completely dark.
Triggering
Every strobe needs a trigger. A method to signal the strobe that it should go off at that moment.
Generally there are two types of triggers – Electrical or Optical. It’s important to understand that one is not better than the other. There are pros and cons to each method.
Electrical Triggering requires and actual hard-wired connection between the strobe and the camera, in which an electrical signal can transfer. This causes two major limitations:
1. The camera must have a hot-shoe. Most compacts don’t.
2. Two additional O-rings are needed to keep the connectors dry – thus creating more risk of flooding.
However, this method is great for saving battery life on your camera, since the internal strobe does not need to operate and it also means you can get very accurate exposure using true TTL. This method is mainly used for DSLR’s or high-end compacts in Ikelite & Aquatica TTL housings.
Optical Triggering is divided into two options:
1. Slave trigger – where the sensor receives a signal from the surroundings and fires according to that.
2. Fiber optic cable – the sensor is “fed” directly with a focused beam of light through a fiber optic cable which transfers light from the master flash.
Fiber optics is the most preferred method between the two, since it is clean, accurate and reliable.
The 2 cons here are:
1. Wasting battery life by firing the on-camera flash just as a trigger.
2. Slower recycle time limited by the internal flash.
The biggest advantages are:
1. Simple mechanism, no additional openings in the housing – less risk of flood, easier to fix if there is a malfunction.
2. Works reliably cross-brand. Light is light so the strobes don’t really care which housing/camera you use. (aside from different methods of pre-flash, which are mostly taken care of on the strobe).
Using a slave trigger without a fiber optic cable results in the internal flash being part of the lighting sources, which creates backscatter and uneven lighting. It is also less reliable and may fail to fire under certain conditions.
– The Inon S2000 features a unique mirror adapter which improves the reception of the slave sensor significantly making it more reliable when used without a fiber optic cable.
– Inon offers snoots which fit the S2000 for creative lighting options.
– Mounts are not included. You need to get them separately.
– The S2000 is a direct competitor with the YS-01. Advantages of the S2000 are smaller size, snoot options, sturdy build.
The YS-250Pro has been discontinued! No successor has been released yet.
MSRP: US$1069.95
The Good:
– Lighting fast recycle time.
– Strong even beam.
– Strong built-in target light.
The Bad:
– Very heavy and bulky.
– No optical TTL. If triggered optically – manual settings only.
The Good-To-Know:
– The YS-250PRO has an audible signal indicating when the strobe is ready to fire again, so you can concentrate on your subject without lifting your head.
– Very affordable. Works with every camera that has a flash.
– No need for fiber optic cable.
– Package includes everything needed – tray, arm, sensor and strobe.
The Bad:
– Works as an optical slave only. Camera flash interferes in shot and creates backscatter.
– Slower recycle time.
– You can’t choose which tray & arm to use.
– Rather narrow beam angle (80 deg or 90 with diffuser).
The Good-To-Know:
– The AF35 is one of the easiest strobes you can get. Simply place your camera on the tray and start shooting. Great for people who don’t want to mess around with too many parts.
– Built-in 500 Lumen LED Video light. Only strobe which has this option.
The Bad: (Almost similar to DS160)
– Expensive.
– Heavy & bulky.
– TTL only with Ikelite & Aquatica housings.
– Unique battery – if it’s not charged then no alternative.
– LED Light is nice but not actually strong enough for most videos other than real close-ups and macro.
The Good-To-Know:
– The DS161 is exactly the same as the DS160 but with the LED light. Most photographers prefer getting this one since it’s only $150 extra and you get a 500 lumen light included.
– Best when used with Li-Ion batteries, which improve recycle rate and life span.
– Auto off feature on video light when strobe fires.
– Great battery life – up to 700 flashes on full power or 1hr of video light.
– Fast recycle time – 2s.
The Bad:
– Bulky and heavy.
– No “real” TTL. Semi-Auto mode works rather well though.
The Good-To-Know:
– Check out the SS-2 model – it’s stronger, and has a neat LCD panel on the back which makes it much easier to set up and control.
– The video light can be upgraded to 4000 lumens! This model includes the SS-2 with 4K lumens.
– Semi-Auto mode works by “learning” the correct power after setting it up once on a subject, then changing strobe power according to distance from the subjects using a proximity sensor. This works great and includes two modes – one for macro and one for wide angle.
– Enclosed in waterproof case – Danger of flooding.
The Good-To-Know:
– This is basically similar to your on-camera flash, but off-camera. You won’t get much power here but you will get better lighting since you can place it on the side of your camera and prevent backscatter while getting more flattering lighting on you subject.
That’s it. If you still need more info and you’re struggling to decide which strobe to get, simply Contact Us and we will gladly help you out!
News and Updates:
Aug 2015 – YS-D2 replaces the YS-D1!
Oct 2015 – As of now, you can get true TTL with Ikelite strobes (DS51/DS160/DS161) on Aquatica housings as well, either using an Ikelite 4301 or 4302 TTL converter for Nikon or the internal Ikelite TTL circuitry on Canon housing (Aquatica A7D Mk II and A5Dsr housing).
Most top-side DSLR / Mirrorless photographers appreciate the importance of having several lenses for different types of shots. A basic photography kit usually includes a wide angle lens, a telephoto zoom lens and perhaps a couple of prime lenses.
Switching between lenses on ground is pretty easy, but underwater, we don’t have that luxury.
Even if you’re shooting with a compact above water, you can always take a few steps back, or zoom in, to get a different angle or frame. When water enters the equation, things aren’t that simple.
Enter Wet Lenses!
Wet lenses were developed as a method of altering the field of view or optical quality of our original lens, without the need to surface. Hence the name – Wet Lenses!
Wet lenses are positioned in front of the camera housing, flush against the port. They are usually designed to take into account the layer of water between the front of the port and the back of the lens, since water combined with air creates some type of optical element.
The main advantage of shooting with compact cameras underwater is versatility. The option of using wet lenses and changing them during the dive allows you to shoot a Whale Shark and a Nudibranch on the same dive! Something that can rarely be achieved with a DSLR. This is the reason some photographers prefer leaving their DSLR’s above water and getting a 2nd compact system dedicated for underwater use.
Nauticam WWL-1 Wide Angle lens mounted on RX100 IV housing
Let’s go over the main features of wet lenses:
Types of Lenses
The 2 most common types of wet lenses are Wide Angle and Macro (aka Close-Up).
This is derived from the 3 types of underwater photos – Wide Angle, Medium shots and Macro. Medium shots are also known as “Fish Portraits” and don’t require special lenses, since your average camera lens will usually be the ideal focal range to shoot that type. The other two are the ones we want to improve on. As long as you’re changing your FOV (Field Of View), you would probably want to go wider or get closer.
Mounting Options
Mounting a wet lens on your housing can be done in several ways and is generally determined by the type of mount the housing offers. Some methods can be combined or replaced using various adapters.
Thread Mount (Screw-on lenses)
The most popular method is threading on the front of the port, 67mm and 52mm are the most common thread sizes. With this method, the lens has similar threading and can simply be screwed on the front of the housing. If the threading on the lens and the port are different, a step-up / step-down ring is used.
Bayonet Mount
The Bayonet mount is a common attachment type in many industries, due to the simplicity of attaching something with this mechanism. It requires a simple “1/4 twist and press” action, which is usually locked in place with a button, lever or spring. It was quickly adopted underwater, to prevent unnecessary fiddling with the gear and making the lens replacement as simple as possible. The problem is that the standardization of this type of mount is not uniform among different manufacturers, and many of them tend to develop their own unique type of Bayonet, which doesn’t play nicely with other types.
Flip / Swing Mount
This is not a method by itself, but usually combines a thread mount along with a swing or flip mechanism to position the lens in front of the port or get it out of the way fast. This is by far the fastest and easiest way to switch between different FOV’s but it’s mainly effective for close-up lenses, since wide angle lenses are heavier and require more precise positioning.
The adapter itself can be pricey and if it’s not high-quality, it can swing / flip out of place involuntarily, which can be quite annoying. Nevertheless, it’s a valuable asset and very common among macro photographers.
Other Mounts
Some manufacturers create their own mount types for lenses, such as Fantasea’s excellent snap-on mechanism for the G7X / G16 housings. These custom mechanisms are usually very good and easy to use, but would limit the user to one type of wet lenses, made by the housing manufacturer.
How does it work?
Wet lenses consist of one or more optical elements and rely on a specific type of lens which they are to be mounted on. As mentioned before, they take into account the thin layer of water between the port and the lens, to deliver optimal quality and sharpness throughout the frame. Naturally, some lenses use higher quality optical elements, which raises the final price for the customer. They vary in size, weight, shape, contrast, sharpness, vignetting, corner sharpness, fringing and more. Not all lenses are created equal and not every lens is intended for all housings, or all photographers for that matter.
Wide Angle Lenses
If you’re a diver, or even a snorkeler, you have probably noticed that things look bigger underwater. 33% bigger to be precise (34% bigger in salt water) and 25% closer than they actually are. This is caused by optical refraction between air (in your mask) and water. The same thing happens with your camera. The housing serves as a “mask” for the camera, causing it to see things 33% bigger, which is translated to a narrower FOV, just like zooming in.
A wide angle wet lens is meant to fix that, or even produce a wider field of view, such as FishEye or Ultra Wide.
Dome vs Actual Lens
There are two types of wide angle lenses for underwater. The first one is simply a dome, made out of acrylic or glass, with trapped air inside. This type of lens has no actual optical element, so if you look through it above water, you won’t see any difference, but when it goes underwater, the magic starts to happen. The dome combined with optical refraction creates a virtual image on your camera which eliminates the 33% difference in FOV and returns the focal range to that produced on the surface. In short – adding a dome creates a 33% wider image underwater!
Inon UWL-H100 with Dome Unit II installed
The second type is an actual lens with one or more optical elements. Usually a wide angle lens is comprised of several optical elements, producing a definitive angle of view which is mentioned in the manufacturer specifications. These lenses will usually work both underwater and above, producing a certain FOV underwater and an even wider one above water. Some lenses will actually produce a FishEye angle, which is very wide and can reach up to 180 degrees. However, to reach a 180 degree FOV underwater, you will most likely require a dome port in addition to your wide angle lens, installed in front of it.
Some wide angle lenses, such as the popular Inon UWL-H100, have an optional add-on dome which can be purchased separately and installed in front of the lens itself, increasing FOV and significantly improving corner sharpness.
Other wide angle lenses have the dome included as one unit, such as the i-Das UWL-04 and the new Nauticam WWL-1. These lenses are bulky and heavy, but produce the best results overall.
Compatibility note: Wide angle lenses are engineered to fit a specific focal range on your original lens, such as 35mm or 28mm on the newer ones. Recently released compact cameras feature an ultra wide 24mm focal range, making it increasingly hard to produce wide angle lenses that fit without vignetting (black corners). As a result, you might need to zoom in slightly when using wide angle wet lenses on newer compacts, to avoid black corners (alternatively, you can crop in post processing).
Macro / Close-Up Lenses
This is probably one of the most popular additions to underwater camera gear. The underwater world is abundant with small critters which are both magnificent and bizarre. Taking photos of these wonderful creatures and enlarging them for the world to see, is one of the underwater photographer’s main goals and passions.
To create this type of magnification, all you need to do is get close to the critter, zoom in as much as you can, and shoot! Sounds easy right?
The problem is focusing.
Every camera lens in the world has a limitation called minimum focus distance. This is the closest you can shoot from a subject while still keeping the image focused. When zooming in, that distance grows even further away, making it impossible to get a sharp clear shot of the critter. Close-up lenses, aka macro lenses, aka diopters, are placed in front of the lens, altering that “minimum focus distance” and reducing it significantly. The effect is usually measured by +X units (+4, +6, +10, +15…). This is a relative measurement, which depends on the original lens. The longer the zoom of the original lens is, the more magnification you will get in the final shot.
Macro photography is generally considered getting your subject to have a 1:1 size ratio on the sensor. That means a 1/2″ critter will take 1/2″ of your sensor. Assuming it’s a 1″ sensor, a 1/2″ critter will take up half the frame.
While this is the “proper” way to determine exactly how much magnification you are getting, with all due respect, we are not scientists! We’re just a bunch of people who like taking photos. We don’t need exact figures…
What you need to remember is this – More Zoom + Stronger Close-up Lens = More Magnification
Sony RX100 III vs Canon G7X – Full zoom macro shot comparison
An important thing to keep in mind – the more magnification you produce, the smaller your DOF (Depth Of Field) will be.
DOF is the range that is in focus. When shooting macro, it can be as small 1mm (a bug’s eye), causing the act of shooting the photos quite an excruciating feat. You will usually require a lot of practice, excellent diving skills and quite a few tries to get one shot right.
Beginners are advised to start out with a lower magnification lens (+4 or +6), until they get the hang of it and can advance to the +10 or +15 lenses.
Insect View Lenses (aka Micro FishEye)
The last type is an odd combination of both previous types. It’s an Ultra Wide Macro lens! That means that’s it’s intended for close-up shooting, while capturing a very wide frame behind the main subject. This type of photography is called CFWA (Close Focus Wide Angle). You can create CFWA with standard FishEye lenses, but this one takes it to extreme.
The end result is very unique and cool, allowing you to demonstrate to your viewers how the underwater world looks like from the eyes of a bug.
Inon produces the most popular insect view lens – the UFL-MR130 EFS60 lens as well as the less extreme UFL-M150 ZM80 lens.
Common Compatibility Issues
Due to the large amount of manufacturers in the market, both for cameras and housings, as well as wet lenses, compatibility is something you should take great care with.
The easiest solution is to get a lens made by the same manufacturer as the housing. This will likely ensure compatibility and usually easy to figure out which lens you need for your housing.
If your housing manufacture does not produce wet lenses, you can usually find online which are the wide angle and macro lenses that are most recommended for your camera and housing. Our UW photo experts have a lot of experience with this, so it would be best to ask us!
Common issues which you might encounter are:
Noticeable black corners when using the UWL-H100 with a red filter behind it.
Vignetting (Black corners) – This is a problem which occurs in wide angle lenses, that are engineered for a different focal range than the one you’re using (e.g. wet lens made for 35mm, used on a 28mm lens), or if you’re using an adapter for matching different mount types, or adding a filter behind the wet lens, which causes the lens to be further away from the front port than intended.
Vignetting with Macro Lenses is not a problem! It simply means that you didn’t zoom in far enough on your camera. Zoom in all the way and the black corners will vanish.
Black sides – This might occur if your wide angle lens has a shade, which is misaligned. Make sure the larger flaps of your shade are on the top and bottom of the frame, and the smaller flaps (if there are any) are on the sides.
Trouble Focusing – Some lenses will require switching to Macro Mode on the camera (little flower). Mostly on underwater domes such as the Fantasea BigEye. This is because of the virtual image I discussed previously, which is created close to the lens and the camera needs to focus on that.
When using a macro lens, your focus range is limited, so you would need to get used to the closest and farthest distance from which you can shoot your subject.
Soft corners – Some wide angle lenses will cause the corners of your frame to be blurry and soft. This happens as a result of forcing optical elements to work together even though they are not aligned in an optimal way. Using a dome on your lens will help, but the best solution is closing down your aperture. This will reduce the problem significantly.
Strong purple fringing – Some purple fringing always exists in every lens and it’s not always noticeable. The higher quality your lens is, the less fringing you will get. Fringing can be either fixed in post processing (Lightroom does a great job on this) or simply getting a better, higher quality lens.
Related Accessories
Apart from the actual wet lens, there are several useful accessories which can be added to your system for increased comfort and usability.
Lens holders are an excellent addition which enables you to stow your lens on the tray or arms when not in use. These can be found for various types of arms and various mounts. Just look for the one that matches your gear. Using a lens holder is a good alternative to stuffing the lens in your pocket / BCD / wetsuit thus preventing potential damage to the lens.
Flip / Swing holders, which I mentioned previously in the Mounts section, are a useful add-on which can help you apply or remove the lens in the easiest way possible, instead of screwing it all the way in or out between shots.
Nauticam Flip Diopter Holder
Dome shades are a nice little add-on which is available for some lenses and reduces flare from the sun, enhancing the overall contrast of the image.
Filters can sometimes be combined with wide angle lenses for better results when using ambient light. Red or pink filters are quite common for correcting the colors underwater and some wide angle lenses allow the use of filters behind or in front of the lens. Keep in mind that this might reduce sharpness since the lens is not used exactly as intended, so it’s not always recommended.
Inon UWL-H100 (Type 1 / Type 2) | US$522.50 US$380
The Inon UWL-H100 has been the market leader for many years now, since its release. The compatibility with 28mm lenses, the excellent sharpness throughout the frame, the availability of the Dome Unit II for extra wide angle and even better sharpness; all of these have made the UWL-H100 a top choice among compact shooters.
The Fantasea BigEye is a dome only, designed to restore the focal range lost due to optical refraction, effectively adding about 33% wider field of view underwater. It comes in a variety of models to fit different Fantasea or Canon housings and is a great affordable option for getting that entire shark in the frame!
The BigEye is available as a snap-on for Fantasea / Canon housings and threaded for 67mm housings.
The UWL-04 has been around for quite some time and still going strong. It includes both a wide angle lens and a dome unit for about half the price of the Inon or Nauticam alternatives. It’s designed for a 52mm thread, so 67mm threaded housings will require quite a lot of zooming in, sometimes rendering it useless. However, for the smaller compacts such as Olympus, it’s the perfect lens!
High quality wet wide angle lens, with excellent optics and dome port, for optimal image quality underwater. Compatible with a 67mm thread mount, ideal for compact cameras such as Sony RX100 series and Canon G7X series. Expand your FOV (Field of View) to 130 degrees on a 28mm lens!
The W30 is a great solid lens, created to fit most of Ikelite’s compact housings (fits a 46mm or 67mm thread). Specifically designed for digital cameras with 28mm focal length. It’s also possible to use it on any other non-Ikelite housing with a 67mm thread!
This popular +6 lens has been a top choice among beginner underwater photographers for the past few years. It features excellent sharpness and contrast, ideal medium range magnification – enough to make the critters pop, but not too much that it becomes harder to shoot.
The great thing about it, is that it’s double threaded (on both front and back) so once you gain more experience in macro shooting, you can add a second lens, stack it on the first, getting a +12 magnification factor for extreme close-ups!
Nauticam’s CMC-1 was released in 2015 and designed to become the strongest and most high-end close-up lens in the market. This is the SMC’s little brother, engineered for optimal results on compact cameras.
With a staggering +15 magnification factor and razor sharp quality, this small lens delivers! It definitely won’t be easy for beginners to control it, but once you get the hang of it, prepare to be amazed by the results! Nauticam also offer the less powerful CMC-2.
The Subsee is one of the most popular and well known lenses in the market. It comes in two different models – +5 and +10, but the +10 is by far more popular. It produces high magnification and fits a 67mm thread. High quality optics produce razor sharp images, but also make the lens bulkier than others.
Fantasea joined forces with AOI to create 3 excellent high quality macro lenses for various subjects and magnification levels. The UCL-05LF is a +6, the UCL-06LF is +12 and the UCL-09F is a +12.5 super macro lens with maximum magnification.
All lenses use high quality optics and produce sharp, vivid images.
If you’re looking for an affordable and strong magnification lens, this would be the best choice! This excellent +8 close-ups lens delivers the best bang for your buck and fits any 67mm threaded port.
I hope this article helped clear up a few things!
If you have questions about anything I discussed here, or anything else for that matter, feel free to reply to this post or contact me directly at ran@housingcamera.com
High end compacts are the hottest thing in underwater photography these days. They’re tiny, boast incredible specs, large sensors, sharp optics, loads of features, rapid focusing and overall astonishing quality. What else does an underwater photographer need?
Undoubtedly, the two market leaders currently producing the best compact cameras are Sony, with their legendary RX100 series and Canon, with the rival GXX series. Underwater photographers have officially adopted these tiny and very capable cameras as their favorites, and housing manufacturers are working around the clock to develop the best products to take these cameras underwater, safely and without compromising on functionality.
These days, divers worldwide are mostly discussing two specific models for underwater photography – Sony RX100 Mark V and Canon G7X Mark II.
We took these two popular cameras to the test, to help you decide which one fits your needs.
The Sony RX100 V
The Sony RX100 V is the latest model in the ultra-successful RX100 series, which brought compacts up to a whole new level. The new Mark V retains the excellent 4K video capabilities, as well as super slow motion at 960fps. The AF system on the RX100 V is worth noting – blazing-fast 0.05-second autofocus, 315 AF points said to be the “world’s most comprehensive phase-detection coverage of its kind”.
Taken with the Sony RX100 V in Gardens of the Queen, Cuba (by: Ran Mor)
The Canon G7X Mark II
Canon are slightly behind Sony, which has taken the lead on high-end compact cameras, but they manage to keep up pretty well, offering a more competitive price and better usability, with very user-friendly cameras, easier to use than their Sony rivals.
The Canon G7X Mark II is currently the market leader by Canon. This pocket-sized camera boasts fantastic image quality, delivered by a 20.1MP 1″ CMOS Sensor and a Digic 7 processor. While it lacks 4K video capabilities, compared to the RX100 V, it makes up for it with a longer lens range (x4.2 zoom), more competitive price point and easier interface.
The longer zoom range is regarded highly among macro lovers, who need the most magnification possible with an add-on diopter / macro lens.
Both the Sony and Canon cameras are very well supported for underwater. All the major manufacturers released excellent housings to support these high-end compacts, so there are plenty to choose from for every budget.
Both cameras allow full and easy control over all important settings, usually within a button click away. They both have two dials, to control shutter speed and aperture in manual mode, quick access to WB, ISO, Exposure Compensation, Flash and other crucial settings.
The Canon is overall more intuitive. The menu is easier to understand. It has a touch screen so playing around with it above water feels nicer.
What I like about the Sony, as a photographer who is used to DSLR’s, is that it is FAST. It focuses and fires almost as fast as a DSLR, which is incredible for a compact camera. I sometimes feel like it took the shot even before I pressed the shutter.
Specifically for underwater, there is one annoying issue which I’m not sure why Sony overlooked. When the flash is popped up, you cannot turn it off in any mode other than Auto. That basically means that if you popped it up, you’re stuck with it, making it hard to switch from flash photography to natural light. You can turn off your external strobes of course, but the flash will still go off inside the housing, wasting battery life and slowing down your rapid firing. We’re still hoping for a firmware update to fix that, but no news on that yet.
Bonaire, Canon G7X Mark II with UWL-09F Wide Angle lens
Bottom Line
Both of these cameras are amazing. They produce high quality photos and videos and paired with the right lighting and accessories, are easily capable of award winning photos.
Even with just the camera and housing, a diver can snap some incredible photos and create stunning videos.
There is no doubt the Sony RX100 V is the better camera here, which is why the price tag is higher. It has better specs than the Canon, especially when considering video capabilities. I found the Sony to be more responsive, faster to focus and slightly better image quality. The Sony RX100 Mark V is likely the best compact camera produced to date.
That being said, the Canon G7X Mark II gives up quite a fight. The menu and controls are significantly easier to navigate and more intuitive for most, the zoom is longer (x4.2 vs x2.9) which is helpful when shooting skittish subjects, the Underwater White Balance is very helpful, if you don’t like messing around with custom WB and the battery life is longer.
If you are looking for a camera that is easier to use, more affordable, and you plan to mostly shoot photos rather than videos, I would recommend going with the Canon G7X Mark II.
If you are used to a DSLR above water and want to get the closest thing, but in a much smaller size, or if you plan to shoot mostly videos, the Sony RX100 Mark V is the camera for you.
The abundance of high quality underwater cameras in the market these days are a blessing for us divers! Never has it been so easy and affordable to travel with UW photo gear and get amazing results without breaking the bank or carrying 2 huge Pelican cases.
But with so many great cameras out there, how on earth do you choose the right one??
Pssst, I’ll let you in on a little secret: They’re all great!! You can and will get stunning results with any of the high-end compacts in the market, whether made by Sony, Canon, Olympus, Panasonic or others.
However, there are clearly some differences, and it’s quite easy to pinpoint the right camera for you, by listing the subtle differences between the various options.
As you can see, the are several differences that clearly stand out.
Video Comparison – 4K or not 4K
The Canon G7X Mark II lacks 4K. This does not mean it has bad video. It actually produces excellent video! It simply means you cannot shoot 4K with it. 4K is slowly but surely becoming the new standard among TV’s and Monitors, but for the next few years, 1080p (AKA full HD) is still perfectly ok and looks great on every monitor.
Another advantage of 4K is that you can “zoom in” a bit more, by cropping your video after shooting down to 1080p. This allows you to double your zoom without quality loss compared to shooting 1080p in the first place.
Another feature you can notice, is the ability to shoot crazy slow motion on the RX100 V, and even on the TG-5, though it will be in lower resolution. Slow motion turns out beautiful in an underwater environment and fun to experiment with it.
Bottom line, if video is your thing, RX100 V is the way to go.
Note on 4K Video: Not every 4K is better than every 1080p. A video shot at 1080p with an excellent camera such as a DSLR or mirrorless, will likely look better than a 4K video shot with a GoPro or a lesser camera. It’s merely the number of pixels which comprise the frames in the videos.
Note on overheating: The RX100 V is notorious for overheating. When shooting 4K for several minutes, you may experience overheating and the camera will have to shut down for a few minutes to rest and cool down. Whether or not you’re willing to live with that is up to you. For most people, it’s well within their shooting habits and won’t limit them as much as they think.
Lens
Many macro shooters are disappointed with the Sony RX100’s shorter focal length. This is because the longer the focal length, the more magnification you can achieve with a diopter (close-up lens). The RX100 V maxes out at 70mm, while the other two reach 100mm.
True, that does mean you won’t reach the same amount of magnification with the RX100 as the other two, however, it compensates for that with exceptional sharpness and image quality, so that when cropped down, you can still get the same end result with comparable details. Read my blog post about shooting macro with the RX100 here.
Image Quality
Image quality is something that’s hard to determine from dry specs. It’s a combination of optics, sensor, dynamic range and image processor. From my personal tests, I can say that the RX100 V is a winner here, with the G7X II right behind it and the TG-5 is the underdog. The TG-5 does produce excellent photos, but the smaller sensor is no match for the 1″ sensor on its rivals.
Robustness
Ok, that’s not fair. There’s clearly no match for the TG-5 here. It’s a TOUGH camera. As such, it is built to survive any abuse you inflict upon it. Olympus describes it as “Lifeproof” – waterproof, shockproof, crushproof, freezeproof, and dustproof. Basically, do whatever you want with it, just don’t stick it in the microwave!
The other two are built well, quite sturdy, but you have to be a bit more gentle with them, or at least stick them in a housing near water.
Manual Mode
This is a major issue and one of the downsides of the TG-5. It lacks manual (M) mode. While this is ok for some, who prefer to use the excellent underwater auto modes built in the TG-5, most photographers would be limited by this at some point. To gain full control over your camera, especially when using strobes, manual mode crucial.
That being said, if you’re comfortable using the automatic modes and don’t see yourself messing around with settings too much, then you can definitely do without M mode.
Housing options
Housings for Sony RX100 V
There are plenty of housings to choose from for this camera.
GoPro cameras are awesome! No doubt about that. They work great above water and produce stunning video and cool wide angle photos. The problem starts underwater…
As you all know, colors fade away the deeper you dive underwater. This proves difficult for photographers, as the essence of photography is capturing light and color. Even at a shallow depth of 15ft/5m, your GoPro starts producing blue-green footage, which end up being boring and lifeless.
Sure, filters help. A red filter brings back some of the red hues and produces a nicer result, but it doesn’t really produce natural colors. For that, you will need to introduce artificial light!
Since the GoPro is a fairly basic camera, it suffers from limited dynamic range and WB range. This makes it even more important to provide the GoPro’s sensor with good lighting, and only then does it really shine! But choosing the right light could be a daunting process. With so many options out there, what’s the best video light for your GoPro?
Lumens
We’ll start with a video light’s most dominant feature – Lumens! In the end, it all boils down to power. Light intensity is measured by lumens and the more the more the merrier. Contrary to common belief, you cannot have too much light. A GoPro is used to working in bright sunlight conditions, which produces far brighter light than anything you can generate with an LED light. It will adjust to the amount of light you produce.
However, it is a factor of distance as well, and if you shine a really bright light from a very close distance, such as when shooting macro, you may reach the limit of the GoPro and wash out (overexpose) the scene. The good thing is that all lights can be dimmed – set to a lower power mode for macro situations, so it’s not really a limitation.
The more lumens you have, the better, and the further away you will be able to light up a subject.
So how many lumens do you really need? as I mentioned before, the more lumens you have, the better, and the further away you will be able to light up a subject.
LED technology is advancing very fast, so what I’m writing right now may not be relevant in two years time, but at this point in the market, 1000-2000 lumens would be a nice basic light, 3000-5000 would be a medium range light, and 8000-12000 would be some serious lighting power.
Remember that beam angle and whether you’re using one or two lights is also an important consideration.
You can read more about beam angle in theUltimate Guide to Underwater Video Lights, but here I will only mention that since the GoPro has a wide angle fisheye lens, it’s best to use 2 lights over one, so that you can light up the entire frame and get nice coverage. If you’re using 1 light, then make sure it’s a very wide beam. You may still get fairly dark corners, but the majority of the frame and your subject will be well lit.
Light Modes
As opposed to video lights for regular cameras such as compact, mirrorless or DSLR, with a GoPro you will likely need just one mode on your light – Flood. This would be the main mode for shooting either photos or videos.
That being said, Spot mode can come in handy, when using it as a dive light to spot marine life. I usually like to dive with my spot light on, checking little crevices and hideouts to find cool critters. When I start shooting, I would switch to flood mode, record and then back to spot light when I’m done. This would also conserve battery life, as spot feature uses less power than flood.
Another cool mode that you might want to experiment with is UV / Blue light, AKA fluorescence photography. With this mode, you will also need a yellow filter on your GoPro, and a yellow mask filter, to witness and record the cool effect of fluorescence underwater.
Red mode, which is usually used as a focus light on night dives for compact cameras, isn’t really needed with a GoPro.
Tray and mounts
There’s a variety of ways to mount lights to your GoPro:
Mount GoPro directly to light
Create some distance between the light and the GoPro
Use a tray and arm set – single or dual
Mount GoPro directly to light
This method is quick, easy, compact and cheap. The actual adapters you need depend on the mount of the light you chose to use, but the most common method is to get a ball mount for your GoPro, add a standard 1″ ball clamp, then mount the light on the other side of it. If the light has a ball mount – great! If it has a YS mount, use this YS to Ball adapter to connect it to the clamp.
The problem with this method is backscatter. Your light will be very close to the actual lens, resulting in unavoidable backscatter in your frame from the little particles in the water. That’s why I wouldn’t recommend it with strong lights, or with poor visibility. Use this method with an 1000 lumen light in Cozumel-visibility or similar.
Create Distance between the Light and the GoPro
This method involves using the above ball mount and clamp method, but adding another arm segment and clamp between the light and GoPro. This is still relatively cheap and easy, usually solves the problem of backscatter as your light is further away from the lens, and highly customizable, as you can use any length or arm segment that works for you.
The difficulty here is that the rig becomes a bit messy, and there’s no real shape to the whole thing.
Use a tray and arm set
This would be the preferred method to mount a light on your GoPro. There are plenty of trays out there, most consist of a base tray, where you mount your GoPro, and an arm of some sort on which you mount the light.
Here are several popular trays you can consider:
Beneath The Surface – Dual Boomerang Tray with YS Locline Arms
The BTS boomerang tray is one of the most popular GoPro trays in the market. It’s made of high quality materials, features fantastic ergonomics and compatible with most of the lights in the market. The locline arms can be quickly disconnected with a twist-and-pull method, for easy packing and traveling. This model includes YS mounts on the ends of the arms, but other mounts are available for any type of light.
Beneath The Surface – Single Boomerang Tray with YS Locline Arm
For those of you who are looking for a compact rig, BTS also offers a single tray, which is great for mounting one powerful light to your GoPro, featuring a comfortable grip, quick disconnect arm and a GoPro quick-release mount.
The Ikelite action tray for GoPro features a boomerang shaped tray, to get the arms out of the GoPro’s line of sight. It comes with two Ikelite signature quick release grips, which are the same type used on their Mirrorless and DSLR housings.
This tray features a comfy pistol grip, making it excellent for fast action shots and easy to handle whether using one or two lights, or no light at all. Standard Ikelite ball mounts can be inserted in the grips, or locline flex arms for mounting your lights.
The Big Blue tray is a nice and affordable option. Solid design, GoPro compatible with standard 1″ ball mounts, with padded grips and made of durable materials.
Best Underwater Video Lights for GoPro (Updated Sep 2017)
Hydra 2000
The Kraken Hydra 2000 is an excellent value compact light, capable of 2000 lumens with a beam angle of 110 degrees, two buttons to control the light, flood and red modes, cool carrying case and great over all design.
The Sola lights are well known in the market, with their distinct spring loaded control lever, factory sealed body and high quality beam. With a beam angle of 60 degrees, we recommend getting two of these to cover the entire GoPro frame.
The Black Molly is one of the best value lights in the market, with a very high ratio of lumens per dollar. It comes with an integrated ball mount, yellow filter for warming up the light and long battery life.
The Sealife 2500 produces a nice and clean 2500 lumens beam at a 100 degree beam angle. Sealife’s unique design is user friendly and highly reliable. The light operates on 4 x AA batteries.
The best thing about this light is the Auto Power feature. The light will automatically dim itself when approaching a subject to prevent overexposure, and increase power when you back up. Very useful!
This feature packed little light is capable of producing 3000 lumens of Flood light at a 120 degree beam angle, 1000 lumens of Spot with a narrow 15 degree beam, as well as red light and UV mode for night dives and fluorescence photography.
Two buttons control the power output and modes, a YS mount is included for mounting the light and batteries are interchangeable lithium type.
This beast will light up an entire cave without breaking a sweat! The Solar Flare is about as powerful as it gets, with a staggering 10,000 lumens of flood light, emitted by 5 LED’s at a 160 degree beam angle.
Control the power output with an easy push button with dial – 0-100% in 5% increments.
The light head is water resistant! So even in the rare case of a flood, your main investment is fully protected.
Sola video pro 9600 is the ultimate imaging light for the serious pro with a new patented cooling system to deliver the best performance in the industry and ushering a new era of constant lighting for underwater imaging specialists.
9600 lumens at a 90 degree beam angle, with a floodproof design and OLED Dashboard Display for monitoring settings, battery life, etc.
Integrated Li-ion battery charges completely in 1hr 45 min!
Getting quality footage from your GoPro depends on the quality of lights you get and how easy it is to control your setup underwater. Remember that a GoPro is a great base for a setup, but to get really good results, lights are crucial.
If you still can’t decide on the right light and tray for your needs, contact us via the online chat of over the phone. We’d love to help!
*BONUS*
Make the decision even easier with our Ready-To-Dive GoPro light packages! Determine your budget and pick the bundle that works best for you!
Scuba divers love new toys! Especially if they take photos underwater as well! Nothing like the feeling of testing out an awesome new underwater camera, housing, light or lens on your upcoming dive trip and enjoying the improved results to show your friends and family.
But with so many options out there, what should you get as a Christmas gift for the underwater photographer in your life?
We’ve made it super easy for you this year. We’ve divided the gift ideas depending on which gear your loved one already owns!
Scroll down or choose one of the categories below:
And if you’re still having a hard time deciding, contact one of our experts via the online chat and they’ll help you out.
Gifts for GoPro Shooters
Scuba divers often venture into underwater photography by getting an action camera – GoPro or others. Once they fall in love with taking photos, they look for an upgrade. Here are a few awesome upgrade ideas:
Sealife DC2000 Underwater Compact Camera
Enjoy full creative freedom with SeaLife’s new DC2000 digital underwater camera. Featuring a large SONY 1″ type back-illuminated 20MP image sensor and RAW formatting capabilities, the DC2000 will let your underwater inspirations guide you to stunning results.
The FG9X Housing is manufactured to the highest professional standards of function, style and durability. It was specifically designed for the Canon G9X, thereby providing the most compact, sturdy and ergonomic housing in the market for this camera. Moisture detector, hand strap and lens port cover included at no additional cost!
One of the most exciting bundles available! The Olympus Tough TG-5 is a spectacular piece of engineering, including a surprising amount of fun features and capabilities. This bundle includes the PT-058 housing allowing you to dive up to 45m with this excellent camera. Finally RAW Format is supported!
The best universal underwater smartphone housing in the market! Compatible with 99% of smartphones in the market. This high end housing is the ultimate tool to protect your precious phone underwater and allow you to take stunning photos and videos without purchasing an additional camera. Add-on filters and lenses can easily be fitted on the front of the housing. PRO version includes depth and temperature gauge to help you track your dive profile underwater.
New generation of high end lights! The sleek Hydra 2000 light emits 2000 lumens of bright light in a small compact unit AND features Red mode as well, which is helpful for focusing on night dives.
Novice underwater photographers who already have a nice underwater camera with a waterproof case, could benefit a lot by adding lighting to their setup! Here are some popular lights you can get them:
Sea & Sea YS-01 Strobe Kit
The Sea & Sea YS-01 Strobe is a compact yet powerful underwater strobe that can be used with multiple modes: DS-TTL, manual, TTL with converter. It can also be used as a Slave flash. The strobe offers a guide number of 20 and support a standard Fiber Optic connection.
The Sea & Sea YS-D2 is the next generation TTL underwater strobe, following the widely popular YS-D1. Excellent for both wide-angle or macro photography above and under the water. Multi Core Fiber-Optic Cable II included!
Sea and Sea YS-D2 w/cable MOZ-YS-D2-KIT Underwater Strobe featuring GN 32 with Fiber Optic / 5 Pin Nikonos Connections, Focus Light / Red Filter. Includes YS Mount / Ball Mount.
First of it’s kind, the I-torch Symbiosis offers a strobe AND video light in one! You no longer have to compromise and decide which lights to take on the dive – Symbiosis has got you covered!
The perfect light for beautiful macro shots! Fits on any 67mm lens thread and provides even and unique lighting for close-ups photos and videos.
The Kraken ring light gives you 1000 lumens (continuously) with 4 different power levels (100%, 75%, 50% and 25%) and can be easily mounted on any 67mm port or adapter.
Those who are still shooting with a Canon G12, or an Olympus TG-1, might be getting great results, but they are missing the amazing technology leaps which took place in the recent years, improving shooting experience and image quality significantly. Help them reach the next level with their photography with the following upgrades:
Canon G7X II Camera & Housing Bundle
The Canon G7X II is one of the best high-end compacts available. Featuring a huge 1″ sensor, 24-100mm f1.8-2.8 very bright lens and all manual features we know from previous Canon cameras, this is a perfect system for underwater imaging.
The Fantasea FG7X II is a custom molded, Polycarbonate housing that is perfectly contoured to the camera. This high end design make their housing very ergonomic which almost feels as an Aluminum housing but at the price of Polycarbonate. The housing offers full control of all cameras function. Its dials and buttons are strategically placed at thumbs reach making it very comfortable to use. BONUS – Moisture Detector comes installed in every FG7X II housing at no additional cost!
The FRX100 V Housing, specially designed for the Sony RX100 III / IV / V Cameras, meets the same high standards of function, style and durability as previously found in popular and successful Fantasea F series housings (FG16 and FRX100 III).
The FRX100 V Housing is ergonomically designed, fully functional and features easy-to-use, clearly labeled controls. The waterproof housing is shock resistant, protecting your camera from impact and damaging elements including water, sand, dust, snow, ice and pollutants.
The Sony A6000 has been one of the most popular cameras for underwater photographers. Now with Fantasea’s new great value housing, you can get a complete system for an incredible price!
Best value for money! DSLR Camera + Kit Lens + Ikelite TTL Housing + Dome Port Bundle. The included dome port accommodates the Canon 18-55mm STM kit lens, AND the popular Tokina 10-17mm lens.
For more advanced photographers, who are already using a single strobe on their setup, it may be time for an add-on lens, or another strobe, which can expand their creative options and bring in a new dimension to their photography.
Sea & Sea YS-03 Slave Strobe
Underwater lighting just became easier with YS-03 strobe. YS-03 is designed to mimic the light intensity of the camera’s built-in flash. Say goodbye to manually adjusting the strobe output, as YS-03 is TTL.
Excellent and travel-friendly strobe for compact or mirrorless cameras. This sleek and powerful strobe packs quite a punch, and works with nearly all cameras in the market! Includes Cable and Mount!
The Sea & Sea YS-D2 is the next generation TTL underwater strobe, following the widely popular YS-D1. Excellent for both wide-angle or macro photography above and under the water. Multi Core Fiber-Optic Cable II included!
Sea and Sea YS-D2 w/cable MOZ-YS-D2-KIT Underwater Strobe featuring GN 32 with Fiber Optic / 5 Pin Nikonos Connections, Focus Light / Red Filter. Includes YS Mount / Ball Mount.
High quality wet wide angle lens, with excellent optics and dome port, for optimal image quality underwater. Compatible with a 67mm thread mount, ideal for compact cameras such as Sony RX100 series and Canon G7X series.
UWL-09F Wide Angle Lens - Fantasea Wet Wide Angle Lens. This lens will mount on top of a standard camera lens in order to increase the angle of view and convert it to a Wide Angle Lens.
The UCL-05 Fantasea Wet Macro (Close-Up) Lens will mount on top of a standard camera lens in order to magnify the subject and allow you to fill the frame with it while maintaining sharp auto focus.
UCL-05LF +6 Wet Macro Lens - Fantasea Wet Macro (Close-Up) Lens. This lens will mount on top of a standard camera lens in order to magnify the subject and allow you to fill the frame with it while maintaining sharp auto focus.
The Nauticam CMC-2 is a new macro lens designed to stand alongside the previous CMC-1, offering a less powerful lens choice for モlargerヤ macro subjects that is noticeably easier to use.
Hundreds of engineering hours utilizing computer software to model a lens that complements an entire system – camera, lens, port, air, and water – as a whole, resulting in optimal performance underwater.
Compact Macro Converter 2 - Nauticam Wet Macro (Close-Up) Lens. This lens will mount on top of a standard camera lens in order to magnify the subject and allow you to fill the frame with it while maintaining sharp auto focus.
If your loved one prefers filming instead of still shooting, they would likely want a new and powerful video light! These lights make ALL the difference underwater and boost any video with spectacular colors and beautiful clarity
Kraken Hydra 5000 Video Light
New generation of high end lights! The powerful 5000 model includes Flood, Spot, Red and UV! Everything you need, in just one compact light.
Our best selling video light from 2015 has been upgraded to 3500 lumen and it keeps its affordability with high performance features. This light is still a great choice for any diver taking video whether it be Go Pro or a higher light performance requirement.
The Sea Dragon 2300 Auto boasts 2300 true lumens of brightness. Powered by a rechargeable 7.4 lithium ion battery, the light burns for a full hour at 100% power at constant brightness with its new CREE XP-L LEDs. The light features an Auto Flash Detect Mode that turns off the light for 2 seconds when an external flash is detected. Auto Flash Detection helps eliminate undesirable shadows, color shifts or backscatter.
The Radiant 3000F is a highly versatile, compact and durable dive and video light, designed to enhance color and light in underwater videos and still images.
WWL-1 Wet Wide Lens - Nauticam Wet Wide Angle Lens. This lens will mount on top of a standard camera lens in order to increase the angle of view and convert it to a Wide Angle Lens.
The CB70 Square Grouper is the ultimate bag to carry your assembled underwater housing with strobes from the hotel, shuttle ride to the dive shop and your dive boat. It’s highly collapsible design makes it fit easily in your dive luggage.
Couldn’t find what you were looking for on the list above? Perhaps these items could give you some more ideas:
Set of travel bags for ports and accessories – Cinebag
The Cinebag port bags are made out of heavy duty tarpaulin fabric and includes a neoprene carry handle.
Designed for wet environments, the bags feature waterproof construction and heavy-duty saltwater resistant YKK zippers.
The best universal underwater smartphone housing in the market! Compatible with 99% of smartphones in the market. This high end housing is the ultimate tool to protect your precious phone underwater and allow you to take stunning photos and videos without purchasing an additional camera. Add-on filters and lenses can easily be fitted on the front of the housing. PRO version includes depth and temperature gauge to help you track your dive profile underwater.
This is the single most important part in any UW photographer’s gear bag! Can be extended or contracted during the course of the dive allowing you to shoot freely or attach the camera close to your BCD.
BTS - BTS-CL36SSY - Camera Housing or Tray Lanyard Extendable Strap Available in Yellow / Pink or Black. Can be extended or contracted during the course of the dive allowing you to shoot freely or attach the camera close to your BCD.
New generation of high end lights! The sleek Hydra 1000 is the perfect focus light. Featuring Wide beam, Spot and Red light, the Hydra 1000 includes everything you need it one small light.
With so many video lights in the market, it’s often hard to choose the best one that fits your needs. For the past year or so, the Kraken video lights brand made quite an impact among divers and underwater photographers worldwide, offering an impressive line of high-end, feature packed, underwater video lights.
I’ve been using the Kraken lights for quite some time now, and very pleased with them!
The first thing you notice about all of the Kraken lights, is that they have a very sturdy feel to them. Kraken uses high quality materials, fast charging batteries and top of the line LED’s.
Two buttons are used to control (almost) all of the Kraken lights, which makes it much easier to navigate through the different modes and power outputs. A battery indicator light surrounds the buttons, letting you know if your battery is full (blue), halfway (green) or low (red).
Also, most of the lights support the Kraken Remote Control unit, which allows you to control two lights simultaneously from the tip of your finger, via fiber optic cables. This is incredibly useful for videographers, who need to change their lighting quickly and efficiently, without too much fuss. It also makes it easier for photographers, who can adjust their lighting without taking their camera and eyes off the subject, when shooting macro photos.
For your peace of mind, all Kraken light heads are waterproof, so even in the unlikely event of a flood, your light is kept safe and dry. The lights can be used down to 330ft/100m.
Kraken Hydra 2500 WRU Macro Edition
This is the newest addition to the Kraken line-up. The Hydra 2500 was designed with the macro photographer in mind, featuring White Flood, Red, Blue and Pink lights.
The flood light is perfect for standard macro video or photos, powerful enough for close-ups, and dimmable if you prefer to conserve battery.
The Red light is intended for using as a focus light at night, if using strobes as your main light.
The Blue and Pink modes are great for creative lighting when shooting macro! Use them as a backlight, or add a little bit of color tint from the side to get beautiful and unusual results.
I recently took this light with me to our workshop in Bonaire, and absolutely loved it!
Check out the following photos of a christmas tree worm, where I used the Hydra 2500 to add some pink light from the right side.
Kraken recently started implementing a new LED strobe technology, which allows you to use the video light as a strobe, triggered by the on-camera flash, producing a burst light which is almost twice as strong as the constant light output. This means you can emit 4000 lumens of light when shooting photos! The strobe feature works on each of the 4 modes available on the light. Pretty cool stuff.
Don’t be fooled by the “Mini”. This little light is a beast! Capable of 8000 lumens of high quality flood light, this is one of the strongest lights in the market. Given the powerful output, Kraken managed to keep it fairly small in size. The battery itself takes up most of the light, in order to provide over an hour of burn time on full power.
The Solar Flare Mini is so powerful, you can even shoot some great wide angle photos with it!
The following photos were taken with the Tokina 10-17mm fisheye and just a single Solar Flare Mini:
The front of the light has been equipped with a dome port, to enlarge the beam angle to 120 degrees, even underwater! To protect your little dome, whether during travel or just when not in use, a neoprene cover is included with the light.
When testing the Solar Flare Mini, I found that it exactly covered the entire frame when using the Tokina 10-17mm on the 17mm end.
The Solar Flare Mini has just one mode, flood, so it’s really designed for those who simply need a lot of light, whether shooting video, or stills. Since the design still includes two buttons, Kraken assigned one button to increase power, and the other to decrease, making it very easy to control your power modes. For me, the most useful thing about it was switching between the highest and lowest power settings with only one push of a button, so that I can conserve battery life between shots, and quickly fire it up to full when recording.
The Solar Flare Mini weighs 2lbs above water and 1lb underwater, so make sure you get some float arms or foam units to balance the weight.
Check out this short video taken with the Solar Flare Mini:
Ring lights have been around for quite some time in the underwater industry, but until now, no light was as easy and as elegant as the Kraken Ring Light 3000. The Ring Light 3000 is small, light, easy to use, universally compatible with a 67mm thread, and packed with features!
The main light is a 1800 lumen white light, but it also includes Red and Blue modes – Red can be used as a focus light at night, and blue can be used for creative backgrounds and side lighting.
This was the first light to feature Kraken’s unique LED strobe function, pushing the light up to 3000 lumens on burst mode, which is triggered by your on-camera flash via fiber optic cable. The cool thing is that the strobe has a memory function, so that you can use a constant Red light, but fire a white strobe light! That way you can easily shoot at night, without scaring away skittish marine life and still getting powerful lighting on your subject.
The even beam produced by the ring light is ideal for macro subjects, and can easily be fitted on any double threaded macro lens, such as the Inon UCL-165, Fantasea UCL-09 and UCL-05, Nauticam CMC-1/2 and more.
I used the Ring Light in the Philippines, during our macro workshop in Puerto Galera. By simply mounting it on the front of the macro lens, on the Sony RX100 V in the Fantasea housing, I got some great results and perfect lighting. Check out the following photos:
For those who want to use the ring light off-camera, Kraken included a thread and optional ball mount, so that you can mount it on any standard ball & joint tray.
The Hydra 3500 WSRU can rightfully be nicknamed Kraken’s “flagship” light. This is the ideal choice for most underwater photographers, featuring pretty much every mode you’ll ever need – flood, spot, red and UV. The lumen output is perfect, strong enough for most scenarios, yet not too much to require a massive battery and a bulky light.
Equipped with both YS and ball mount, the Hydra 3500 can be mounted on any tray / arm system, and can be used for both video and stills, as well as a focus light, using the spot or red modes.
For those who fancy fluoro diving, the UV mode works great and all you need to get is the yellow filters for your mask and housing.
The Hydra 5000 WSRU is basically an upgraded version of the 3500 model. All features remain the same, but the output has been bumped up to 5000 lumens. The battery is stronger as well, which enables almost 1hr of burn time at 5000 lumens.
The Hydra 1000 WSR is the ultimate focus light! Small, light, featuring flood, spot and red modes, as well as a new Auto-Off feature, which turns off the light when the strobe goes off.
The Hydra 1000 WSR can produce 1000 lumens of flood light, 800 lumens spot and light enough to mount anywhere, whether you want it on an arm, your cold shoe, under your GoPro or even handheld.
It can easily double as a dive light, or even a video light for tight macro shots.
Burn time is an impressive 85 minutes on full power.
The high end Solar Flare Max is a masterpiece of engineering! This light produces a mindblowing 10,000 lumens of light, emitted from 5 high powered LED’s, through a unique dome port for ultra wide beam angle.


 ) activity.


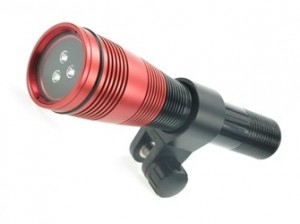


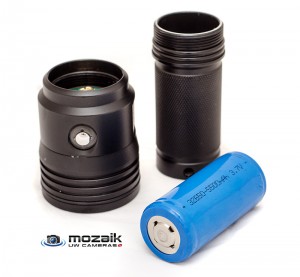


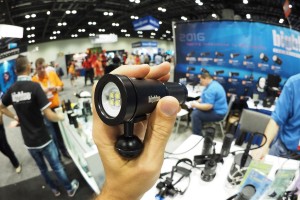

 2015 Gift Guide For Underwater Photographers

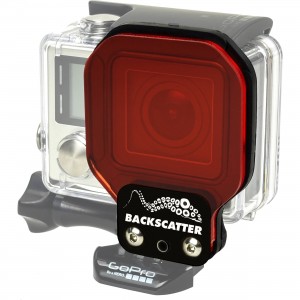
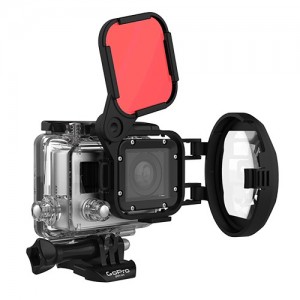

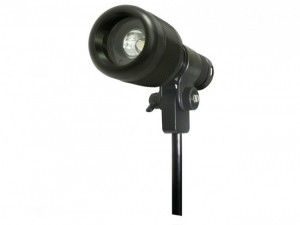
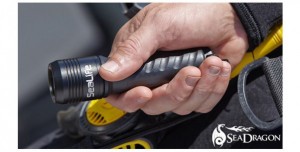


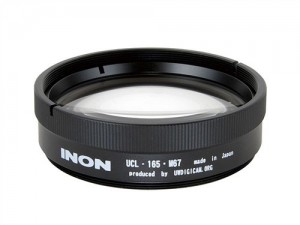

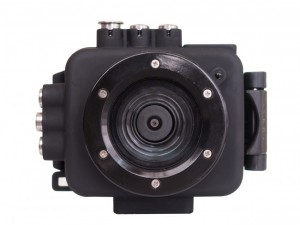
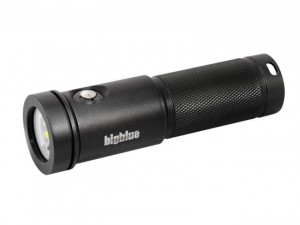

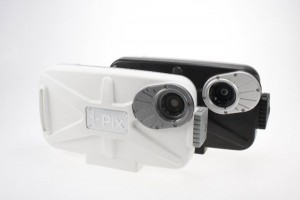


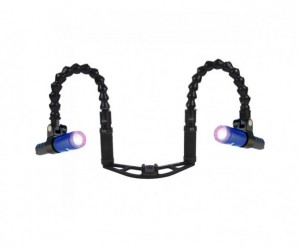
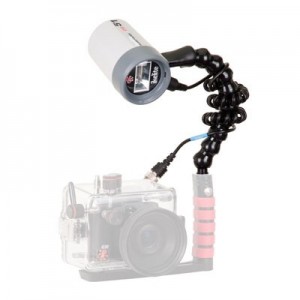


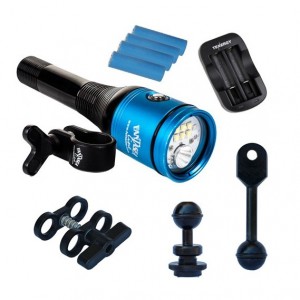
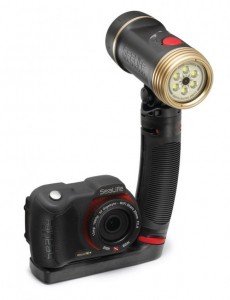
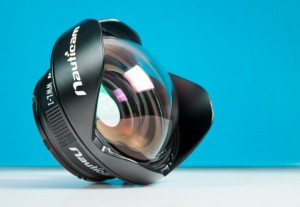
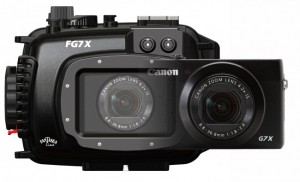
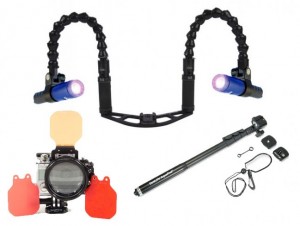
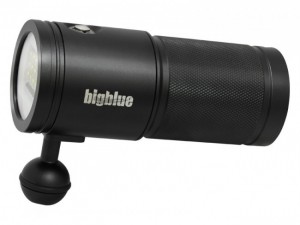
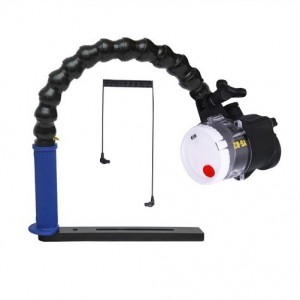

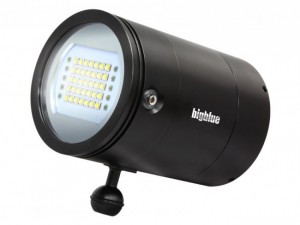
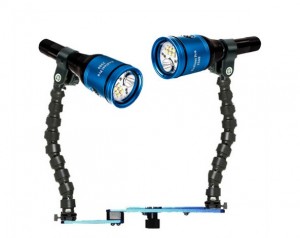

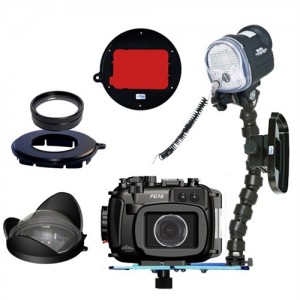
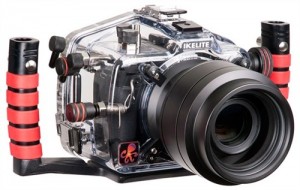


 Bayonet Mount
 If you’re a diver, or even a snorkeler, you have probably noticed that things look bigger underwater. 33% bigger to be precise (34% bigger in salt water) and 25% closer than they actually are. This is caused by optical refraction between air (in your mask) and water. The same thing happens with your camera. The housing serves as a “mask” for the camera, causing it to see things 33% bigger, which is translated to a narrower FOV, just like zooming in.
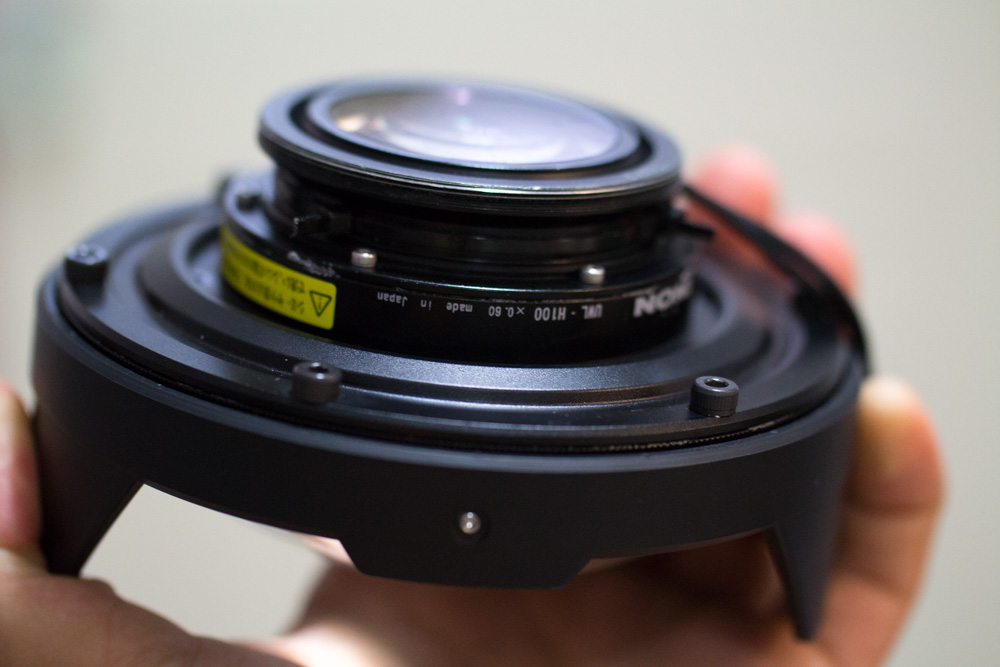
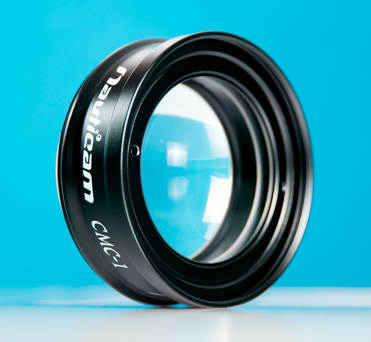 This is probably one of the most popular additions to underwater camera gear. The underwater world is abundant with small critters which are both magnificent and bizarre. Taking photos of these wonderful creatures and enlarging them for the world to see, is one of the underwater photographer’s main goals and passions.
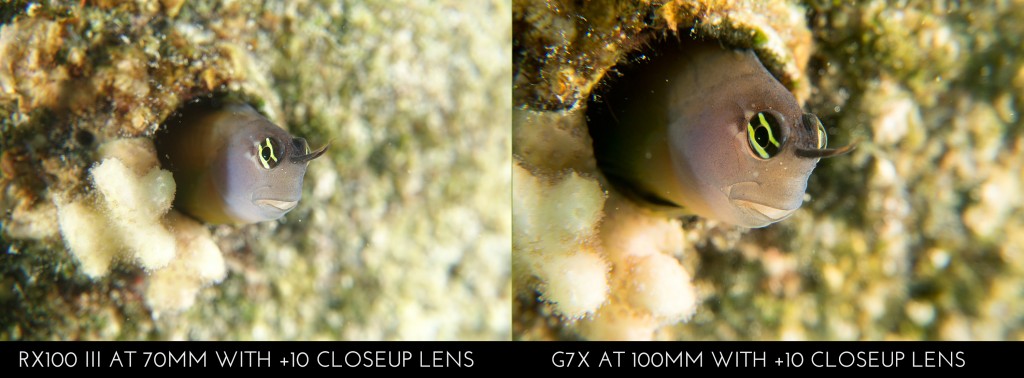
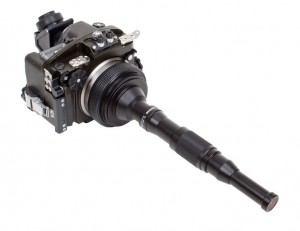 The last type is an odd combination of both previous types. It’s an Ultra Wide Macro lens! That means that’s it’s intended for close-up shooting, while capturing a very wide frame behind the main subject. This type of photography is called CFWA (Close Focus Wide Angle). You can create CFWA with standard FishEye lenses, but this one takes it to extreme.
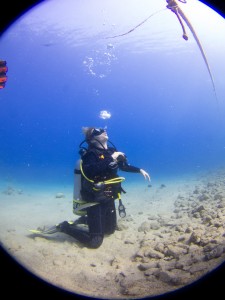
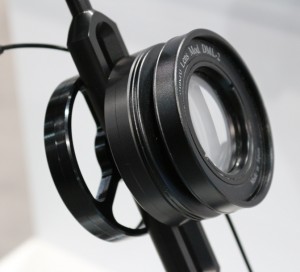
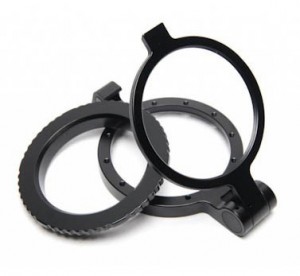
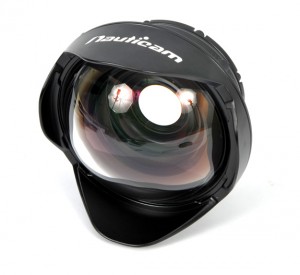


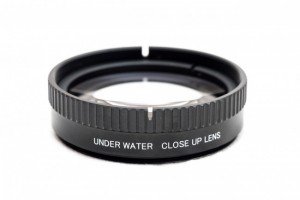


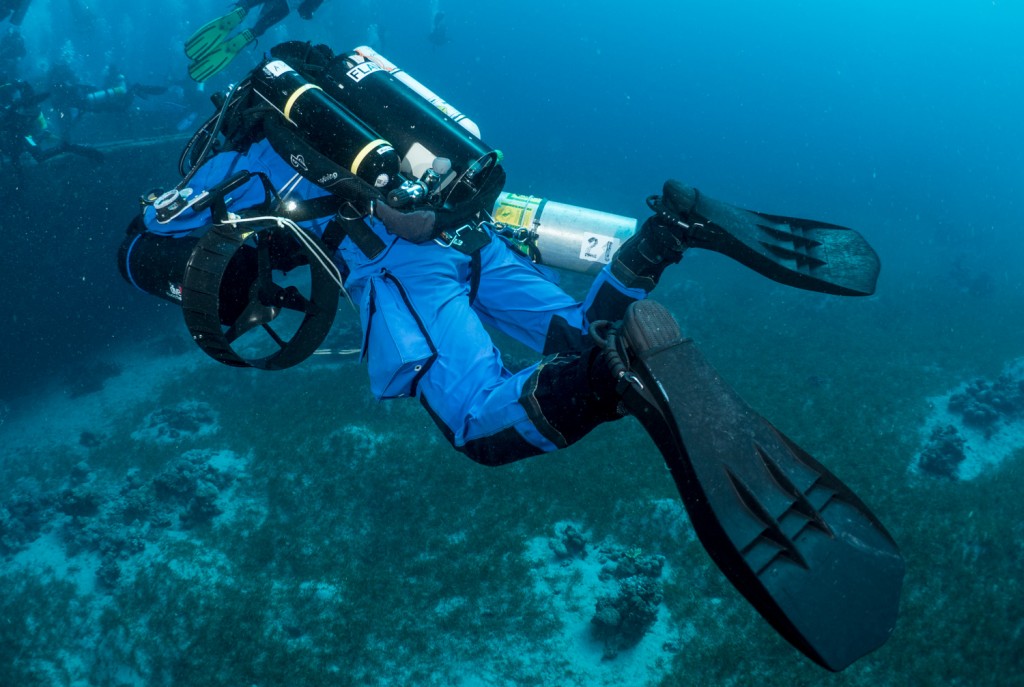

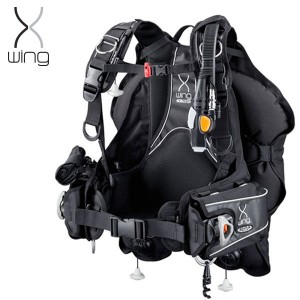

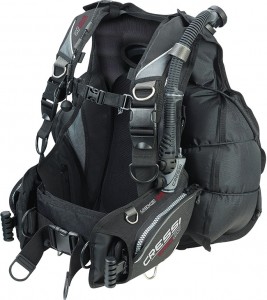 Now that we have talked about where the BCD stores air, and how it gets air in and out, we should take a minute to talk about lift capacity. This is the amount of buoyancy your BCD bladder provides when fully inflated, measured in pounds (or newtons). Smaller BCDs are going to have smaller lift capacities just due to their size, and back inflate or backplate and wing designs are going to generally have higher lift capacities, especially if you are adding larger aftermarket wings. You need to make ABSOLUTELY sure that the BCD you choose has enough lift capacity to give you positive buoyancy if needed, as well as maintain your neutral buoyancy during the dive. Another thing to remember is that as you use your air, your buoyancy will change throughout the dive. The amount of gear you carry, what kind of tanks you are diving (steel vs. aluminum, LP vs. HP), and what exposure protection you are wearing (drysuit vs. wetsuits) will all affect your buoyancy and weighting. As a safety measure, it is also a good idea to have extra lift available in your BCD in case your drysuit floods. You can usually find the buoyancy characteristics of most dive equipment in the manufacturer’s descriptions. If all of this sounds confusing, don’t worry! Your local dive pros will help you figure all of this out, and while the math is available on several scuba forums it is not as complicated as it sounds. The small amount of time you’ll spend before the dive figuring out your buoyancy, weighting, and trim will pay off as less effort while diving and using less air maintaining your buoyancy.
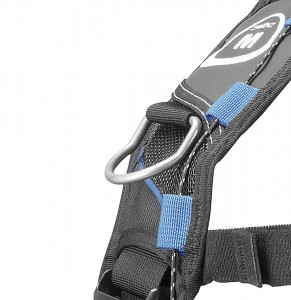 Ok, we are getting a lot closer to finding the perfect BCD for you, we only a few things left to go over (I promise). Now that you have the BCD design and size that will suit your type of diving, the lift capacity you need for you and your gear, and you are ready to go with your inflator (and inline regulator if you like), the next question is: where are you going to put your dive tools and equipment? There are two ways to approach this: D-rings and pockets. D-rings are great for attaching small pieces of gear like
 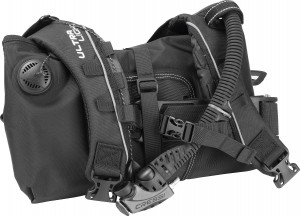 Travel BCDs have some general design features that set them apart from other BCD setups. They are usually much lighter and more compressible than standard BCDs. What do I mean by more compressible? They are minimalist in design with less bulk, and are easier to pack into your luggage as they take up less space. However, the trade off for less weight and less volume is usually less pockets, less D-rings, and possibly no weight integration ability. Take a look at this
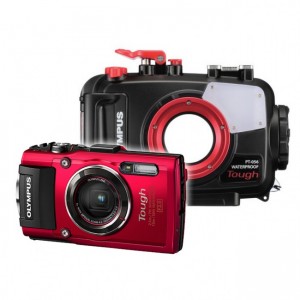


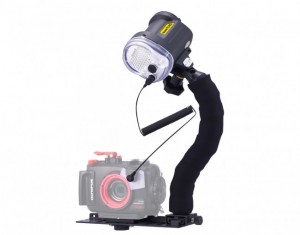

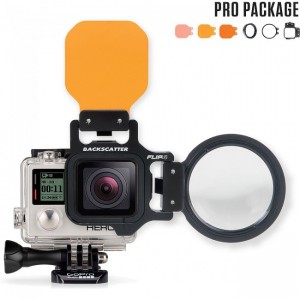
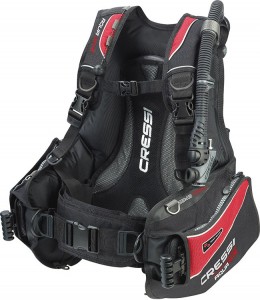


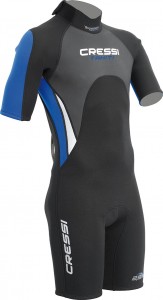
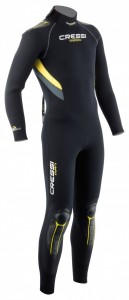
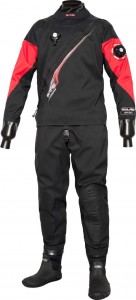
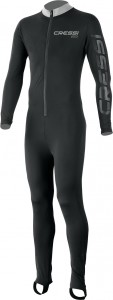

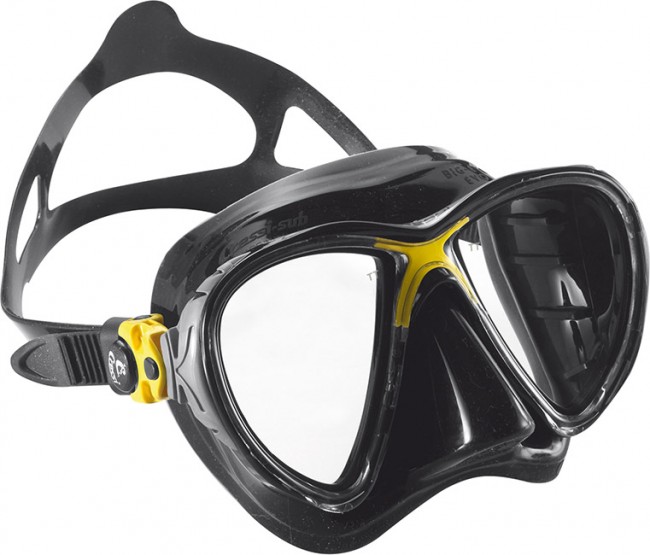
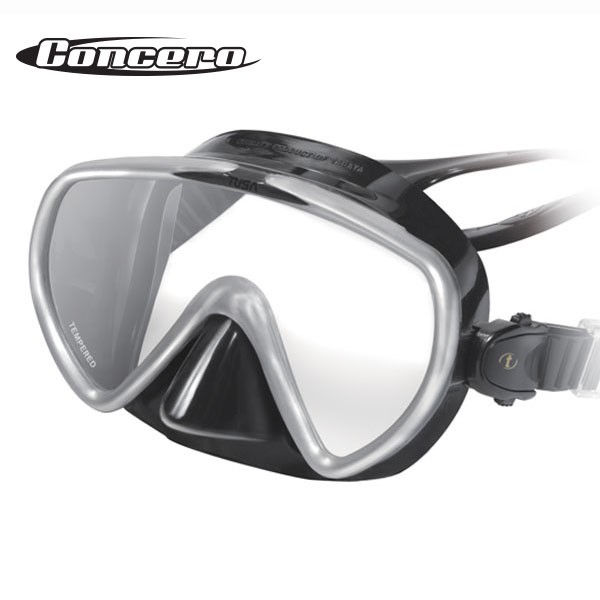 A good test is to place the mask on your face without the strap on and inhale through your nose. A well-fitted mask will suck up to your face and will remain there even when you move your hand away. If the suction breaks, then the mask is not sealing properly.
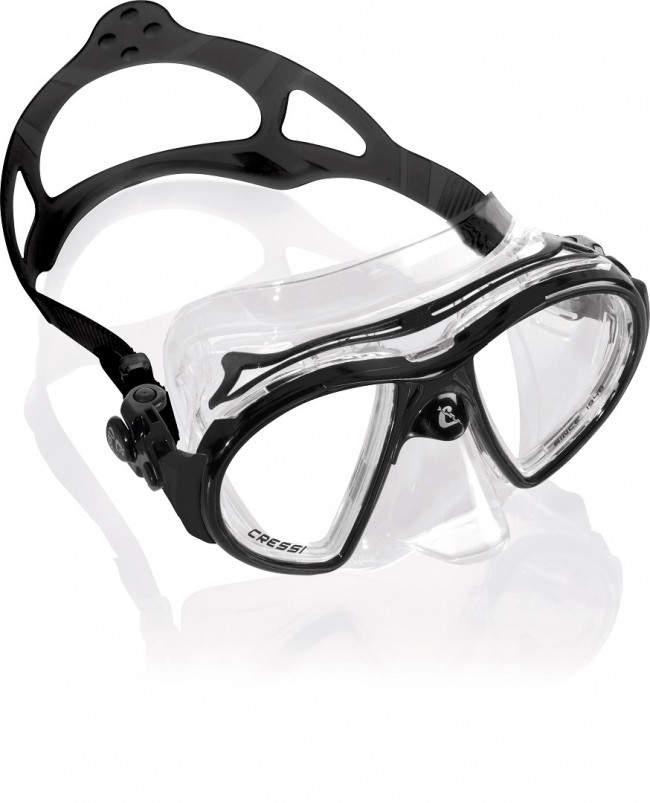 Skirts can be further divided into a few more sub-categories. There are translucent skirts and opaque skirts. Translucent skirts are clear or lightly tinted, and will allow lots of light into to the mask as well as allow some more peripheral vision. Keep in mind that since the silicone of the skirt is not designed with optics in mind, this peripheral vision will not be very precise. Some divers prefer these kinds of skirts because they feel more open. The extra light is also a good feature for those divers who have some issues with claustrophobia or feel as though masks constrict their vision. Opaque skirts do precisely the opposite and block light from coming into the sides of the mask. Photographers and divers who are interested in videography often prefer these masks because they reduce distractions and allow them to focus on the field of view directly in front of them. The functional seal of the mask should not be affected by the visual qualities of the skirt. Personally, I own masks that have both kinds of skirts and I use them for different kinds of diving. For a good comparison, look at the
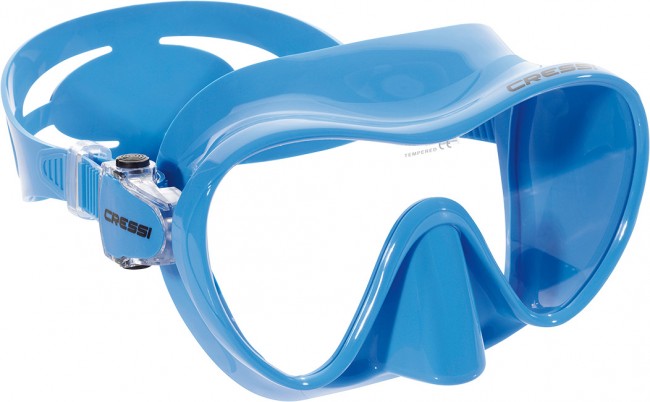
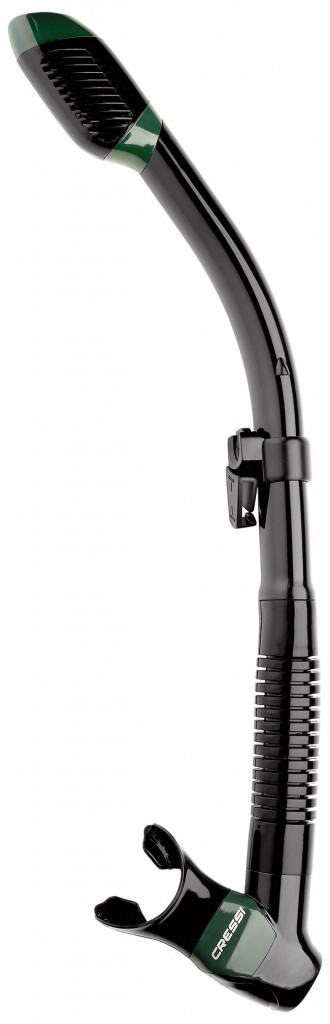
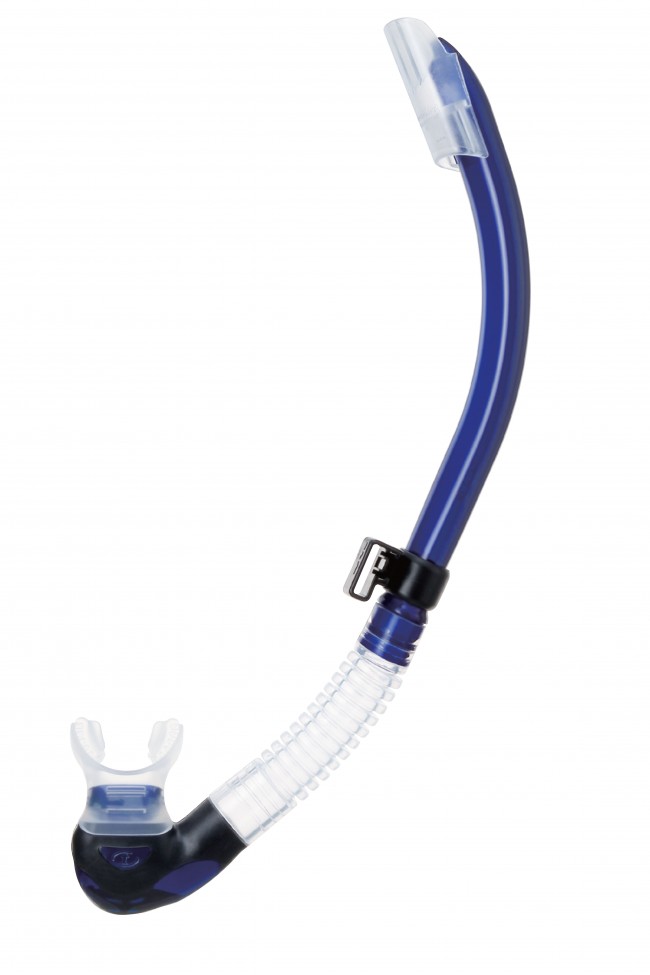 position that doesn’t put strain on your mouth or jaw when your head is in a natural viewing position. A valve at the end of this section will help make clearing the snorkel easier, but is not absolutely necessary. The flexible section will probably be ribbed on the outside; this is not what you should be concerned with. What you want to look for here is a smooth interior. Baffles on the interior of this section will cause turbulence in the airflow and make the snorkel less efficient at exchanging air. You also want to make sure the transition to the angle and the rigid section is securely bonded, you will be stressing these joints repeatedly as you look around and as you swim.


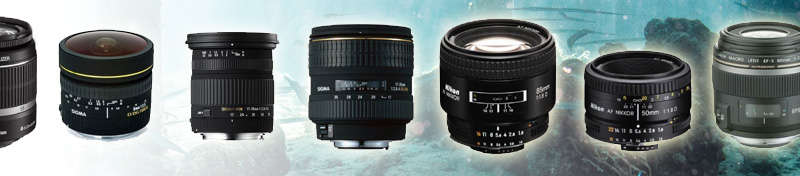


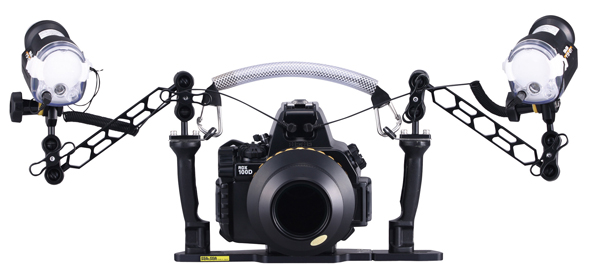
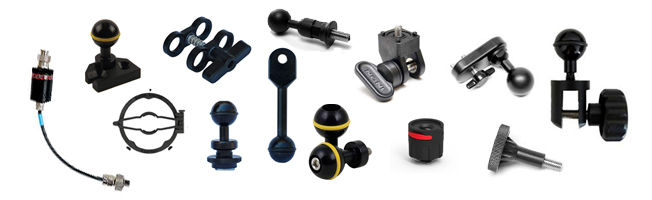

 ) activity.
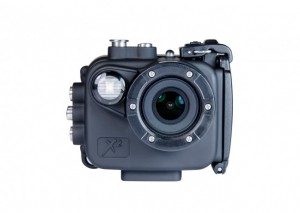


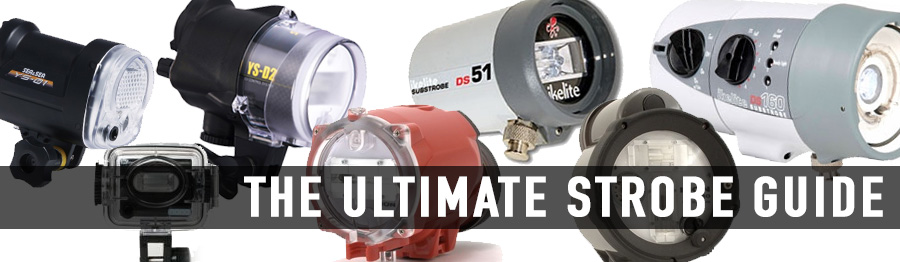

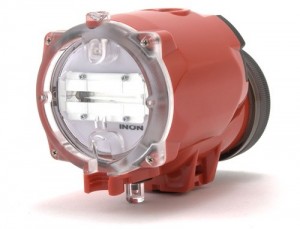


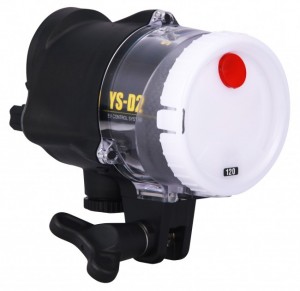


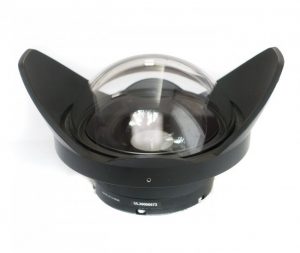
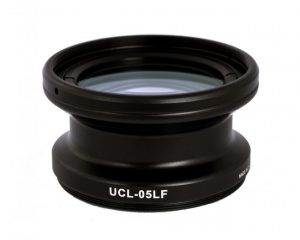 CL-05LF